
Grand Marquis V8-4.6L VIN V Flex Fuel (2006)
Removal and Installation
1. WARNING: If equipped with fire suppression system, depower the system. For important safety warnings and procedures, refer to Fire
Suppression System.
Disconnect the battery ground cable. For additional information, refer to Battery.
2. Drain the cooling system. For additional information, refer to Cooling System Draining, Filling and Bleeding.
3. Remove the bolt and position aside the power steering reservoir.
^
To install, tighten to 10 Nm (89 inch lbs.).
4. Disconnect the degas bottle overflow hose and the supply hose and position aside.
5. Remove the bolt and the degas bottle.
^
To install, tighten to 10 Nm (89 inch lbs.).
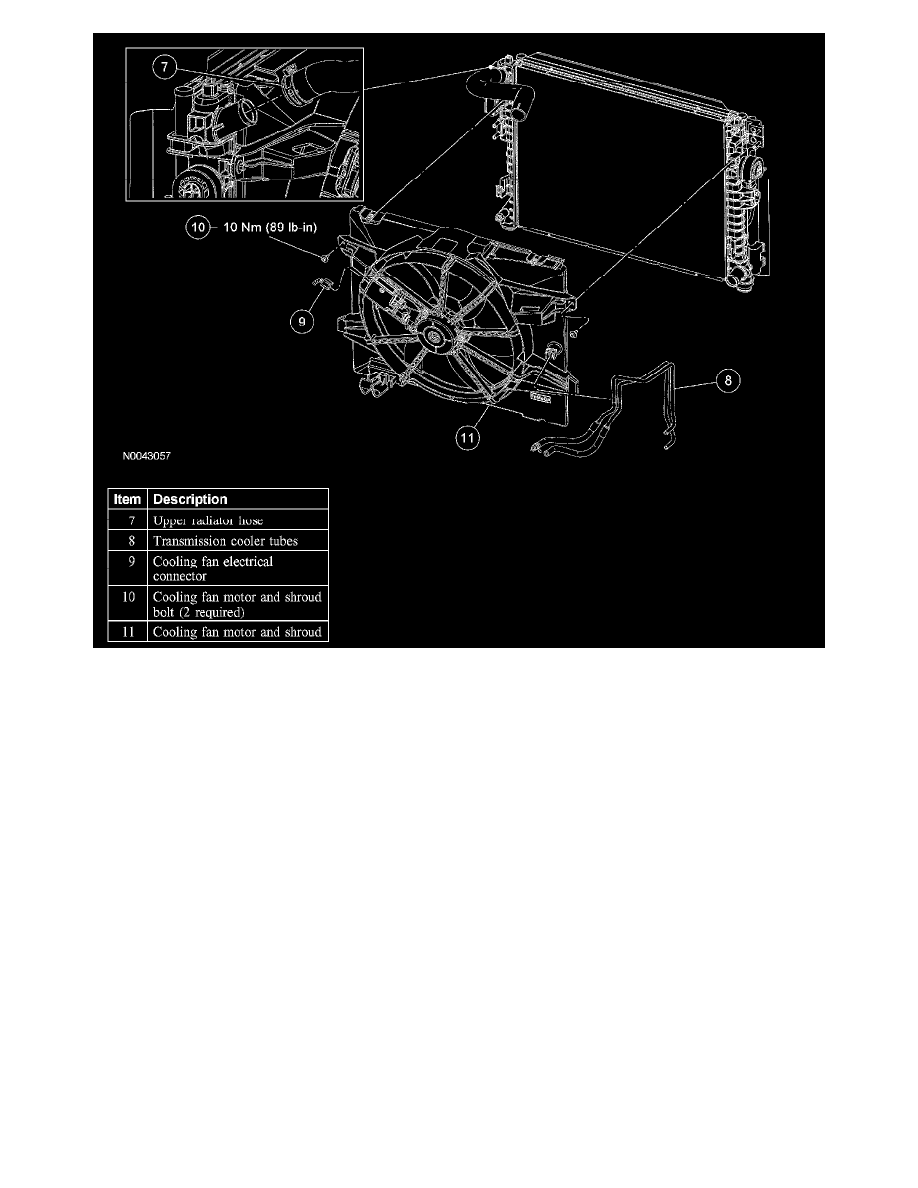
6. Disconnect the upper radiator hose and position aside.
7. Detach the transmission cooler tubes from the cooling fan motor and shroud.
8. Disconnect the cooling fan motor and shroud electrical connector.
9. NOTE: Position the lower radiator hose away from the cooling fan motor and shroud.
Remove the 2 bolts and the cooling fan motor and shroud assembly.
^
To install, tighten to 10 Nm (89 inch lbs.).
10. WARNING: If equipped with fire suppression system, repower the system. For important safety warnings and procedures, refer to Fire
Suppression System.
To install, reverse the removal procedure. If equipped with fire suppression system, repower the system.
11. Fill and bleed the cooling system.