
Grand Marquis V8-4.6L VIN V Flex Fuel (2006)
(SRS) is involved in a collision, inspect the sensor mounting bracket and wiring pigtail for deformation. Replace and correctly position the sensor
or any other damaged supplemental restraint system (SRS) components whether or not the air bag is deployed.
NOTE:
-
The air bag warning lamp illuminates when the RCM fuse is removed and the ignition switch is ON. This is normal operation and does not indicate
a supplemental restraint system (SRS) fault.
-
The SRS must be fully operational and free of faults before releasing the vehicle to the customer.
-
Repair is made by installing a new part only. If the new part does not correct the condition, install the original part and carry out the diagnostic
procedure again.
-
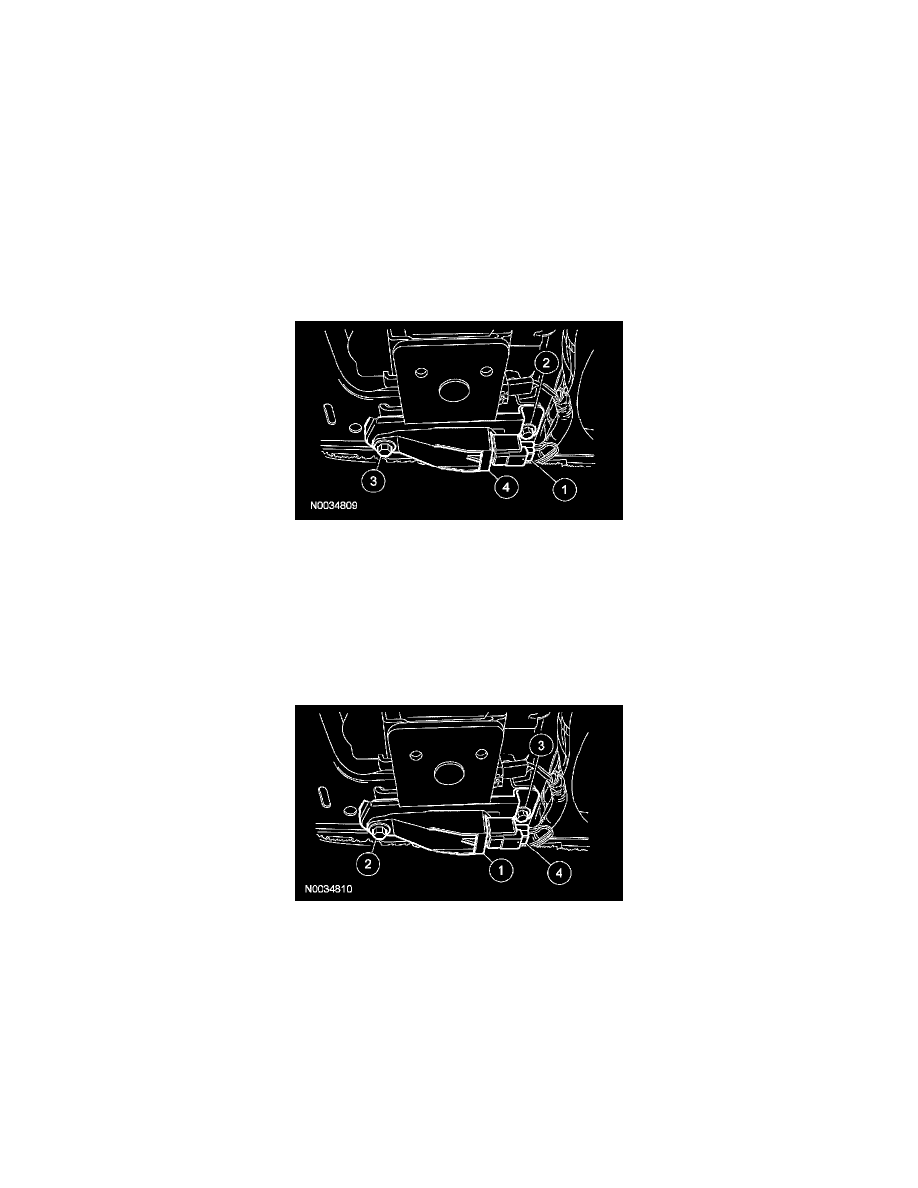
LH shown, RH similar.
1. Depower the system.
2. Remove the front door scuff plate.
3. Remove the rear door scuff plate.
4. Release the front and rear door B-pillar weatherstripping.
5. Pull out to release the retaining clips and remove the lower B-pillar trim panel.
6. NOTE: The side impact sensor bolts must be removed in the sequence shown.
Remove the side impact sensor with bracket.
1
Disconnect the electrical connector.
2
Remove the bolt.
3
Remove the bolt.
4
Remove the side impact sensor with bracket.
Installation
1. WARNING: The tightening torque of the air bag side impact sensor retaining bolts is critical for correct system operation.
NOTE: The side impact sensor bolts must be installed in the sequence shown.
Install the side impact sensor with bracket.
1
Position the side impact sensor with bracket.
2
Install the bolt.
-
Tighten to 12 Nm (9 lb-ft).
3
Install the bolt.
-
Tighten to 12 Nm (9 lb-ft).
4
Connect the electrical connector.