
Grand Marquis V8-4.6L VIN V Flex Fuel (2006)
Ride Height Sensor: Service and Repair
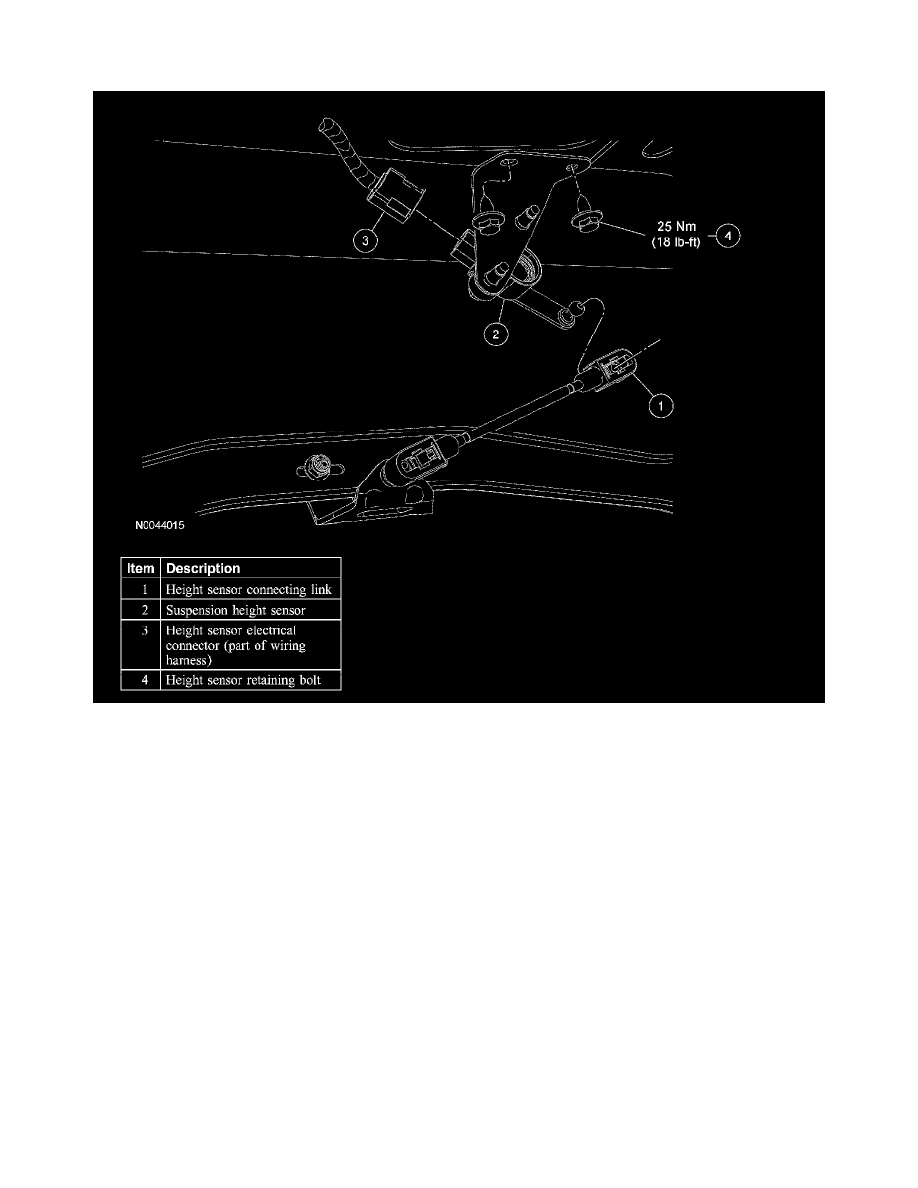
Suspension Height Sensor
Removal and Installation
WARNING: The electrical power to the air suspension system must be shut off prior to hoisting, jacking or towing an air suspension vehicle.
This can be accomplished by turning off the air suspension switch located in the LH rear quarter trim panel. Failure to do so can result in
unexpected inflation or deflation of the air springs, which can result in shifting of the vehicle during these operations. Failure to follow these
instructions may result in personal injury.
CAUTION: Suspension fasteners are critical parts because they effect performance of vital components and systems and their failure can result in
major service expense. A new part with the same part number or an equivalent part must be installed, if installation is necessary. Do not use a part of
lesser quality or substitute design. Torque values must be used as specified during reassembly to make sure of correct retention of these parts.
1. Turn the air suspension switch to the OFF position.
2. With the vehicle in NEUTRAL, position it on a hoist. For additional information, refer to Maintenance/Service and Repair.
3. Disconnect the battery ground cable. For additional information, refer to Battery.
4. Disconnect the suspension height sensor electrical connector.
5. Disconnect the suspension height sensor connecting link.
6. Remove the 2 suspension height sensor retaining bolts and the height sensor.
^
To install, tighten to 25 Nm (18 ft. lbs.).
7. To install, reverse the removal procedure.