
Grand Marquis V8-4.6L VIN V Flex Fuel (2006)
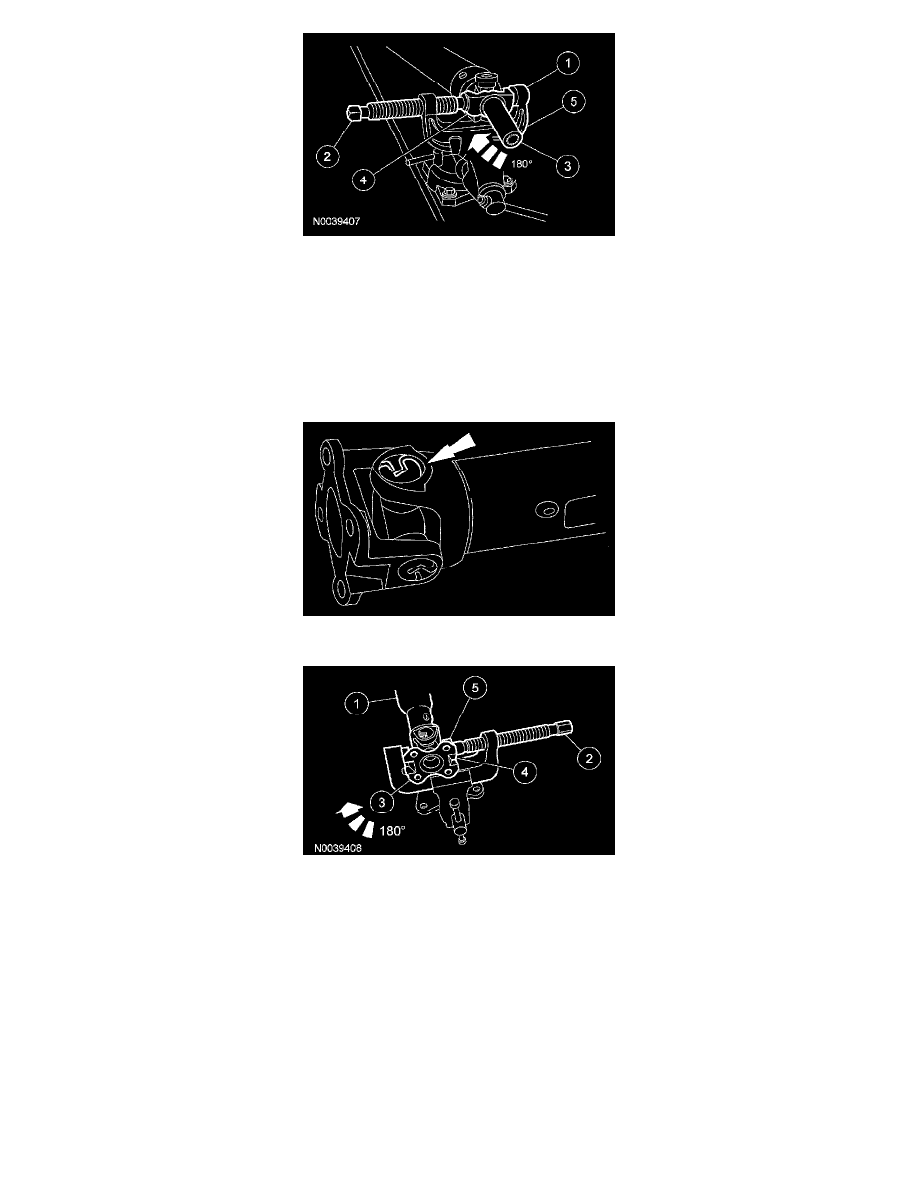
5. NOTE: If the bearing cup cannot be pressed all the way out, remove it with vise grips.
Remove the driveshaft slip-yoke.
1
Position the driveshaft in the U-Joint Tool.
2
Press out a bearing cup.
3
Rotate the driveshaft 180°.
4
Press on the spider to remove the bearing cup from the opposite side.
5
Remove the driveshaft slip-yoke.
6. Remove the remaining bearing cups and the spider.
7. Remove the snap rings from the driveshaft centering socket yoke end.
8. NOTE: If the bearing cup cannot be pressed all the way out, remove it with vise grips.
Remove the driveshaft centering socket yoke.
1
Position the driveshaft in the U-Joint Tool.
2
Press out a bearing cup.
3
Rotate the driveshaft 180°.
4
Press on the spider to remove the bearing cup from the opposite side.
5
Remove the driveshaft centering socket yoke.
9. Remove the remaining bearing cups and the spider.
10. Clean the driveshaft yoke area at each end of the driveshaft.
^
Inspect the driveshaft and driveshaft components for wear or damage.
Assembly
NOTE: Universal joint service kits are to be installed as complete assemblies only. Do not use components from other universal joints.