
LN7 L4-98 1.6L SOHC VIN 4 2-bbl HP (1983)
Suspension Strut / Shock Absorber: All Technical Service Bulletins
Shock Absorber - Manual Revisions
Article No. 84-8-21
SHOP MANUAL - REVISION TO SECTION 14-01 - SHOCK ABSORBER CHECKS
FORD 1981-84 ESCORT, EXP; 1984 TEMPO
LINCOLN-MERCURY 1981-83 LN7; 1981-84 LYNX; 1984 TOPAZ
This article is a revision to the 1984 Car Shop Manual, Section 14-01, Shock Absorber Checks, and is applicable to all subject vehicles.
Page 14-01-3 Subtitle "On Vehicle Tests"
1.
Check all tire pressures.
2.
Check for loose spare tire, wrench, jack, cargo lid, and/or objects in cargo compartment.
3.
Check for witness (wear) marks and loose attachments by performing a visual inspection on a body hoist with struts in full rebound.
4.
Check torqued joints such as shock rod, stabilizer bar, spindle, knuckle, control arms, and tie rods. Torque to specifications as required. See
specifications on pages 14-10-12, 14-32-6 and 14-35-8.
5.
Check shock assembly for external damage.
6.
Check shock absorber to be sure it is securely and properly installed. Check shock absorber insulators for damage and wear. Replace any damaged
insulators and tighten attachments to specification.
7.
Inspect the shock absorber for evidence of fluid leakage. A light film of fluid is permissable. Be sure that any fluid present is not from sources
other than the shock absorber. Replace shock absorber if leakage is severe and fluid is dripping from the strut body onto the ground.
8.
Check the damping effect of the shock absorber by bouncing the vehicle by hand. If the damping effect is not smooth and uniform, the following
bench test should be conducted.
Page 14-01-3 Subtitle "Bench Test"
With shock absorber right side up as installed in vehicle, extend it fully. Then turn shock absorber upside down and fully compress it. Repeat this
procedure at least three times to ensure that trapped air has been expelled.
Place the shock absorber right side up in a vise. Hand stroke the shock absorber as fast as possible using as much travel as possible. Action should
become smooth
and uniform throughout each stroke. Higher resistance on extension than on compression is normal. If the combination dustshield/jounce bumper has
been removed from the shock absorber, care must be taken to avoid excessive bottoming of the rod during the compression stroke to avoid internal
damage.
The following conditions are abnormal:
^
A lag or skip at reversal of travel near mid-stroke when shock is properly primed and in the installed position.
^
Seizing.
^
Noise, other than a faint "swish", such as a clicking upon fast stroke reversal.
^
Excessive fluid leakage.
^
With rod fully extended, any lateral motion of rod in relation to outer can.
If shock absorber action remains erratic after purging air, install a new shock absorber, replacing only the defective unit. Shock absorbers are not to be
replaced as sets.
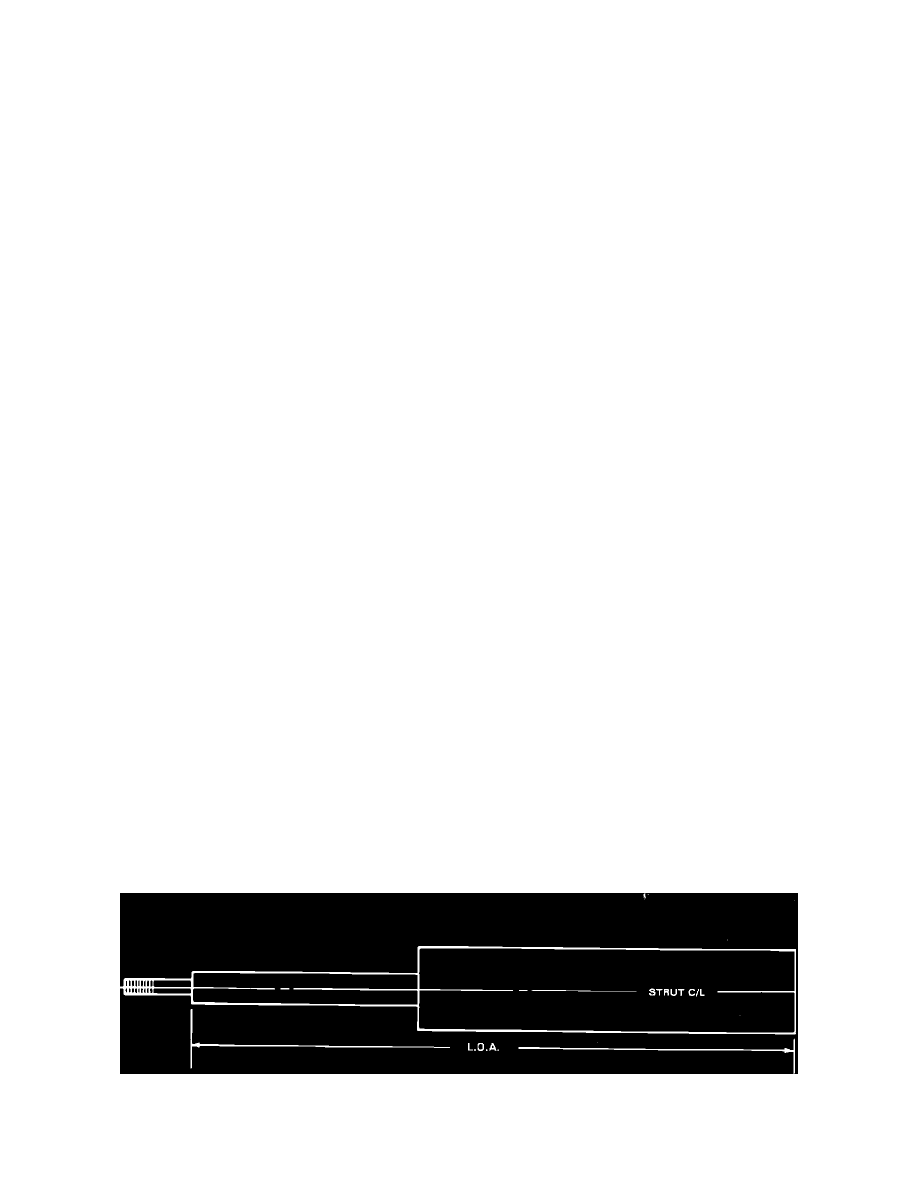
FIGURE 18
Check length overall (LOA) with rod fully extended (See Figure 18). If the strut does not meet the length overall requirement, there is a good indication