
Mariner 2WD L4-2.5L Hybrid (2010)
Front Bumper Cover / Fascia: Removal and Replacement
Bumper Cover - Front
Removal and Installation
NOTICE: Prior to removal of the front bumper cover, place tape at the corners of the bumper cover and below the headlamps to prevent
damage to the paint.
1. With the vehicle in NEUTRAL, position it on a hoist. For additional information, refer to Vehicle Jacking and Lifting.
2. Remove the 6 pushpins from inside the front splash shield (3 each side).
3. Remove the 4 fender splash shield-to-air deflector bolts (2 each side).
-
To install, tighten to 5 Nm (44 lb-in).
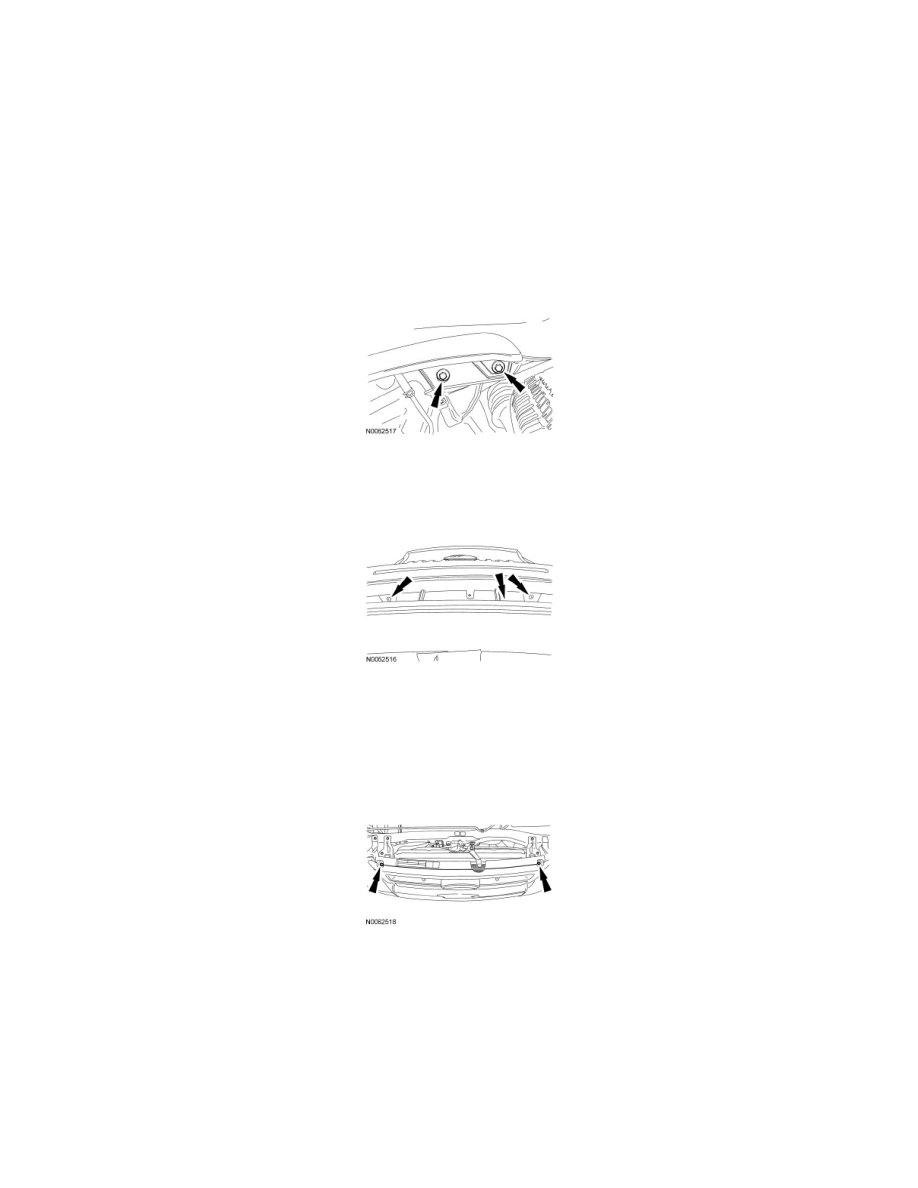
4. Remove the 3 air deflector bolts.
-
To install, tighten to 5 Nm (44 lb-in).
5. Remove the 2 front bumper cover center pushpins from the front bumper cover.
6. If equipped, disconnect the fog lamp electrical connectors.
7. If equipped, disconnect the auto-park long range sensor electrical connector.
8. Remove the 2 front bumper cover upper bolts.
-
To install, tighten to 8 Nm (71 lb-in).
9. Unclip the front bumper cover from the from the front bumper mounting brackets and remove the front bumper cover.
10. To install, reverse the removal procedure.
-
Position the front bumper cover.
-
Push inward on the sides of the bumper cover near the bottom corner of the headlamp until the bumper cover snap onto the bumper slides.