
Mariner 2WD L4-2.5L Hybrid (2010)
-
Stage 1: Tighten the intake camshaft bearing cap bolts until finger-tight.
-
Stage 2: Tighten to 7 Nm (62 lb-in).
-
Stage 3: Tighten to 16 Nm (142 lb-in).
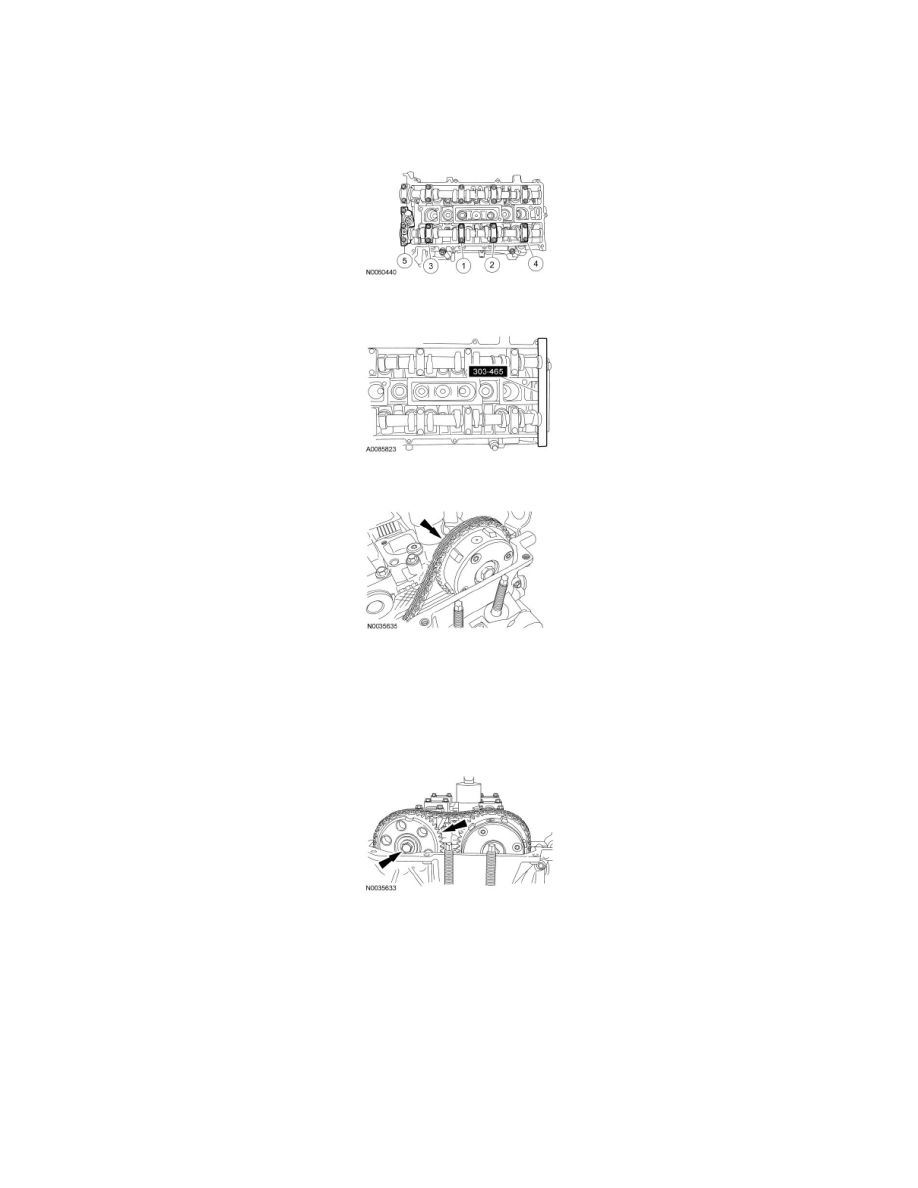
3. Install the Camshaft Alignment Plate.
4. Install the timing chain on the camshaft phaser and sprocket.
5. NOTE: The timing chain must be correctly engaged on the teeth of the crankshaft timing sprocket and the intake camshaft drive gear in order to
install the exhaust camshaft drive gear onto the exhaust camshaft.
Position the exhaust camshaft drive gear in the timing chain and install the gear and bolt on the exhaust camshaft.
-
Hand-tighten the bolt.
6. NOTE: Releasing the tensioner arm will remove the slack from the timing chain.
Remove the M6 x 30 mm (1.18 in) bolt from the upper front cover timing hole to release the tensioner arm.
7. NOTICE: The Camshaft Alignment Plate is for camshaft alignment only. Using this tool to prevent engine rotation can result in engine
damage.
Using the flats on the camshaft to prevent camshaft rotation, tighten the exhaust camshaft drive gear bolt to 72 Nm (53 lb-ft).