
Mariner 2WD L4-2.5L Hybrid (2010)
Removal and Installation
1. With vehicle in NEUTRAL, position it on a hoist. For additional information, refer to Vehicle Jacking and Lifting.
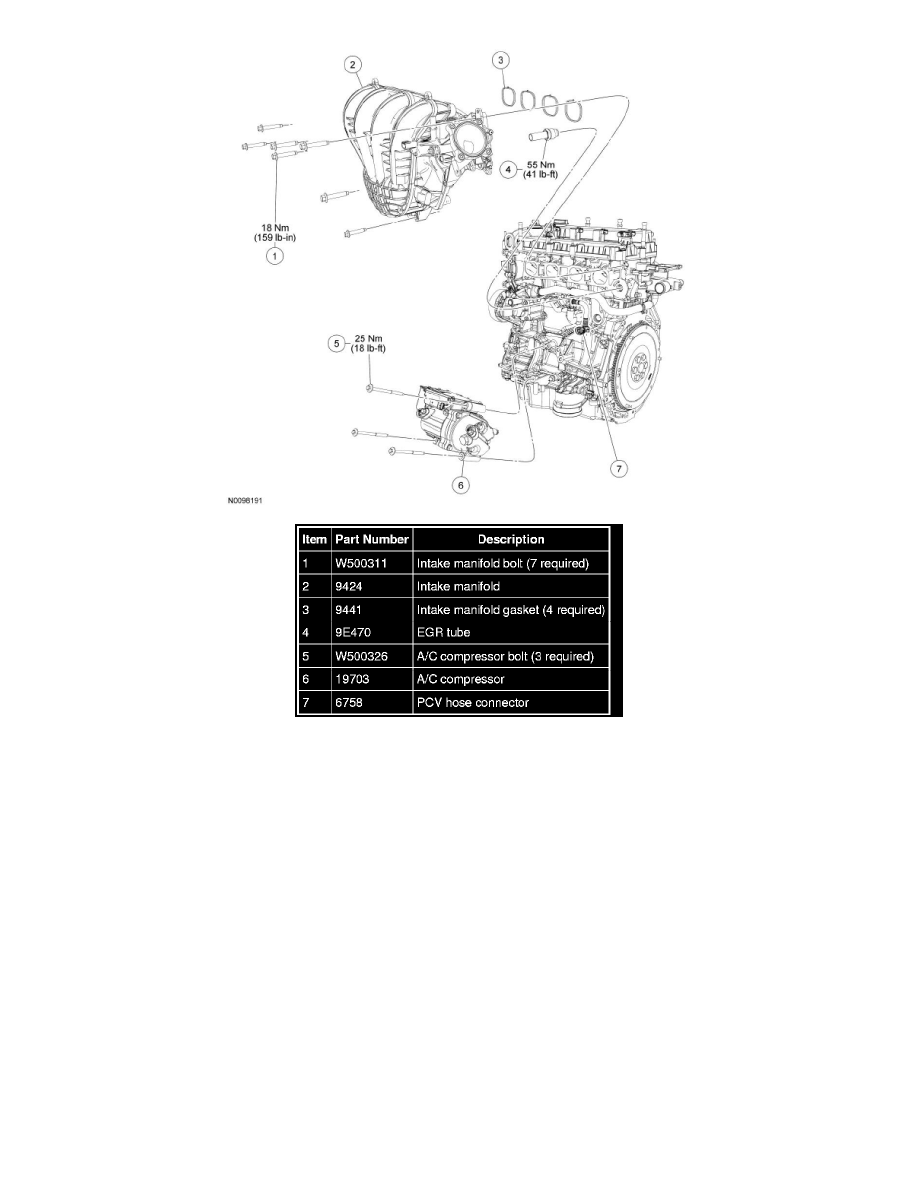
2. Remove the fuel rail. For additional information, refer to Fuel Delivery and Air Induction.
3. Remove the cooling fan motor and shroud. For additional information, refer to Cooling System.
4. Remove the Throttle Body (TB). For additional information, refer to Fuel Delivery and Air Induction.
5. Remove the accessory drive belt tensioner. For additional information, refer to Drive Belts, Mounts, Brackets and Accessories.
6. Disconnect the Engine Oil Pressure (EOP) switch electrical connector.
7. Disconnect the Manifold Absolute Pressure (MAP) sensor electrical connector.
8. Disconnect the Evaporative Emission (EVAP) canister purge valve electrical connector.
9. Disconnect the EVAP tube-to- EVAP canister purge valve quick connect coupling and the brake booster vacuum tube from the intake manifold.
10. Disconnect the Knock Sensor (KS) electrical connector and detach the 2 pin-type retainers.