
Mariner 2WD L4-2.5L Hybrid (2010)
Upload the ACM configuration to the scan tool. For additional information, refer to Programmable Module Installation (PMI) in Information Bus.
See: Powertrain Management/Computers and Control Systems/Information Bus/Testing and Inspection/Programming and Relearning
2. Remove the middle instrument panel center finish panel. For additional information, refer to Instrument Cluster / Carrier &/or Interior Moulding /
Trim.
3. Remove the 4 ACM screws.
-
To install, tighten to 2 Nm (18 lb-in) (navigation).
-
To install, tighten to 1 Nm (9 lb-in) (all except navigation).
Navigation
4. Disconnect the antenna and electrical connectors.
All except navigation
5. NOTE: Only carry out this step if installing a new ACM.
Remove the 2 ACM brackets.
All vehicles
6. Remove the ACM.
7. To install, reverse the removal procedure.
-
Download the configuration information to the ACM. For additional information, refer to PMI in Information Bus. See: Powertrain
Management/Computers and Control Systems/Information Bus/Testing and Inspection/Programming and Relearning
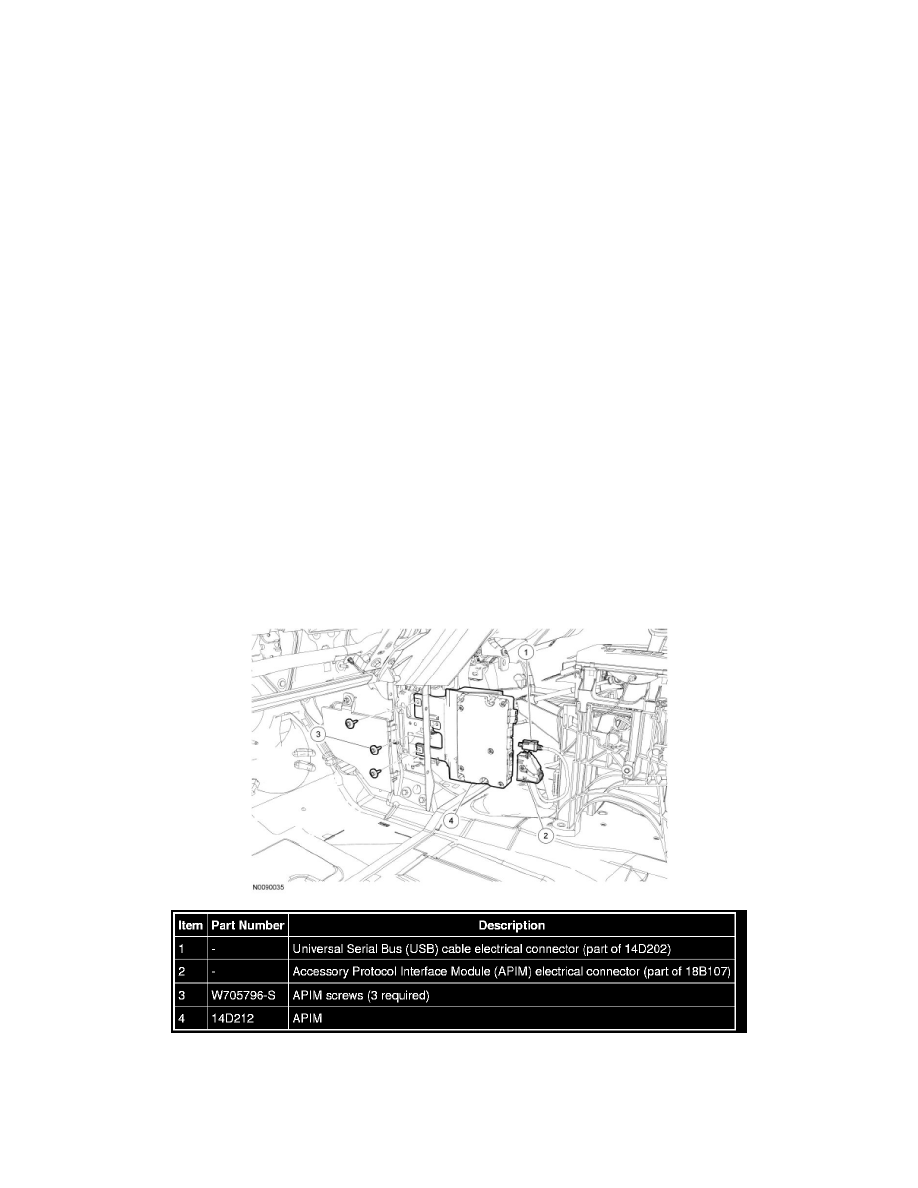
Accessory Protocol Interface Module (APIM)
Accessory Protocol Interface Module (APIM)
Removal and Installation
1. NOTE: It is necessary to record the current Accessory Protocol Interface Module (APIM) software and hardware level when a new APIM is
being installed to make sure that the new component is the same version as the component being replaced.