
Mariner 2WD V6-3.0L (2008)
3. NOTE: The D-pillar bracket mill remain in place. Remove the LH D-pillar trim panel. See: Body and Frame/Interior Moulding / Trim
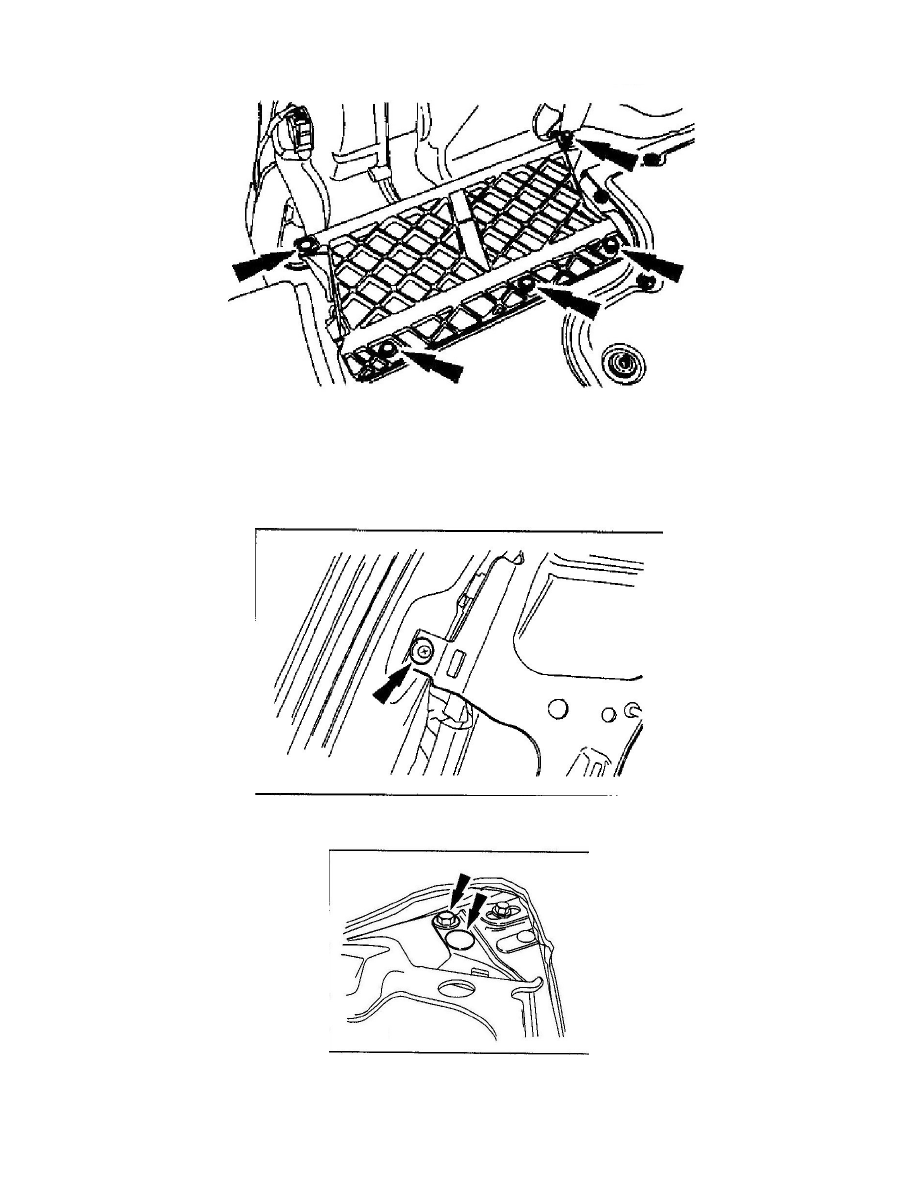
4. NOTE: When installing, tighten the screws on the High voltage Traction Battery (HVTB) first to make sure the duct is sealed correctly. Remove
the 4 battery airflow duct screws, the 1 pin-type retainer and the battery airflow duct assembly To install, tighten 12 Nm (18 lb-in)
5. Remove the 2 auxiliary climate control fresh air inlet duct nuts
^
To install tighten to 7 Nm (62 lb-in).
6. Remove the 2 auxiliary climate control housing bolts.
^
To install tighten to 7 Nm (62 lb-in).
7. Remove the D-pillar bracket pin-type retainer.
8. Remove the D-pillar bracket upper pin-type retainer and bolt end remove the D-pillar bracket.
9. Disconnect the auxiliary airflow mode door actuator electrical connector
10. NOTE: The auxiliary climate control housing must be slightly repositioned to remove the screws. Remove the auxiliary airflow mode door