
Mariner 2WD V6-3.0L (2008)
3. Remove the center console.
4. Remove the lower LH center instrument panel finish panel.
-
Remove the pin-type retainer.
-
Release the 2 retainer hooks from the instrument panel brace.
5. Position back the carpet on the LH and RH tunnel to access the RCM.
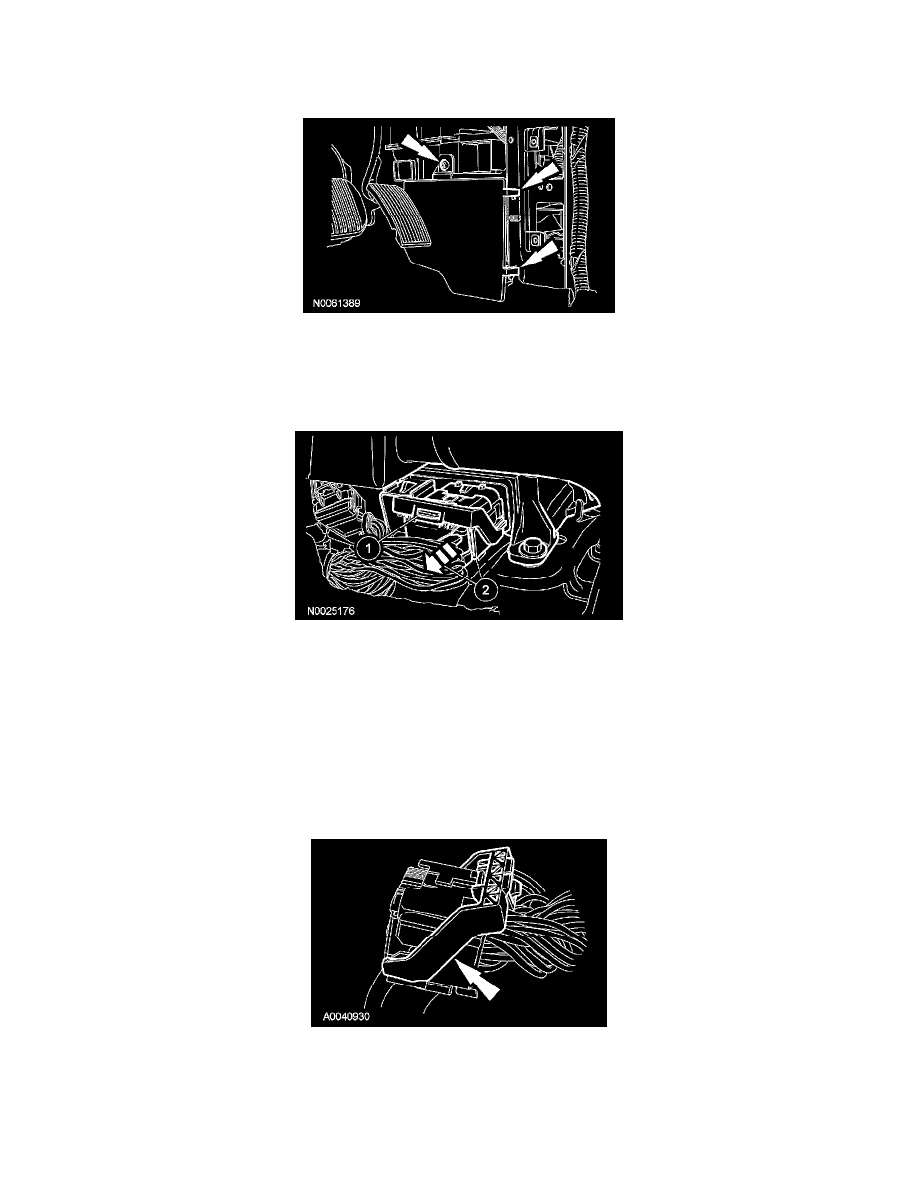
6. Disconnect the small RCM electrical connector.
7. Disconnect the large RCM electrical connector.
1
Pinch the thumb tab and pivot the connector position assurance lever all the way back until it stops.
2
Pull out and disconnect the RCM electrical connector.
8. Remove the 3 bolts and RCM.
Installation
1. WARNING: Always tighten the fasteners of the restraints control module (RCM) and impact sensor (if equipped) to the specified torque.
Failure to do so may result in incorrect restraint system operation, which increases the risk of personal injury or death in a crash.
Install the RCM and 3 bolts.
-
Tighten to 11 Nm (8 lb-ft).
2. Make sure the connector position assurance lever is in the full release position before attempting to connect the connector.
3. CAUTION: Putting the large restraints control module (RCM) electrical connector into the RCM on an angle can cause bad electrical
connections and damage components.
Position the large RCM electrical connector into the RCM.
-
CAUTION: Do not push the connector to the point where the lever pivots and seats itself. Light pressure is needed to get the