
Mariner 2WD V6-3.0L (2008)
^
Remove the radiator grille
MARINER
4. If the grommet is NOT present remove the front bumper cover For additional information, refer to the Workshop Manual (WSM) Section 501-19.
ESCAPE AND MARINER
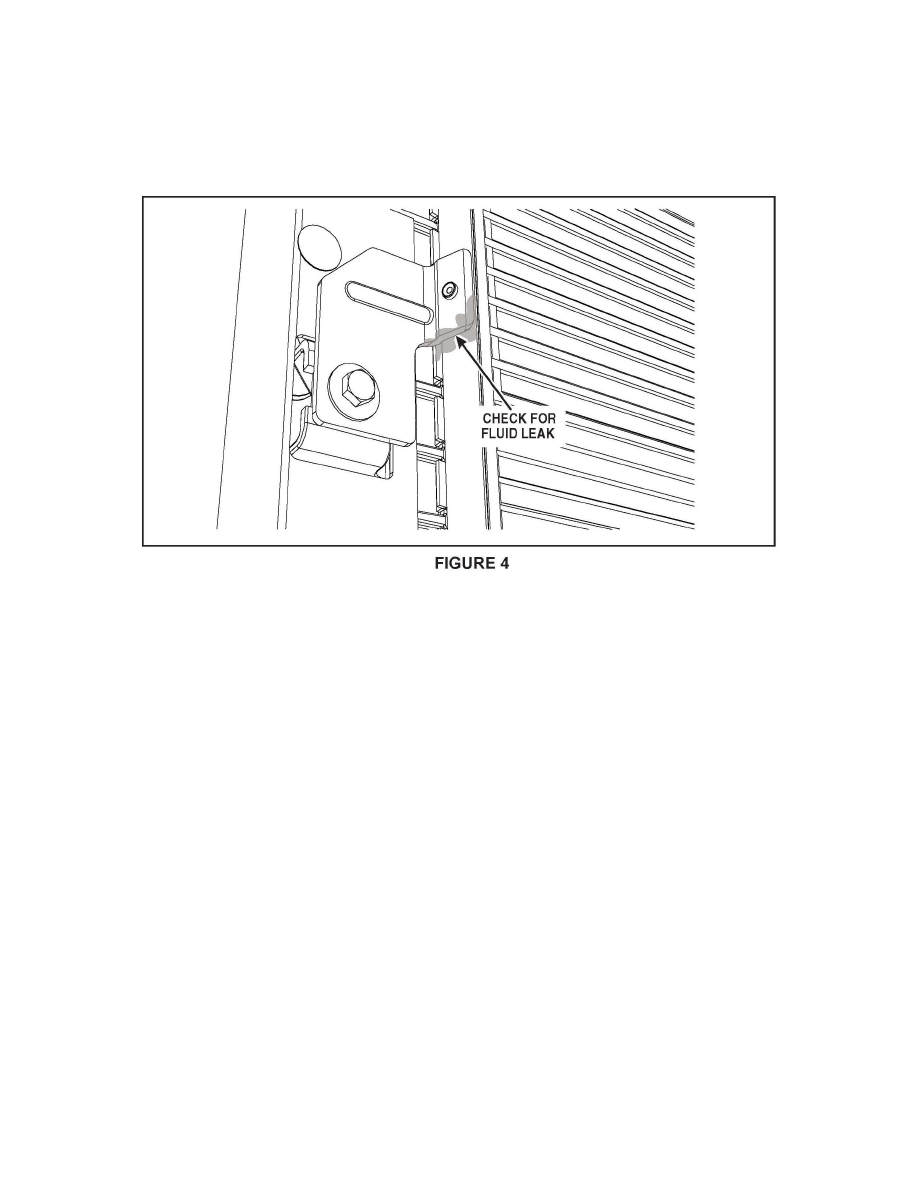
5. Using a clean white paper towel wipe the transmission fluid cooler tube below the RH mounting bracket and check for a fluid leak. See Figure 4.
^
If there is NO fluid leak proceed to SERVICE PROCEDURE 1.
^
If a fluid leak IS present proceed to SERVICE PROCEDURE 2.
SERVICE PROCEDURE 1 - GROMMET NOT PRESENT AND TRANSMISSION FLUID COOLER NOT LEAKING
ESCAPE AND MARINER
If during the inspection there was NO fluid leak detected remove the existing RH transmission fluid cooler mounting bracket and install a new bracket
1. NOTE: It is NOT necessary to evacuate the A/C system or to drain any of the transmission fluid in the following Service Procedure steps
Remove the RH and LH transmission fluid cooler mounting bracket bolts
2. NOTE: When using a wood spacer use NO larger than a 1 X 3, piece of wood for radiator protection Using a larger piece of wood may damage the
radiator and/or the cooler.
Place a wood spacer no larger than 1 X 3 between the cooler RH mounting bracket and the radiator at the bracket location.
3. NOTE: It is recommended to use a die grinder equipped with a small cutting wheel. Do not use a body reciprocating saw or a Sawzall(R) to remove
the bracket. Using this type of cutting tool may cause damage to the radiator and/or the cooler.
NOTE:
Place a protective cover overthe front bumper cover to prevent any damage when removing the RH mounting bracket.