
Mariner 2WD V6-3.0L (2008)
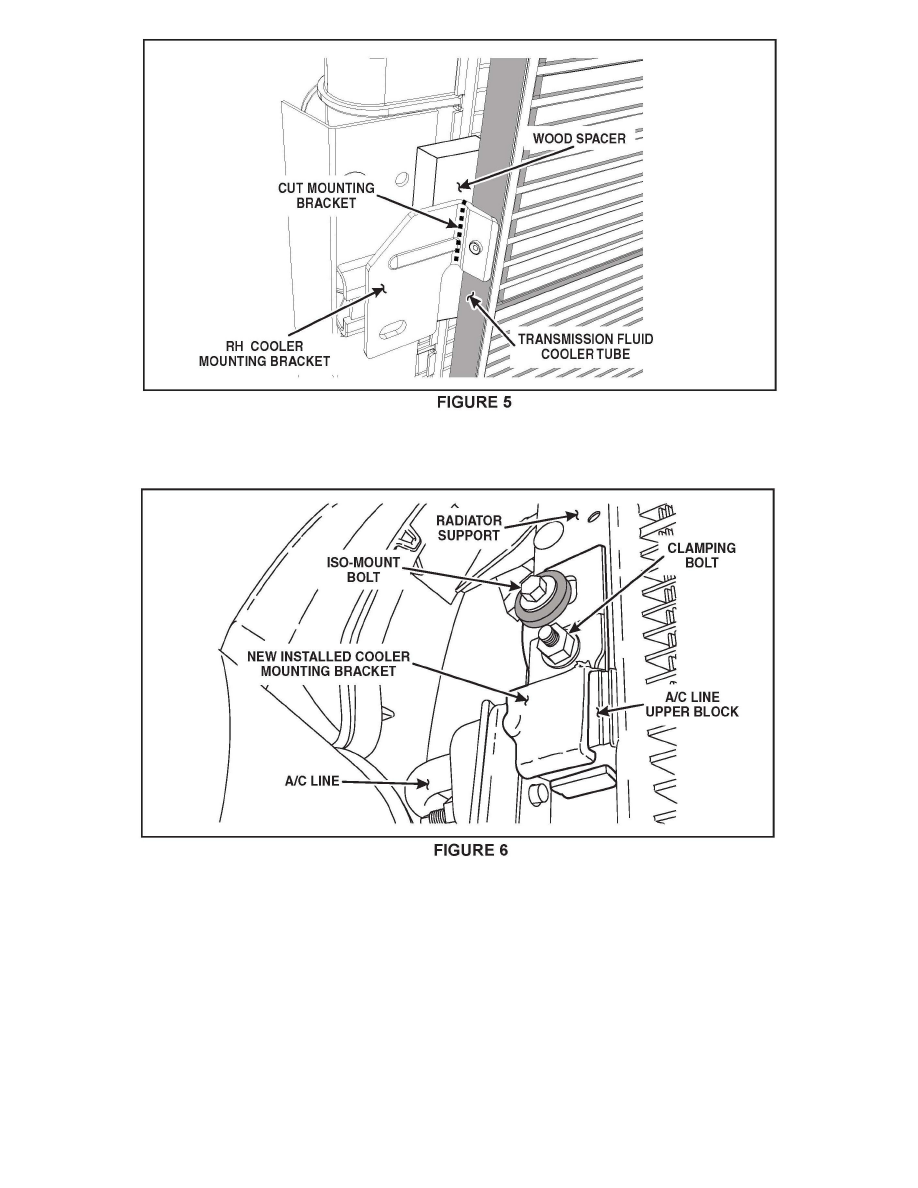
Using a suitable tool, cut the existing RH mounting bracket off of the transmission fluid cooler tube and smooth any sharp edges using a
Scotch-Brite(TM) pad or equivalent. See Figure 5.
4. Install the new mounting bracket. See Figure 6.
^
Install the new mounting bracket onto the A/C line upper block with the longer piece of the bracket flush with the radiator support.
^
Tighten the clamping bolt to 25 Nm (18 lb-ft).
^
Using the same RH mounting location install and tighten the iso-mount bolt to 6 Nm (53 lb-in).
^
Reinstall and tighten the LH transmission fluid cooler mounting bracket bolt to 7 Nm (62 lb-in).
ESCAPE
5. Install the radiator grille. See Figure 3.
^
Attach the three lower grille retainers to the front bumper cover by pushing the grille into the bumper cover. Make sure that all three grille