
Mariner 4WD L4-2.3L VIN Z (2005)
C.
Drill the hole at a slow to moderate pace, occasionally pulling the bit out to clear the chips.
D.
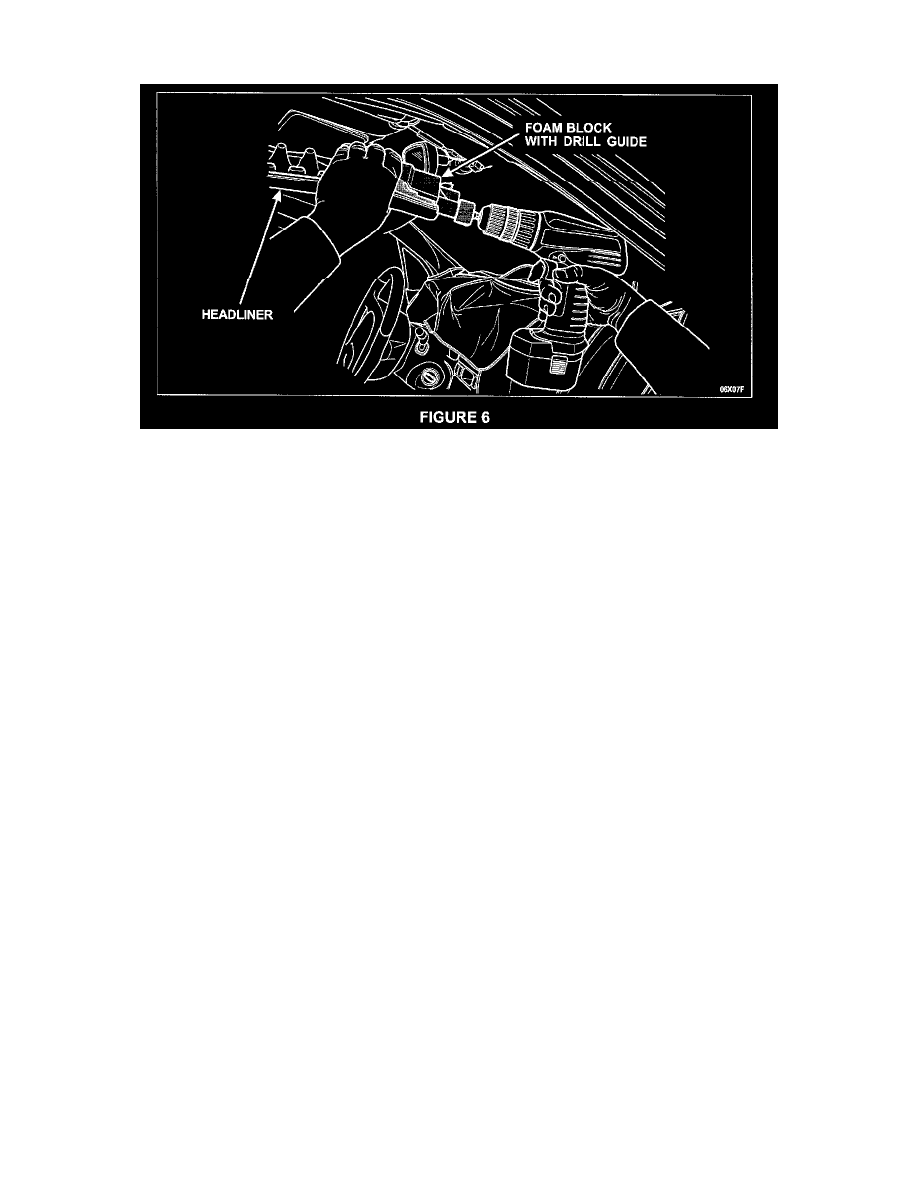
Drill the hole to the proper depth using the stop on the bit as your depth gauge. See Figure 6.
E.
Drill the second hole in the same foam block in the same manner.
F.
Repeat steps A - E on the foam block on the other side of the headliner.
5.
Remove the covers from the instrument panel and clean all foam chips from the vehicle. Proceed to ASSEMBLY.
ASSEMBLY
1.
Position the B-pillar trim panels and install the bolts. Tighten to 7 Nm (62 lb-in), then install the bolt covers.
2.
Position the safety belt and install the safety belt bolts at the B-pillar. Tighten to 53 Nm (39 lb-ft), then install the D-ring covers.
3.
Install the A-pillar trim panels.
4.
Install the passenger A-pillar assist handles and bolts. Tighten to 5 Nm (44 lb-in), then install the bolt covers.
5.
Install the front and rear door weatherstrips.
6.
Connect and install the overhead console, if equipped.
7.
Install and connect the interior lamp and screws.
8.
Install the interior lamp lens.
9.
Install the sunvisors, connecting the electrical connectors if equipped, and the sunvisor clips.
10.
Install the rear seat overhead assist handles and bolts. Tighten to 8 Nm (71 lb-in), then install the bolt covers.
Owner Letter
Owner Notification Letter will be mailed on May 19, 2006.