
Mariner 4WD L4-2.5L (2010)
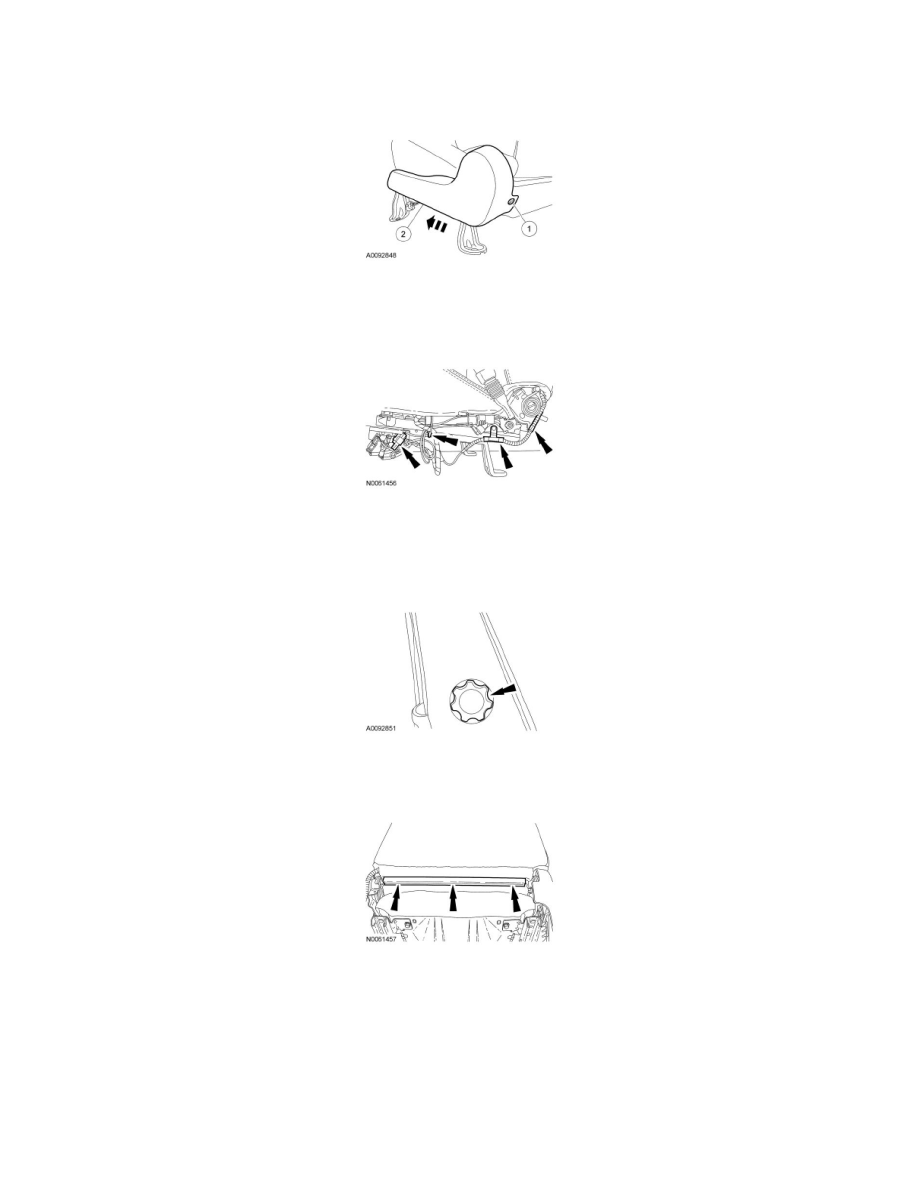
1. Remove the rear screw.
-
For driver seat, remove the front and rear screws.
2. Push the side shield forward to release.
3. NOTICE: Note the position of the wiring harness, to aid installation. An incorrectly routed wiring harness could become damaged when
the seat is moved.
Disconnect the side air bag module electrical connector and detach it from the seat track. Detach the 3 wiring harness routing retainers.
Seats with manual lumbar adjust
4. Turn the manual lumbar knob clockwise until it stops, releasing all tension on the manual lumbar support cable.
5. Pull and remove the manual lumbar knob.
All seats
6. Release the seat backrest trim cover J-clip.
7. NOTICE: Use care when separating the seat backrest trim cover from the hook-and-loop strip. The hook-and-loop strip can be torn from
the seat backrest foam pad. Failure to follow this instruction may result in component damage and/or system failure.
Place a hand between the seat backrest trim cover and the seat backrest foam pad and carefully separate the hook-and-loop strips.
8. Carefully roll up the seat back trim cover in an inside out fashion to the side air bag module.
9. Release the side air bag module deployment chute J-clip from around the side air bag module.