
Mariner 4WD V6-3.0L (2010)
Verify the LH camshafts are in the neutral position.
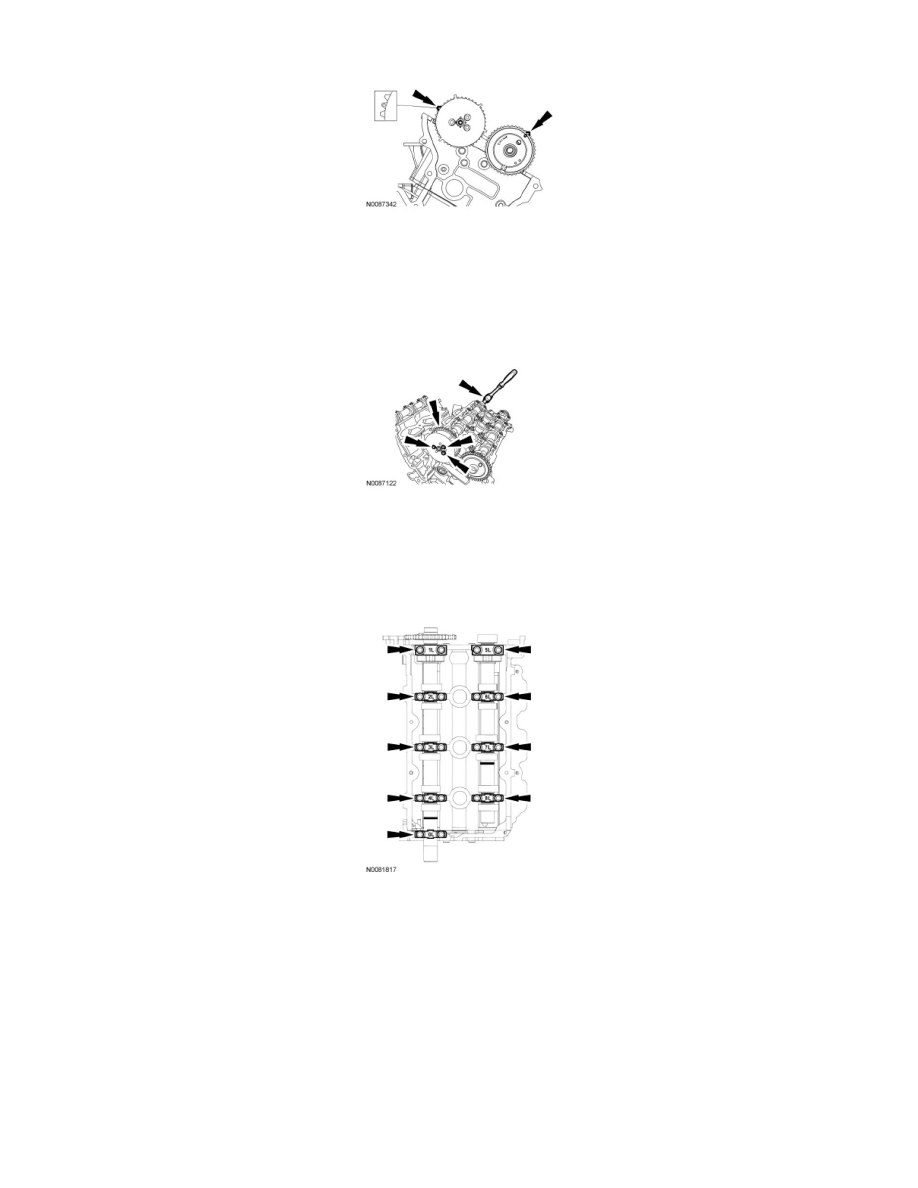
7. NOTICE: Do not allow the camshaft to rotate from the neutral position while removing the camshaft phaser and sprocket or damage to
the engine may occur.
NOTE: Install a 3/8-in ratchet and extension into the D-slot on the rear of the intake camshaft to hold the camshaft in place for removal of the
camshaft phaser and sprocket bolts.
Remove the 3 bolts and the LH camshaft phaser and sprocket.
8. NOTICE: Cylinder head camshaft bearing caps must be assembled in their original positions. Some engines have factory markings on the
camshaft bearing caps (as shown in illustration). Engines that do not have the factory markings must be marked for correct position and
orientation prior to removal. Failure to install the camshaft bearing caps in their original positions may result in severe engine damage.
If necessary, mark the camshaft bearing cap position and orientation as shown in the illustration.
9. NOTICE: After loosening all of the camshaft bearing cap bolts, remove the camshaft bearing thrust caps (1L and 5L) first, or damage to
the thrust caps may occur.
NOTE: Make sure the camshaft bearing caps are marked as instructed in the previous step.
Loosen the bolts evenly in the sequence shown.
1. Remove the camshaft bearing thrust caps (1L and 5L).
2. Remove the remaining camshaft bearing caps.
3. Remove the camshafts from the cylinder head.