
Mariner 4WD V6-3.0L (2010)
NOTE
EACH CAM CAP MUST BE COMPLETELY REMOVED AND INSTALLED, PER INSTRUCTIONS, BEFORE PROCEEDING TO NEXT
CAM CAP OR DAMAGE TO THE ENGINE MAY OCCUR.
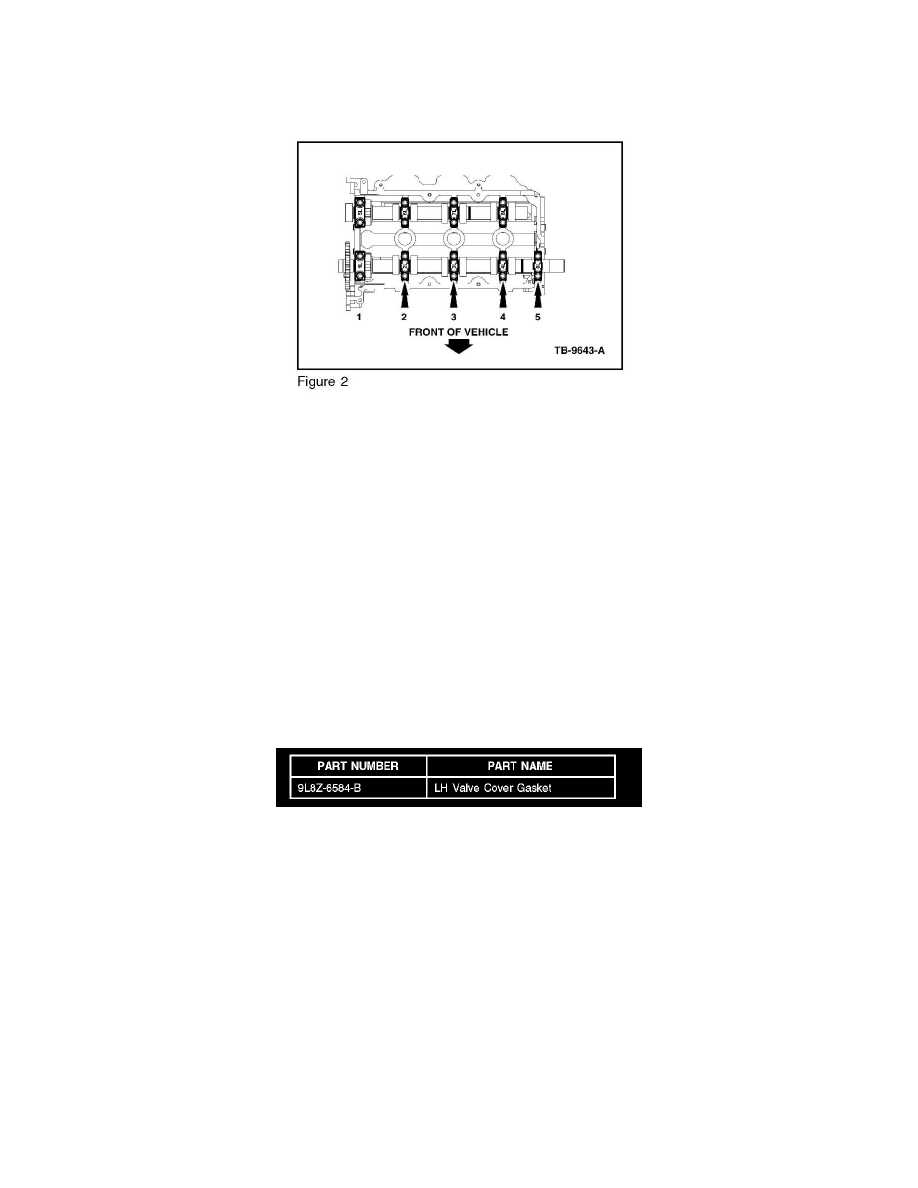
5. On the LH exhaust camshaft only, starting at the front of the engine with the thrust bearing cap (1L), perform the following on all 5 camshaft bearing
caps: (Figure 2)
a. Loosen both bolts.
b. Remove cap.
c. Install cap and push cap toward intake camshaft while tightening bolts, excludes thrust bearing cap (1L).
d. Torque bolts to 89 lb-in (10 N.m) starting with bolt closest to intake camshaft.
e. Proceed to next cam cap.
NOTE
CYLINDER HEAD CAMSHAFT BEARING CAPS MUST BE ASSEMBLED IN THEIR ORIGINAL POSITIONS AND ORIENTATION.
FAILURE TO INSTALL THE CAMSHAFT BEARING CAPS IN THEIR ORIGINAL POSITIONS AND ORIENTATION MAY RESULT IN
SEVERE ENGINE DAMAGE.
6. Install the LH valve cover. Refer to WSM, Section 303-01B.
Parts Block
WARRANTY STATUS: Eligible Under Provisions Of New Vehicle Limited Warranty Coverage
IMPORTANT: Warranty coverage limits/policies are not altered by a TSB. Warranty coverage limits are determined by the identified causal part.
OPERATION
DESCRIPTION
TIME
101203A
2010 Escape, Mariner 3.0L
1.7 Hrs.
Engine: Remove The LH
Valve Cover, Remove And
Install LH Exhaust
Camshaft Bearing Caps.
Includes Time To Road
Test And Diagnose. (Do
Not Use With Any Other
Labor Operations)
DEALER CODING
CONDITION