
Mariner 4WD V6-3.0L (2010)
Timing Chain Tensioner: Service and Repair
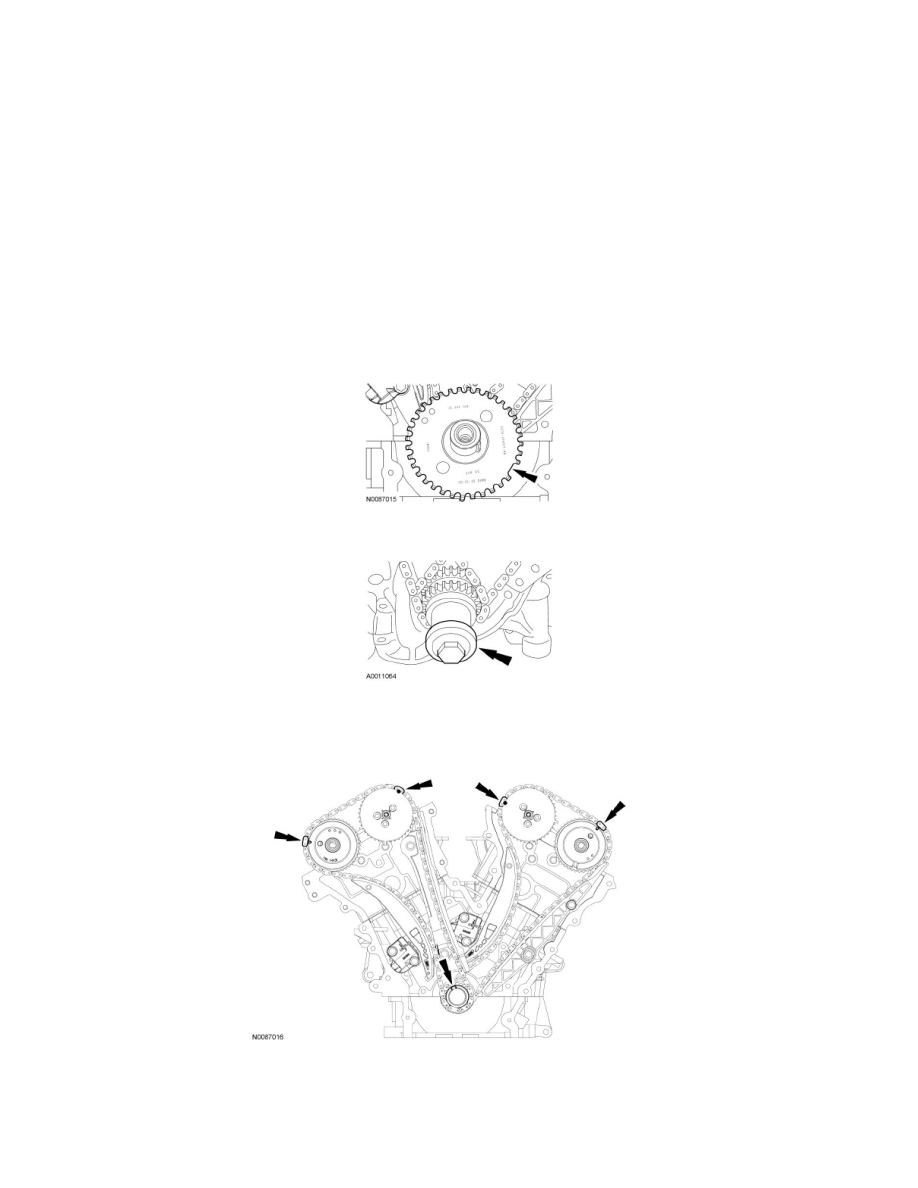
Timing Drive Components
Removal
NOTICE: During engine repair procedures, cleanliness is extremely important. Any foreign material (including any material created while
cleaning gasket surfaces) that enters the oil passages, coolant passages or the oil pan may cause engine failure.
NOTICE: Failure to verify correct timing drive component alignment will result in severe engine damage.
1. Remove the engine front cover. For additional information, refer to Engine Front Cover See: Timing Cover/Service and Repair.
2. Remove the LH and RH spark plugs. For additional information, refer to Ignition System.
3. NOTE: This pulse wheel is used in several different engines. Install the pulse wheel with the keyway in the slot stamped "30RFF" (orange in
color).
Remove the ignition pulse wheel.
4. Install the crankshaft pulley bolt and washer.
5. Rotate the crankshaft clockwise to position the crankshaft keyway in the 11 o'clock position and position the camshafts in the correct position. This
will position the No. 1 cylinder at Top Dead Center (TDC).
-
Verify that the camshafts are correctly located. If not, rotate the crankshaft one additional turn and recheck.
6. Rotate the crankshaft clockwise 120 degrees to the 3 o'clock position to position the RH camshafts in the neutral position.