
Mariner 4WD V6-3.0L (2010)
12. Clean and inspect the LH catalytic converter manifold. For additional information, refer to Engine.
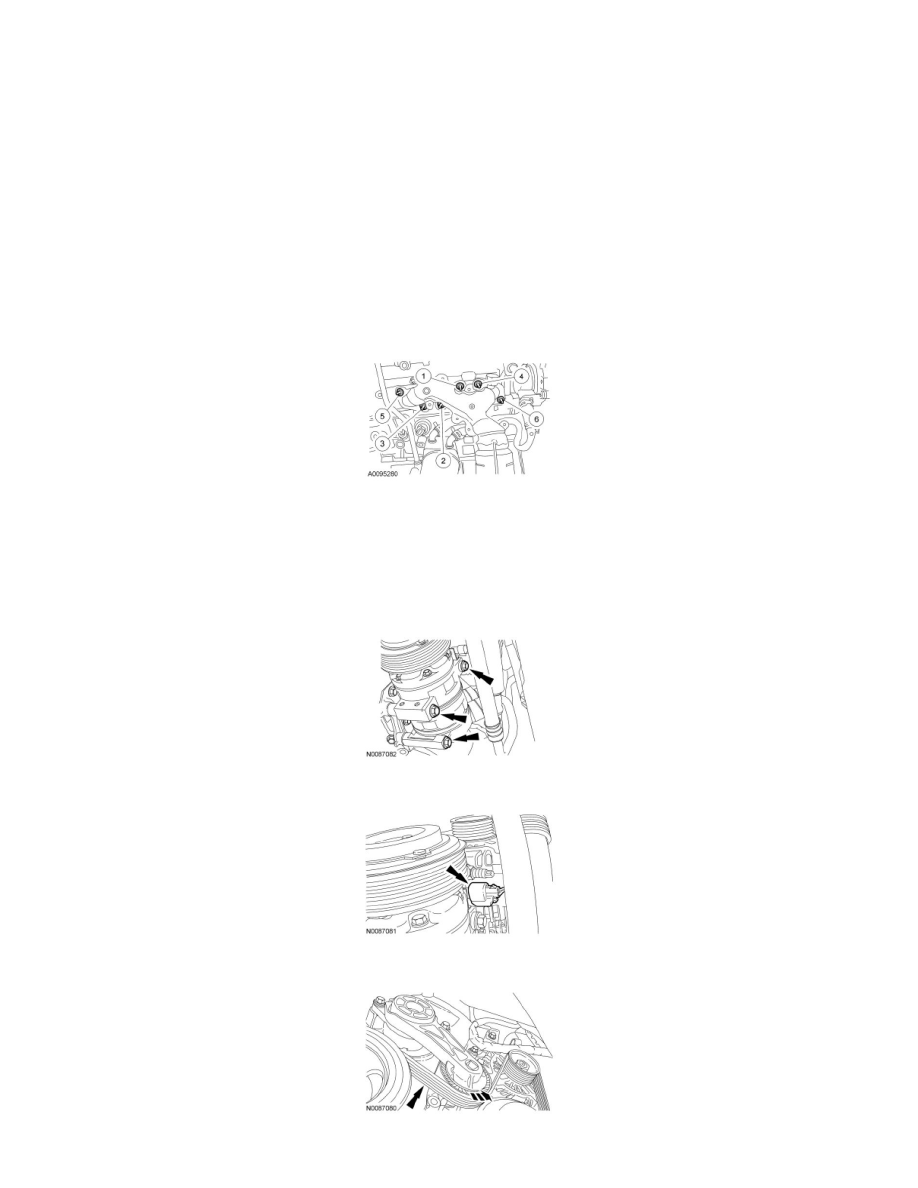
Installation
1. Install the 6 new LH catalytic converter manifold studs.
-
Tighten to 11 Nm (97 lb-in).
2. NOTICE: Failure to tighten the catalytic converter nuts to specification before installing the exhaust Y-pipe will cause the converter to
develop an exhaust leak.
NOTICE: Failure to tighten the catalytic converter nuts to specification a second time will cause the converter to develop an exhaust leak.
Using a new gasket, install the LH catalytic converter and the 6 nuts. Tighten in 2 stages in the sequence shown.
-
Stage 1: Tighten to 25 Nm (18 lb-ft).
-
Stage 2: Tighten to 25 Nm (18 lb-ft).
3. Install the exhaust Y-pipe. For additional information, refer to Exhaust Y-Pipe - 3.0L See: Exhaust Pipe/Service and Repair/Exhaust Y-Pipe.
4. Install the LH catalytic converter heat shield and the 3 bolts.
-
Tighten to 10 Nm (89 lb-in).
5. Position the A/C compressor and install the 3 bolts.
-
Tighten to 25 Nm (18 lb-ft).
6. Connect the A/C compressor electrical connector.
7. Rotate the accessory drive belt tensioner counterclockwise and install the accessory drive belt.
8. Install the LH HO2S. For additional information, refer to Computers and Control Systems.