Mariner 4WD V6-3.0L (2010)

12. Clean and inspect the LH catalytic converter manifold. For additional information, refer to Engine.
Installation
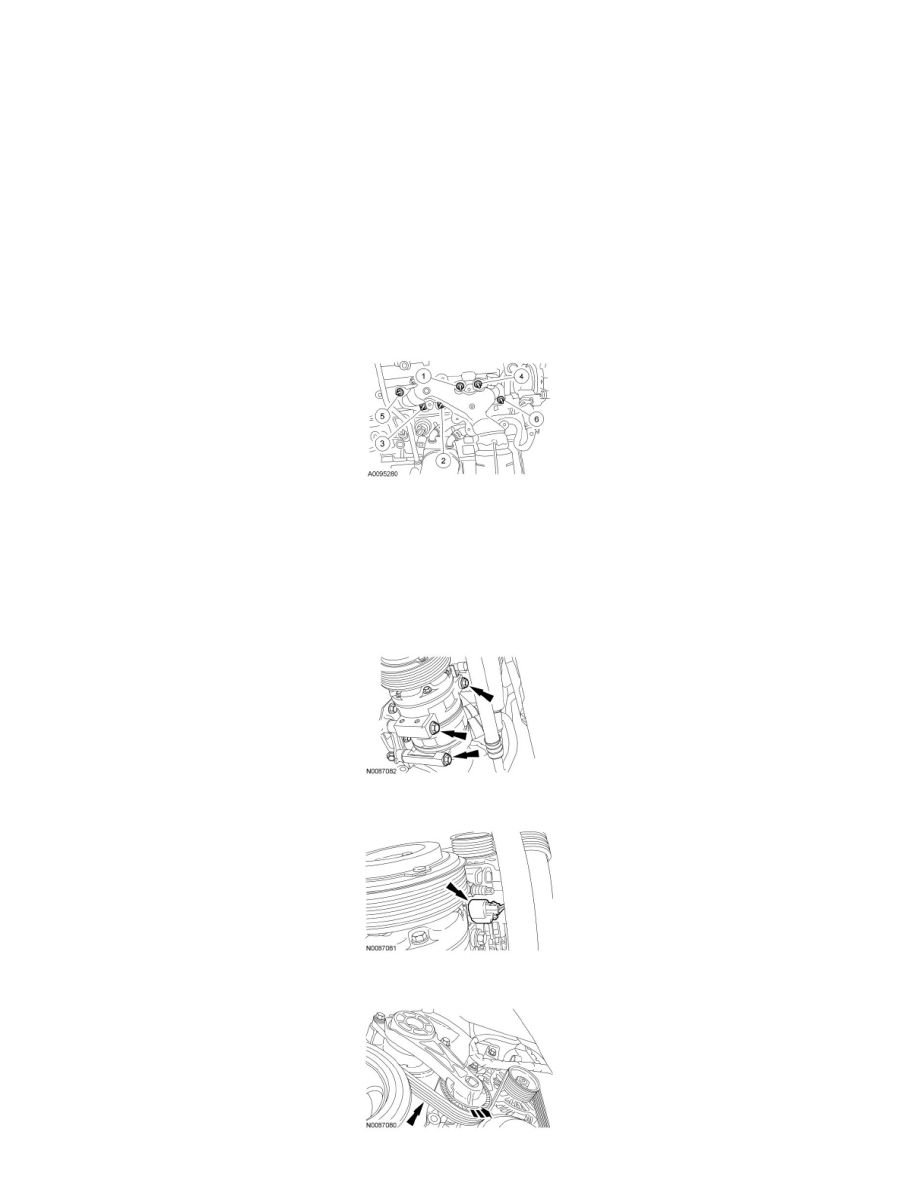
1. Install the 6 new LH catalytic converter manifold studs.
-
Tighten to 11 Nm (97 lb-in).
2. NOTICE: Failure to tighten the catalytic converter nuts to specification before installing the exhaust Y-pipe will cause the converter to
develop an exhaust leak.
NOTICE: Failure to tighten the catalytic converter nuts to specification a second time will cause the converter to develop an exhaust leak.
Using a new gasket, install the LH catalytic converter and the 6 nuts. Tighten in 2 stages in the sequence shown.
-
Stage 1: Tighten to 25 Nm (18 lb-ft).
-
Stage 2: Tighten to 25 Nm (18 lb-ft).
3. Install the exhaust Y-pipe. For additional information, refer to Exhaust Y-Pipe - 3.0L See: Engine, Cooling and Exhaust/Exhaust System/Exhaust
Pipe/Service and Repair/Exhaust Y-Pipe.
4. Install the LH catalytic converter heat shield and the 3 bolts.
-
Tighten to 10 Nm (89 lb-in).
5. Position the A/C compressor and install the 3 bolts.
-
Tighten to 25 Nm (18 lb-ft).
6. Connect the A/C compressor electrical connector.
7. Rotate the accessory drive belt tensioner counterclockwise and install the accessory drive belt.
