
Mariner 4WD V6-3.0L (2010)
NOTE: All-Wheel Drive (AWD) vehicle shown, Front Wheel Drive (FWD) vehicle similar.
Removal
NOTICE: Suspension fasteners are critical parts because they affect performance of vital components and systems and their failure may result
in major service expense. New parts must be installed with the same part numbers or equivalent part, if replacement is necessary. Do not use a
replacement part of lesser quality or substitute design. Torque values must be used as specified during reassembly to make sure of correct
retention of these parts.
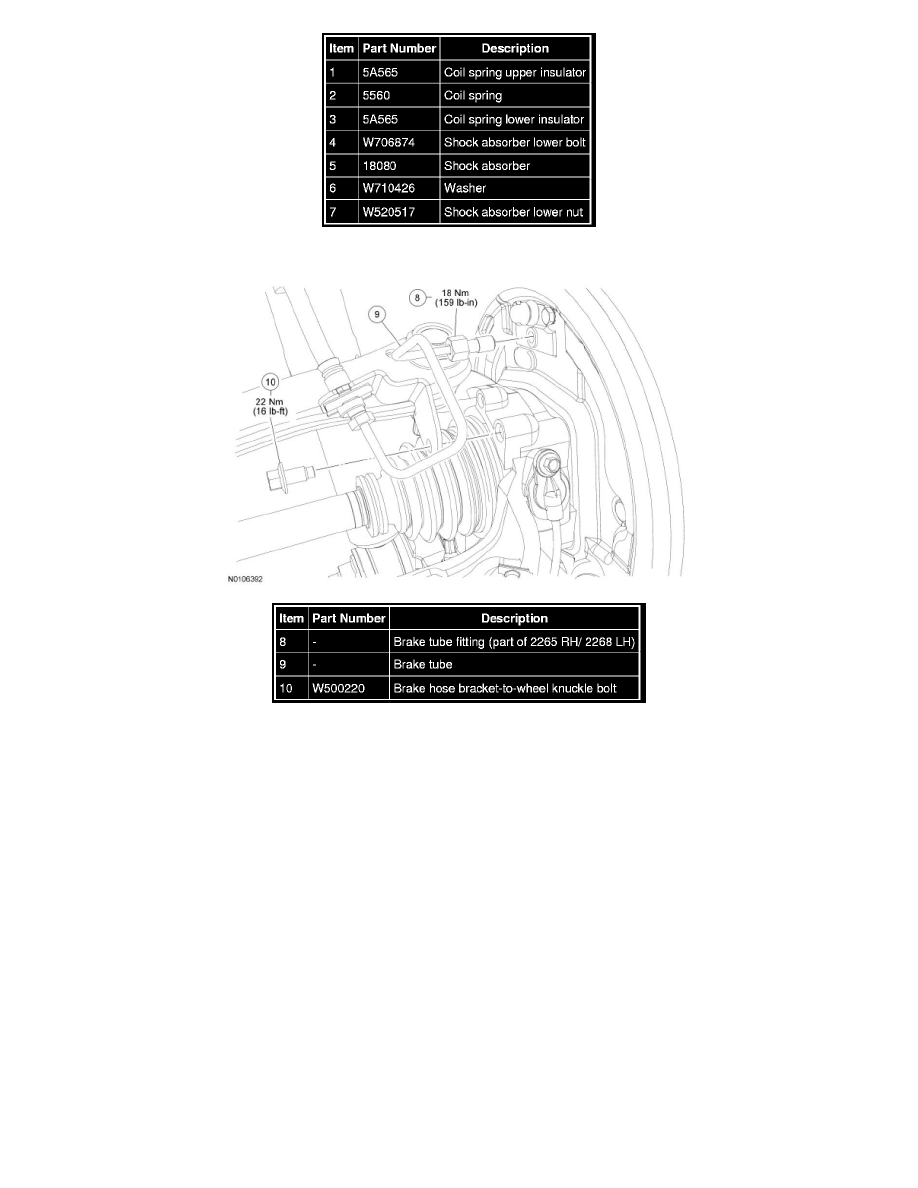
1. Remove the wheel and tire. For additional information, refer to Wheels and Tires.
2. Remove the brake hose bracket-to-wheel knuckle bolt.
3. Disconnect the brake tube from the wheel cylinder and position the brake tube and bracket assembly aside.
4. Using a suitable jackstand, support the wheel knuckle.
5. Remove and discard the shock absorber lower nut, washer and bolt.
6. Remove the upper arm. For additional information, refer to Upper Arm See: Control Arm/Service and Repair/Rear Suspension/Upper Arm.
7. Loosen the lower arm inner bolt.
8. NOTE: Note the position of the coil spring insulators and coil spring for installation.
Using the jackstand, carefully lower the wheel knuckle.