
Merkur Scorpio V6-179 2.9L (1989)
Oil Pan: Service and Repair
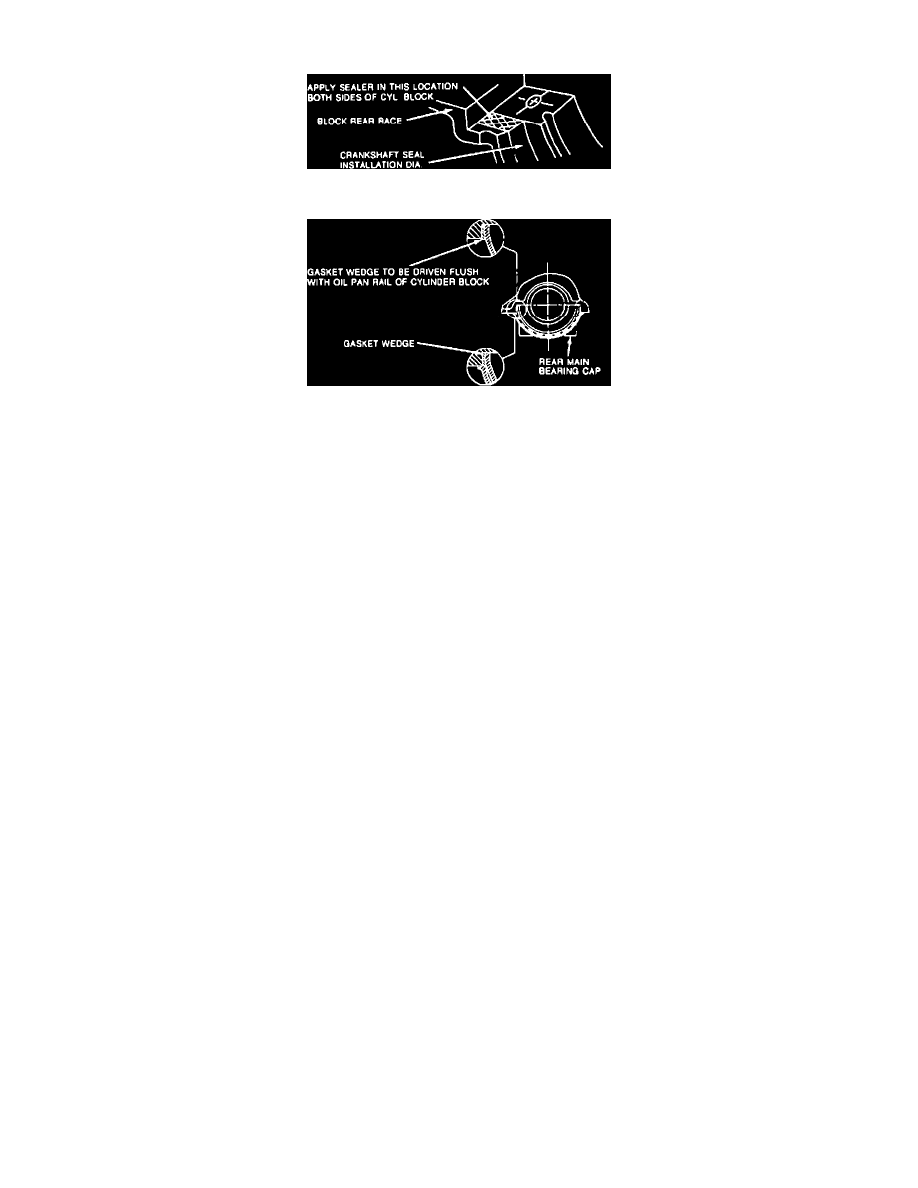
Fig. 12 Rear Main Bearing Cap Installation
Fig. 13 Oil Pan Gasket Installation
1.
Disconnect battery ground cable.
2.
Disconnect distributor cap and rotor and position aside.
3.
Disconnect fuel return line in front of ABS power brake unit.
4.
Remove upper fan shroud attaching bolts and rivets and the shroud. Retain rivets for use during installation.
5.
Raise and support vehicle.
6.
Remove two lower engine mount to crossmember retaining nuts.
7.
Disconnect starter motor wiring, then remove starter motor attaching bolts and the starter.
8.
Disconnect exhaust pipe from exhaust manifold, then lower vehicle.
9.
Using engine support bar (tool No. D79P-6000-B or equivalent), lift engine until transmission contacts dash panel.
10.
Raise and support vehicle.
11.
Remove lower heater hose attaching bolts, then drain engine oil.
12.
Remove two lower transmission attaching bolts.
13.
Remove lower steering shaft flange coupler attaching bolts and nuts.
14.
Position transmission jack under No. 1 front crossmember.
15.
Remove clips from front flexible brake line.
16.
Remove crossmember attaching bolts, then lower crossmember two inches.
17.
Remove oil pan attaching bolts and nuts and the oil pan.
18.
Reverse procedure to install, noting the following:
a. If all gasket material does not come out of groove in rear main bearing cap, remove cap and clean block and the cap. Apply sealant to cylinder
block, Fig. 12, then install and torque bearing cap. Ensure bearing cap is flush within .005 inch of cylinder block rear face.
b. Remove all gasket material from block and oil pan mating surfaces, then apply silicone sealant and install new gasket, Fig. 13.