
Merkur Scorpio V6-179 2.9L (1989)
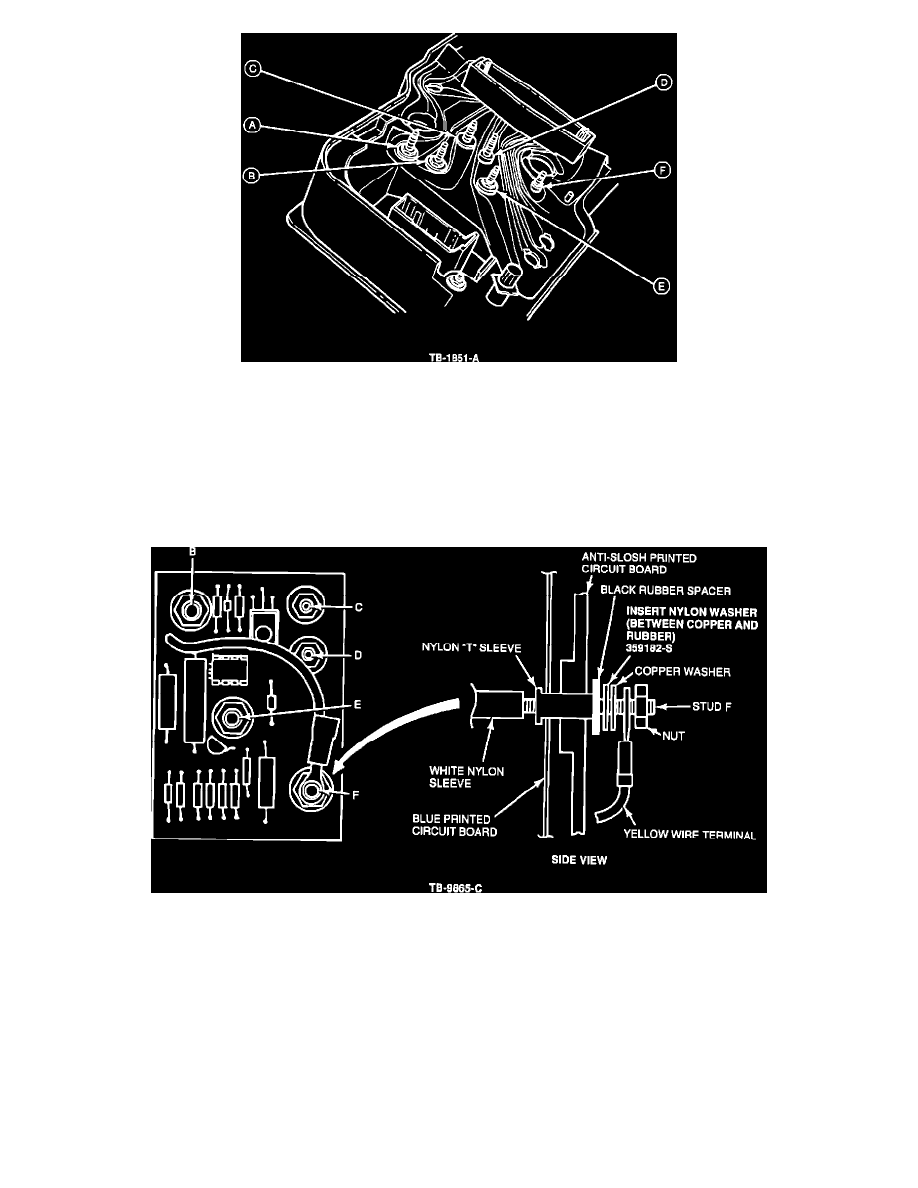
Figure 8
5.
Position the printed circuit in place and install the three (3) copper washers and nuts on studs A, B and E, Figure 8.
NOTE:
THE NYLON "T" SLEEVE WILL INSULATE THE PRINTED CIRCUIT FROM STUD "F".
6.
Install the anti-slosh printed circuit board on the instrument cluster.
7.
Install two (2) copper washers and nuts on studs C and D.
Figure 5
8.
Install the following items in the order listed below, Figure 5:
^
black rubber spacer
^
new nylon washer, (359182-S)
^
copper washer
^
yellow wire terminal
^
terminal nut.