
Merkur Scorpio V6-179 2.9L (1989)
Steering Gear: Service and Repair
Disassemble/Assemble
Manual
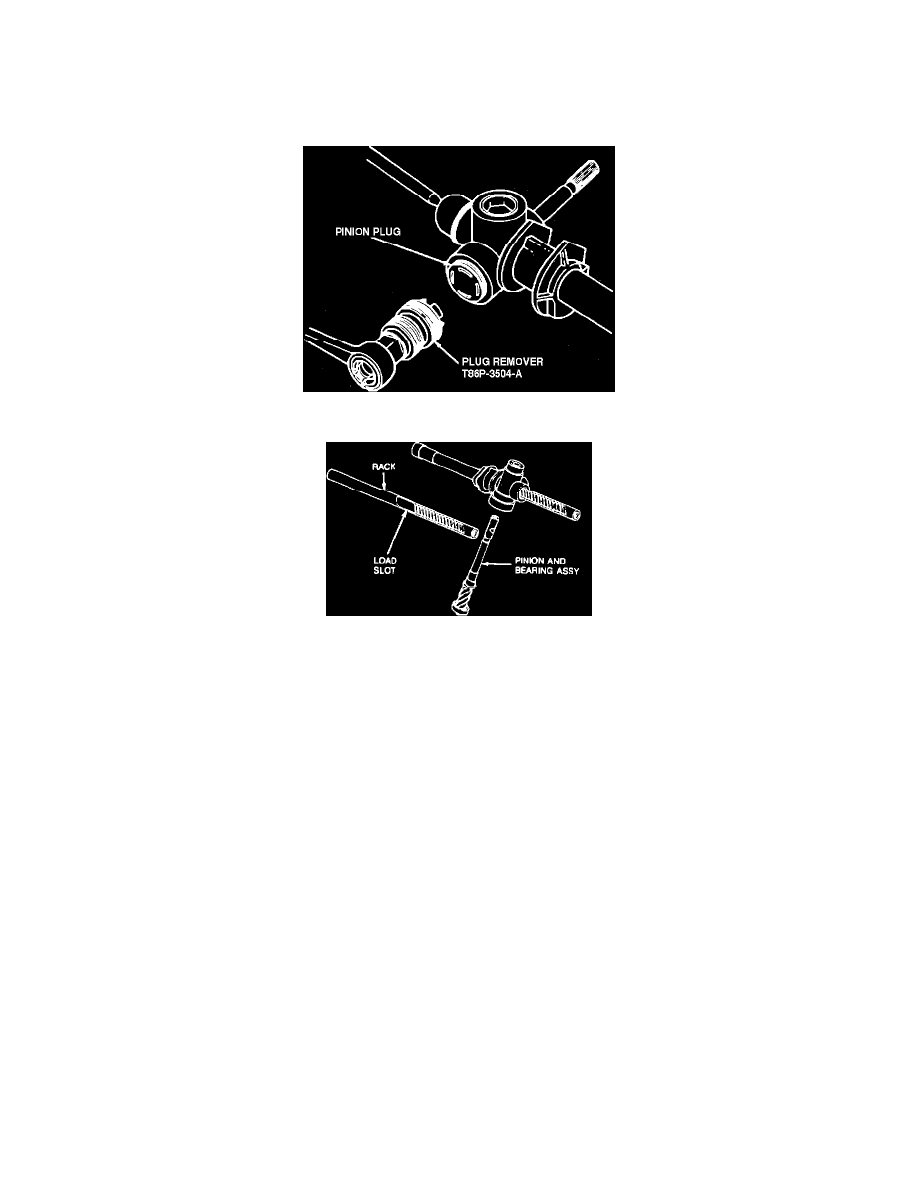
Fig. 3 Pinion Plug Removal
Fig. 4 Pinion & Bearing Assembly Removal
Disassembly
If pinion is removed, the entire gear must be disassembled for cleaning because the pinion plug threads must be re-tapped and cleaned.
1.
Remove tie rod ends, jam nuts, bellows and tie rods. Refer to TIE RODS & BELLOWS procedures.
2.
Hold gear housing in a vise, positioned as required for the following steps.
3.
Twist and pull off plastic dirt extruder on pinion and discard.
4.
Turn pinion to full right position so that load slot is at pinion. Pinion will rotate without moving rack teeth when it is in the load slot.
5.
Remove pinion plug using tool No. T86P-3504-A or equivalent, Fig. 3. Discard plug.
6.
Reverse tool and remove yoke plug. Discard plug.
7.
Remove spring and yoke.
8.
Remove pinion and bearing assembly by pushing out through the pinion plug opening, Fig. 4. Tap lightly with plastic mallet if necessary.
9.
Remove rack from left side (pinion end).
10.
Pry out pinion shaft seal with a screwdriver and discard. Take care not to damage gear housing.
11.
Using tool No. T86P-3504-A or equivalent, clean up threads in the yoke plug bore and pinion plug bore.
12.
Wash all parts in suitable washing solution, and dry prior to reassembly. Do not submerge right end of housing tube containing polyurethane rack
bushing.
13.
Clean pinion and yoke threads with solvent to remove washing solution residue.
14.
Inspect rack bushing for wear or damage. If worn, remove by prying with a screwdriver, taking care not to damage gear housing rack tube.
Inspection
1.
Inspect gear housing for damage. Discard housing if yoke and pinion plug threads have previously re-staked (more than three yoke plug stakes and
more than two pinion plug stakes). Check threads for damage. Examine plastic bushing for wear or damage and ensure bushing tabs are properly
located in tube slots. Check needle bearing for wear and roughness. Replace housing assemble if any of its components are worn or damaged,
except for the rack bushing which can be replaced.
2.
Examine rack for corrosion, straightness, tooth wear or damage. Check threads in end of rack. Replace rack as required.
3.
Inspect pinion rack for corrosion at seal area and below. Lightly oil the pinion ball bearing and check for bearing wear and roughness. Examine
pinion shaft for straightness. Check pinion teeth for wear, cracking, scoring, pitting or breakage. Replace pinion as required.