
Merkur Xr4ti L4-140 2.3L SOHC Turbo (1985)
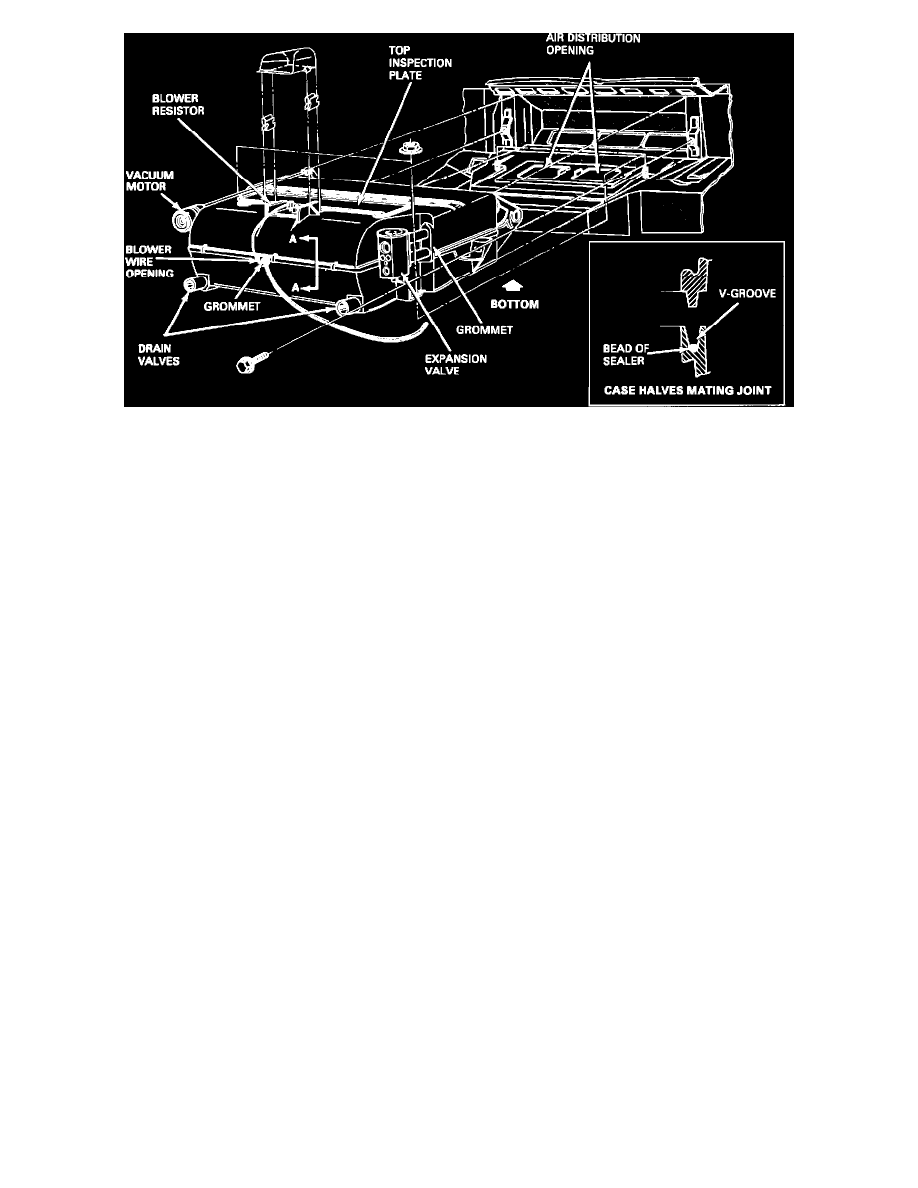
Figure 4 - Article 87-6-3
4.
When assembling the case halves, apply a bead of sealer in the "V" groove of the mating joint and the opening for the blower wires (Figure 4).
Before installing the assembly in the vehicle, inspect the plenum seal at the recirc door and replace it if it is damaged (E5RY-18B623-B). The
lower gasket between the housing and air distribution opening (E5RY-18583-A) must be replaced. This is a compressed seal gasket that remains
compressed after use and is likely to leak if reused.
Test #3 - External Water Entry
1.
With the exception of a loose fuse box cover as previously noted, external water can enter the evaporator housing in several places but entry into
the interior of the vehicle is always through the air distribution opening in the body beneath the blower motor (Figure 4). To facilitate water
testing, remove the plastic insulator cover at the cowl to expose the evaporator assembly to water flow. Set the air distribution lever on the
"floor" position and activate the blower motor on high speed. Direct a liberal flow of water across the windshield in a manner that allows water to flow
over the center cowl area and the evaporator housing. It should be noted that water entering the vehicle is first absorbed by the foam rubber gaskets at the
heater housing and does not start to drip until the gasket is saturated. Therefore, a minimal leak may not be observed until approximately thirty minutes
of continuous water flow after starting the test.
2.
If water is observed entering the vehicle, first check to ensure the blower resistor, the top inspection plate, grommets and the blower wire opening
(see Figure 4) are secure and sealed. If a fault is found with these items, repair/seal as necessary and retest. If no fault is found or if water entry is
still present, remove the evaporator assembly from the vehicle as outlined in Section 36-01 of the Merkur XR4Ti Shop Manual.
3.
Remove the upper case half and apply a bead of sealer in the "V" groove (Figure 4). Discard the lower gasket and replace it with a new gasket
(E5RY-18583-A). Inspect the plenum gasket and replace it if necessary (E5RY-18B623-B). Reinstall the assembly in the vehicle and retest.
NOTE:
Use caution when reinstalling the assembly as the lower gasket may catch on the mating surface and not seat properly.
PART NUMBER
PART NAME
CLASS
E5RY-18583-A
Gasket
C
E5RY-18B623-B
Seal
C
E5RY-19858-A
Hose Assembly -
C
A/C Drain (R.H.)
E5RY-19858-C
Hose Assembly -
C
A/C Drain (L.H.)
OTHER APPLICABLE ARTICLES: None
WARRANTY STATUS: Reimbursable within the provisions of the Warranty and Policy Manual
OPERATION: SP870603A
TIME:
5.3 Hrs. DLR. CODING: Basic Part No. 19860 - Code: 47