
Merkur Xr4ti L4-140 2.3L SOHC Turbo (1985)
Camshaft: Testing and Inspection
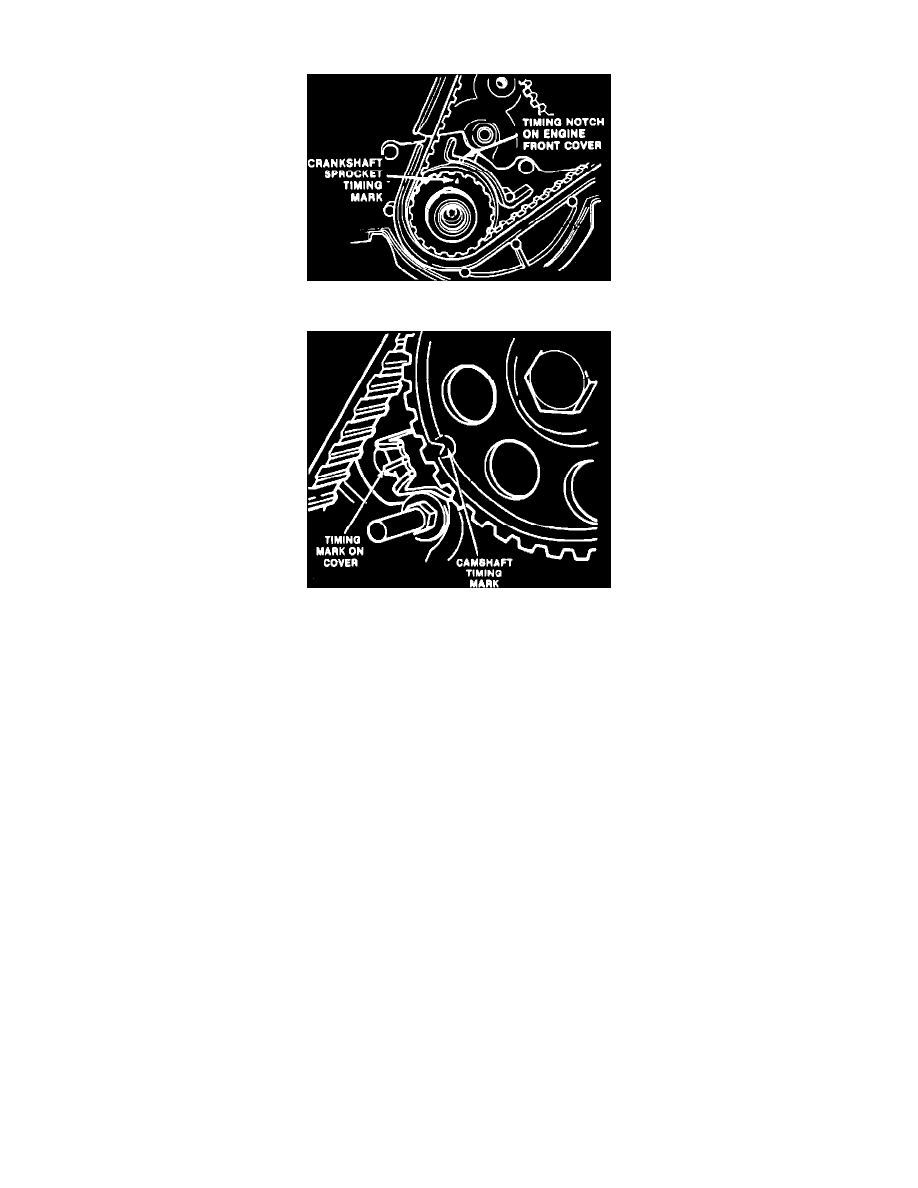
Fig. 2 Align Timing Marks On Crankshaft Sprocket & Engine Front Cover
Fig. 3 Aligning Timing Marks On Camshaft Sprocket & Inner Timing Belt Cover
An access plug is provided in the cam drive belt cover so that camshaft timing can be checked without removal of the cover or any other
engine components.
1.
Disconnect battery ground cable.
2.
Remove access plug from the cam drive belt cover.
3.
Set crankshaft to TDC by aligning the TC mark on the timing belt cover with notch on the crankshaft pulley. Align timing marks by turning the
crankshaft pulley attaching bolt. Always turn the crankshaft clockwise, which is the normal direction of rotation. Reverse rotation
(counterclockwise) may cause the timing belt to jump time due to the arrangement of the timing belt tensioner.
4.
Look through the access hole in the belt cover to ensure timing mark on the camshaft drive sprocket is aligned with the pointer on the inner timing
belt cover assembly.
5.
If the mark is not in sight, turn the crankshaft one complete revolution clockwise and check timing mark alignment.
6.
If the timing marks are properly aligned, the camshaft is correctly timed to the crankshaft.
7.
If the timing marks do not align, proceed with the camshaft timing adjustment procedure.
ADJUSTMENT
1.
Disconnect battery ground cable.
2.
Remove drive belts.
3.
Remove water pump pulley.
4.
Remove timing belt cover as outlined under ``Timing Belt, Replace.''
5.
Remove crankshaft damper and pulley.
6.
Remove spark plugs, if necessary.
7.
Turn crankshaft clockwise to alignment timing mark on the crankshaft sprocket with the timing mark on the engine front cover, Fig. 2.
8.
Turn camshaft to align timing mark on the camshaft sprocket with the timing mark on the inner timing belt cover assembly, Fig. 3.
9.
Remove distributor cap and position aside. Set distributor rotor to the number one firing position by turning the auxiliary shaft.
10.
Install timing belt as outlined under ``Timing Belt, Replace,'' and check timing mark alignment.