
Merkur Xr4ti L4-140 2.3L SOHC Turbo (1985)
Crankshaft: Service and Repair
REMOVAL
1.
Remove engine, then the cylinder head, oil pan, oil pump, connecting rods and pistons and flywheel.
2.
Remove main bearing caps.
3.
Remove crankshaft, being careful not to damage bearing journals.
INSTALLATION
1.
After cleaning, inspecting and measuring crankshaft, install proper size bearings in cylinder block and bearing caps.
2.
Install crankshaft, measuring clearance with Plasti-gauge according to manufacturer's instructions. Clearance should be .0008-.0026 inch
(0.020-0.066 mm).
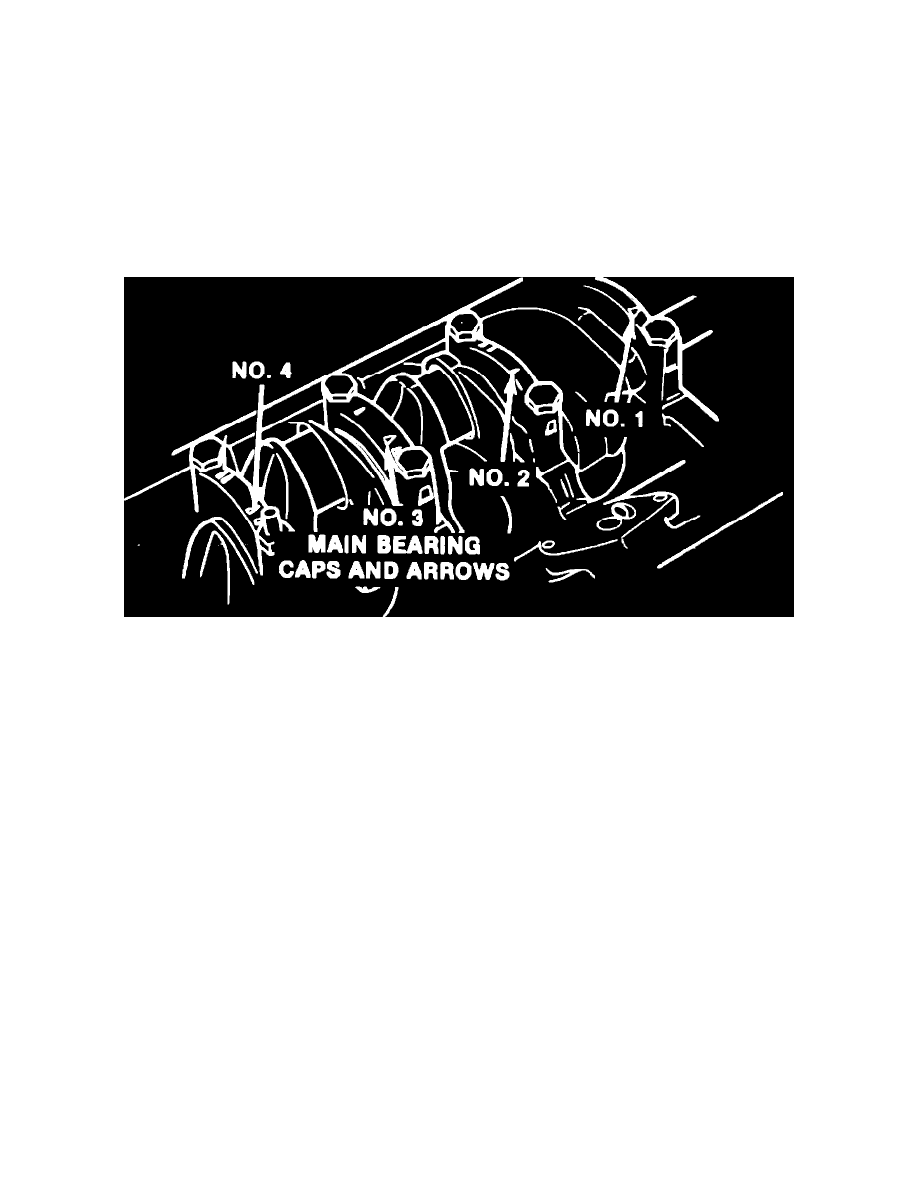
Fig. 15 Main bearing cap installation
3.
Ensure that bearing caps are properly positioned, Fig. 15, then torque cap bolts to 50-60 ft. lbs. After each cap is tightened, ensure that crankshaft
can be rotated manually. If not, remove that bearing cap and verify source of interference.
4.
Torque cap bolts to 75-85 ft. lbs.
5.
Remove rear main bearing cap and apply {1/8} inch bead of suitable sealant across main bearing cap to cylinder block surface. Do not apply
sealant onto bearing or rear seal surface of crankshaft.
6.
Install rear cap, torquing bolts to 75-85 ft. lbs. in two steps.
7.
Install connecting rods and pistons, oil pump, crankshaft rear oil seal, oil pan, flywheel and cylinder head, then the engine.