
Merkur Xr4ti L4-140 2.3L SOHC Turbo (1985)
Dashboard / Instrument Panel: All Technical Service Bulletins
Dash Pad - Replacement Procedure
Article No. 91-16-2
08/07/91
INSTRUMENT PANEL - DASH PAD - REPLACEMENT PROCEDURE - VEHICLES BUILT BEFORE 8/17/88
MERKUR:
1985-88 XR4TI
ISSUE:
When replacing a dash pad on an XR4Ti built before August 17, 1988, it will be necessary to install longer "A" pillar trim panels to
accommodate the replacement dash pad.
ACTION:
If dash pad replacement is required, refer to the following service procedure for installation details. Refer to the following Dash Pad And
"A" Pillar Trim Chart for correct parts usage.
1.
Install the new dash panel. Refer to the 1985/88 XR4Ti Shop Manual, Section 45-61, for details.
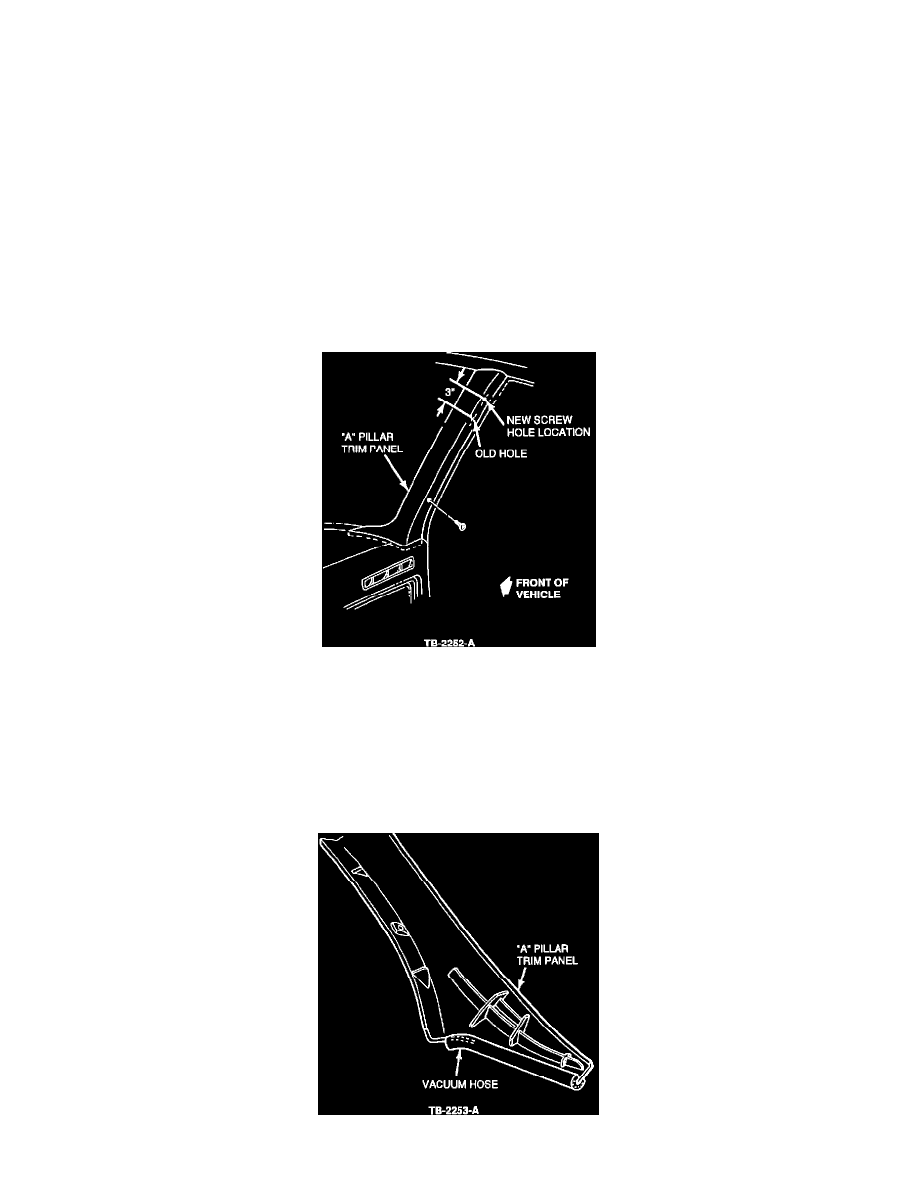
Figure 1
2.
Place the new "A" pillar trim panel in position. Use the witness marks in the headliner to position the new "A" pillar trim panel.
3.
Mark the new location for the top "A" pillar screw hole with a pencil, Figure 1.
4.
Center punch and drill a 1/8" (3.175 mm) hole in the "A" pillar sheet metal.
CAUTION: DO NOT RUN THE DRILL BIT INSIDE THE "A" PILLAR. DOING SO MAY DAMAGE THE WIRING.
Figure 2