
Merkur Xr4ti L4-140 2.3L SOHC Turbo (1985)
Differential Axle Housing: Service and Repair
Rear Axle Replace
Removal
1.
Disconnect axle halfshafts from stub shaft flanges on each side of housing. Before releasing halfshafts, support them from body floor in
approximately their normal position.
2.
Remove driveshaft, then support rear axle housing with suitable jack and remove rear body mount attaching bolts.
3.
Remove four bolts and two shims, if equipped, attaching front end of axle housing to crossmember brackets, then remove nut and through bolt
attaching axle housing to crossmember.
4.
Lower axle housing clear of rear suspension and remove it, then remove rear mount.
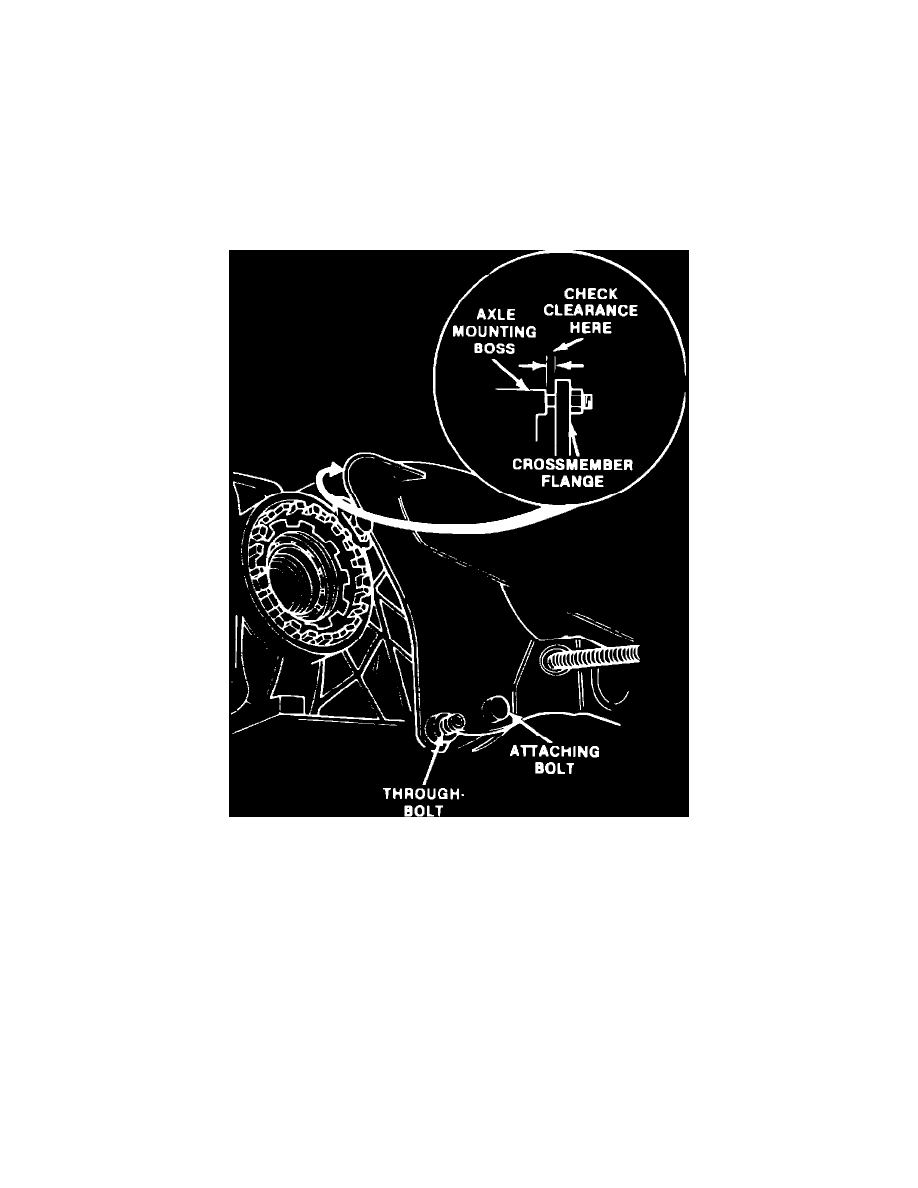
Fig. 7 Checking mounting flange clearance
Installation
1.
If axle case, axle assembly or suspension crossmember is replaced, check flange clearance as follows:
a. Install rear mount on axle housing rear cover, torquing attaching bolts to 37-41 ft. lbs.
b. Lift assembly into position between crossmember flanges.
c. Install through bolt and four axle bolts to crossmember attaching bolts but do not tighten bolts.
d. Position axle housing rear mount against body and secure with four bolts, torquing bolts to 14-18 ft. lbs.
e. Torque front lower attaching bolt to 51-66 ft. lbs.
f.
Torque through bolt to 51-66 ft. lbs.
g. Using feeler gauge, check clearance between crossmember flanges and the rear axle mounting boss, Fig. 7.
h. Select appropriate shims to be installed between crossmember and axle.
2. Install shims, if required, and torque attaching bolts to 51-66 ft. lbs.
3. Install driveshaft.
4. Connect axle halfshafts to stub shaft flanges and install attaching bolts, torquing bolts to 28-31 ft. lbs.