
Milan AWD L4-2.3L (2008)
7. Connect the electrical connectors.
1
Connect the electrical connector for the pressure control solenoid B.
2
Connect the electrical connector for the shift solenoid F.
8. NOTE: Do not use more than the specified amount of sealer on the side cover pan or internal transaxle damage could occur.
^
Apply a bead 1-1/2 millimeters thick of sealer to the transaxle on the side cover sealing surface.
9. Install the side cover and install the 11 bolts.
^
Tighten to 7 Nm (62 lb-in).
10. Install the battery tray.
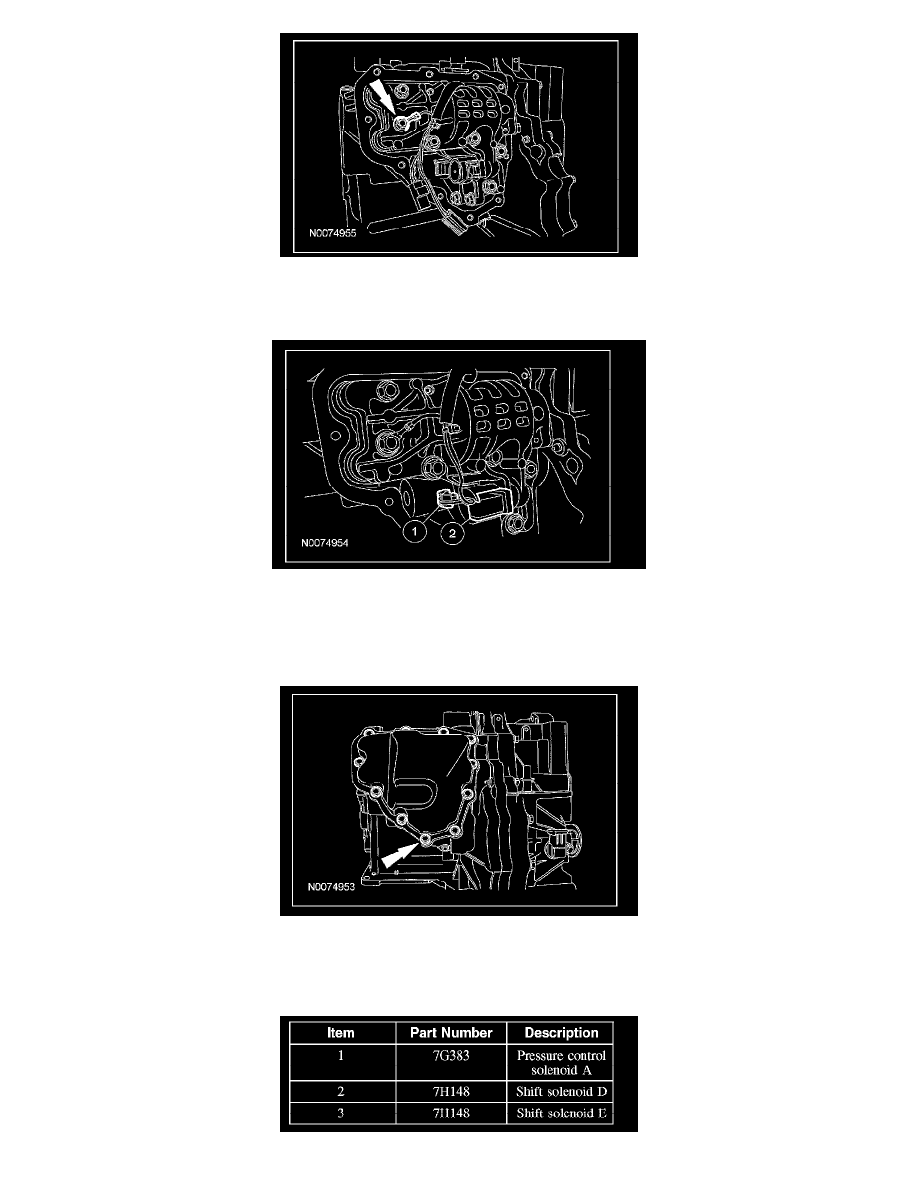
Shift solenoids A, B, C, D, E and PCA
11. Install the affected solenoid and the bolts.