
Milan FWD L4-2.3L (2008)
The following procedure involves updating the Accessory Protocol Interface Module (APIM) software level and installing an external alternate SYNC
microphone attached to the headliner.
NOTE
THIS PROCEDURE DOES NOT APPLY TO VEHICLES EQUIPPED WITH HEADLINER MICROPHONE OR DEALER-INSTALLED SYNC
SYSTEMS.
Go to Step 2 if the vehicle is already equipped with SYNC 3.0 Traffic and Directions or has already been upgraded to latest available consumer interface
processor (CIP) level 9L3T-14D544-AE without E911/VHR, 9L2T-14D544-BE with E911/VHR or later versions. To determine the current APIM
software level, Refer to the Professional Technician Society (PTS) website, enter the VIN in OASIS, click the GO button and select the SYNC button.
1. Reprogram the APIM to CIP software level 9L3T-1 4D544-AE without E9 11 /VHR, 9L2T-14D544-BE with E911/VHR or later version. For
additional information Refer to other SYNC TSB's and WSM, Section 418-01. Service Pack files may also be obtained at www.syncmyride.com.
When diagnosing a concern related to voice recognition (VR) difficulties, instruct the customer to test VR functionality while the vehicle is parked. If
customer concerns are still present, this procedure will not yield an improvement and the service procedure should not be performed. Instead, refer to the
SYNC supplement guide and www.syncmyride.com for additional VR tips to assist customer.
The VR experience can be improved with user training and making improvements to the phone book entries (longer entries make the system more
robust). Ensure the customer does not try to speak too loud or slow and remove any objects hanging on the rear view mirror as this will reduce system
effectiveness.
When diagnosing a concern related to call sound quality, expect marginal improvements for calls described as speaking in a tunnel, chamber, etc. Expect
substantial improvements for complaints where the call audio seems to drop out intermittently.
NOTE
THIS REPAIR WILL CHANGE THE APPEARANCE OF THE VEHICLE INTERIOR. REFER TO THE PHOTOGRAPHS FOR THE
APPLICABLE VEHICLE LOCATED IN THIS PROCEDURE. DO NOT PERFORM THIS REPAIR WITHOUT CUSTOMER APPROVAL
PRIOR TO PROCEEDING WITH MICROPHONE INSTALLATION.
2. Install SYNC microphone service kit. Installing the kit includes mounting an external microphone directly to the headliner and splicing in a jumper
harness to the vehicle's existing wiring harness. The existing SYNC microphone will no longer be functional. The jumper harness is equipped with a
voltage filter. The filter will need to be wrapped in soft foam 164-R4901 or flock tape 164-R4903 from the Rotunda squeak and rattle kit 164-R4900
to prevent interior squeak/rattle noise.
a. Refer to the appropriate vehicle line and microphone illustration(s) below for microphone installation and wire splicing locations. Refer to
Wiring Diagram (WD), Section 5-1 for recommended splicing methods.
b. Ensure the SYNC microphone wires are secure and do not interfere with vehicle operation or functionality.
c. The microphone is directional. Make sure the microphone is always positioned so wire length is minimized from view. When installing the
microphone adjacent to trim, place the microphone as close to trim as possible to help minimize visible wire.
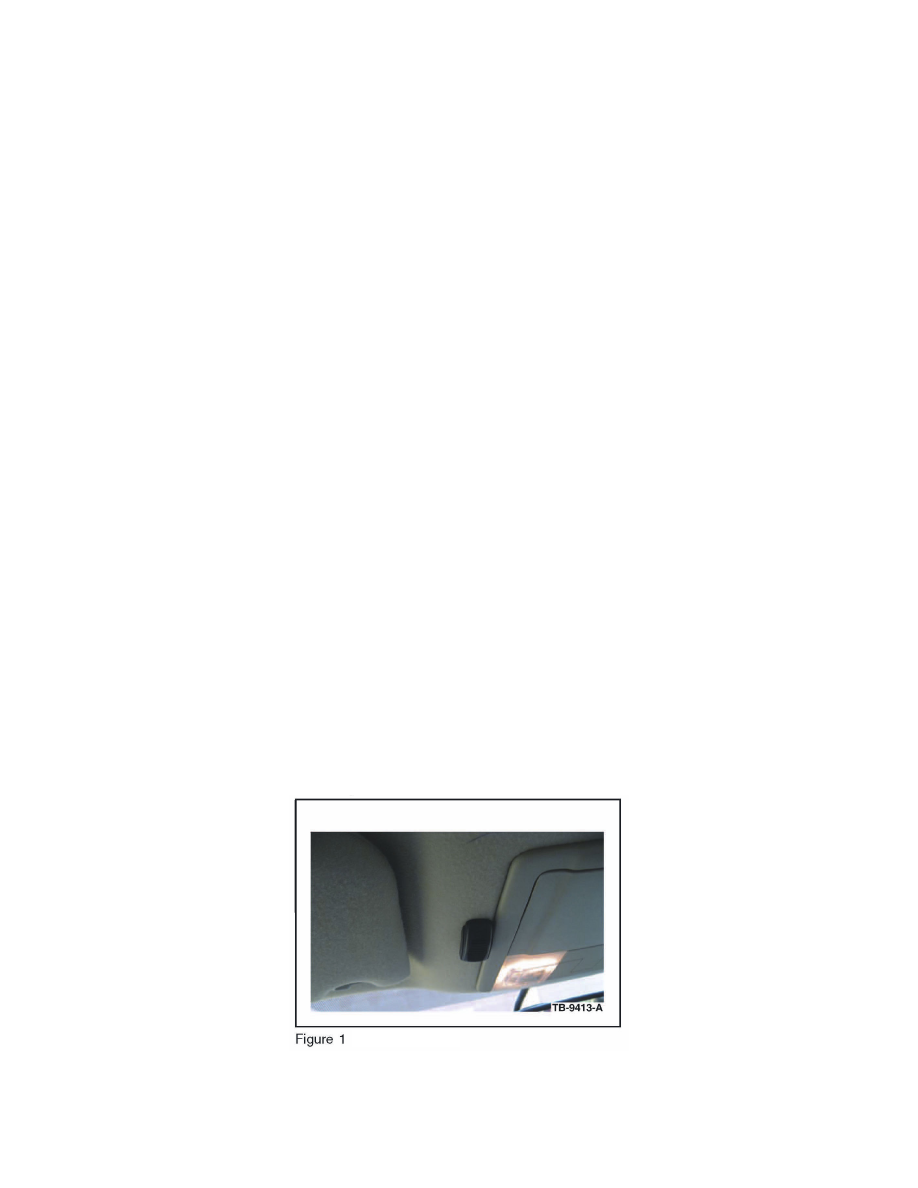
Edge / MKX
1. Remove the protective backing from the adhesive on the microphone and attach the microphone. (Figure 1)
^
Firmly press the microphone into place.