
Milan FWD L4-2.3L (2008)
3. Remove the transmission fluid filter.
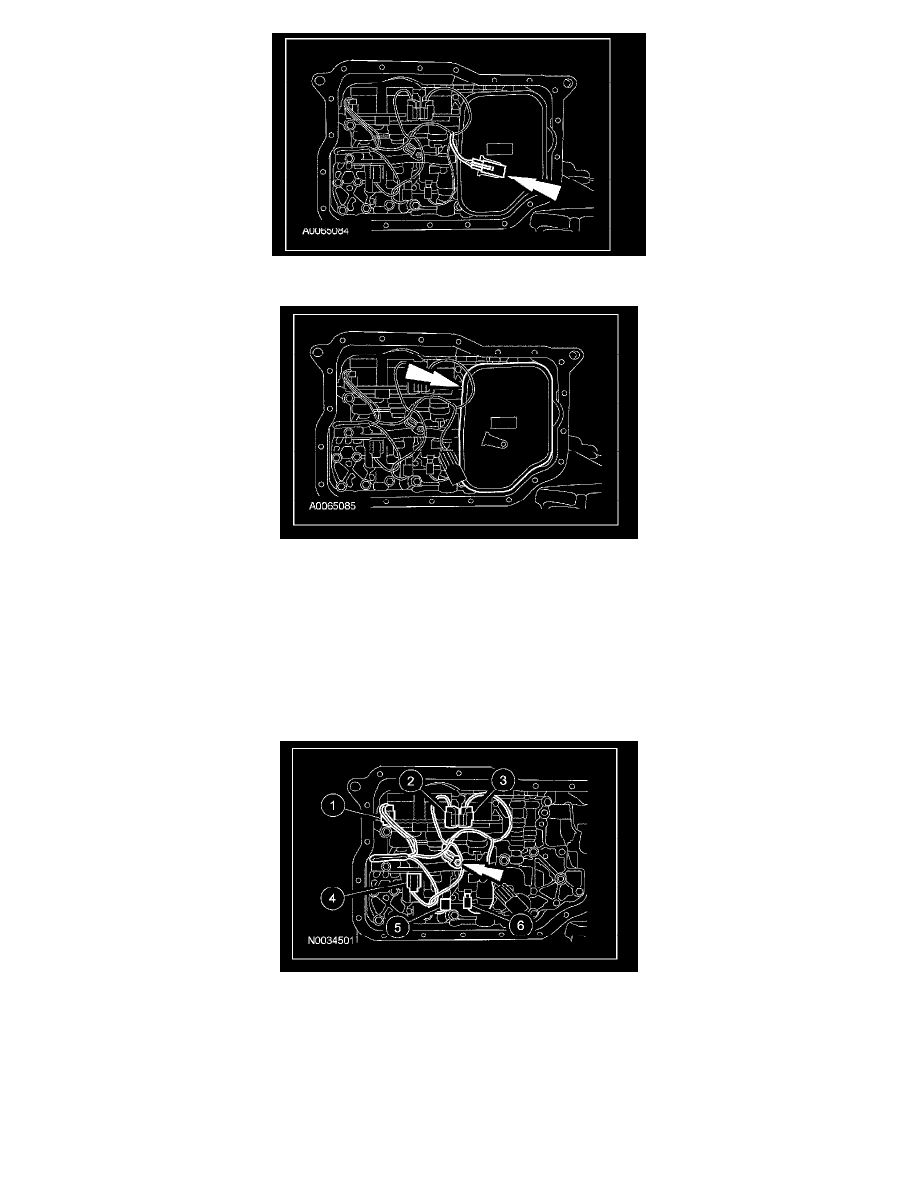
4. NOTE: It is necessary to note the location of the main control wire harness connectors so they can be connected in the same positions. Connector
color letters are cast into the solenoid body.
Remove the ground wire bolt. Disconnect the electrical connectors and remove the main control wiring harness.
1
Solenoid SSA, color (BU/GN).
2
Solenoid SSB, color (BK/GN).
3
Solenoid SSC, color (BU/BN).
4
Solenoid PCA, color (BU/BN).
5
Solenoid SSD, color (WH).
6
Solenoid SSE, color (RD).
5. CAUTION: Note the 2 accumulators and springs may fall out of the case during the main control valve body removal.
NOTE: Note the locations of the 2 long bolts.
Remove the 14 main control valve body bolts and remove the main control valve body and solenoids as an assembly.