
Milan FWD L4-2.3L VIN Z (2007)
Part 2
Exploded View
Removal and Installation
NOTE: Anytime a roof opening panel motor is removed, the cables/mechanisms can experience free-play movement. It is important that the cables do
not move. They are timed to be parallel with each other. If one or both are moved in either direction, they must be retimed.
1. Close the roof opening panel glass.
2. Open the 4 passenger assist handle covers.
-
Remove the bolts and remove the handles.
-
To install, tighten to 5 Nm (44 lb-in).
3. Remove the A-pillar trim panels.
4. Remove the B-pillar trim panels.
5. Remove the C-pillar trim panels.
6. Remove the overhead console.
-
Disconnect the electrical connector.
7. If equipped, disconnect the automatic-dimming rear view mirror electrical connector.
8. Remove the sun visors and the sun visor clips.
-
If equipped, disconnect the electrical connectors.
9. Remove the 2 headliner pushpins at the rear.
10. Remove the interior lamp.
-
Disconnect the electrical connector.
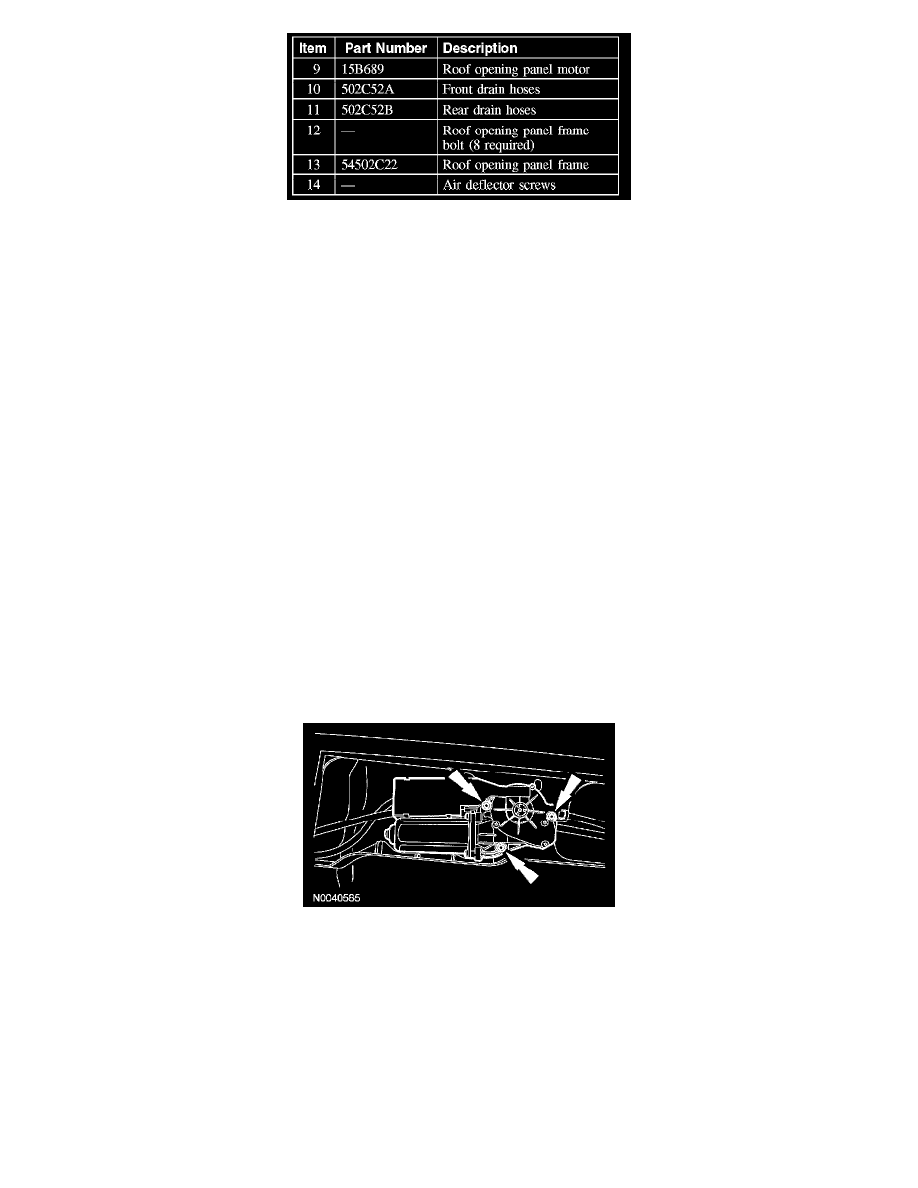
11. Position the headliner forward to gain access to the roof opening panel motor.
12. Remove the 3 roof opening panel motor screws and the roof opening panel motor.
-
Disconnect the electrical connector.
-
To install, tighten to 4 Nm (35 lb-in).
13. To install, reverse the removal procedure.
-
Initialize the roof opening panel motor.