
Milan FWD L4-2.3L VIN Z (2007)
Hose/Line HVAC: Service and Repair
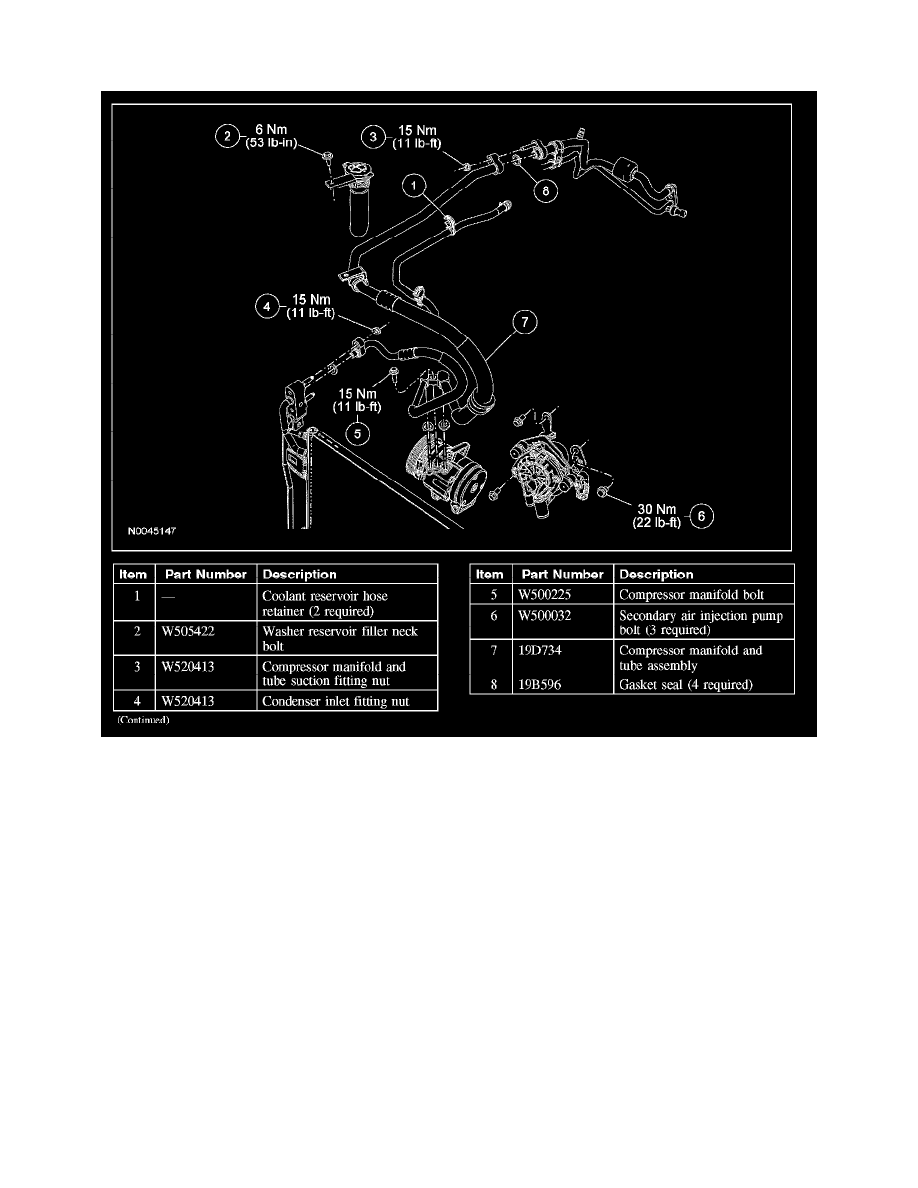
COMPRESSOR MANIFOLD AND TUBE ASSEMBLY
Removal and Installation
NOTE: Installation of a new receiver/drier cartridge is not required when repairing the air conditioning system except when there is physical evidence
of system contamination from a failed A/C compressor or damage to the receiver/drier cartridge.
1. Recover the refrigerant.
2. With the vehicle in NEUTRAL, position it on a hoist.
3. Detach the 2 coolant reservoir hose retainers from the compressor manifold and tube assembly.
4. Remove the washer reservoir filler neck bolt.
-
To install, tighten to 6 Nm (53 lb-in).
5. Remove the compressor manifold and tube suction fitting nut and disconnect the fitting.
-
Discard the gasket seal.
-
To install, tighten to 15 Nm (11 lb-ft).
6. Remove the condenser inlet fitting nut and disconnect the fitting.
-
Discard the gasket seal.
-
To install, tighten to 15 Nm (11 lb-ft).
7. Remove the lower engine splash shield.
8. Remove the compressor manifold bolt and detach the manifold from the A/C compressor.
-
Discard the gasket seals.
-
To install, tighten to 15 Nm (11 lb-ft).