
Milan FWD L4-2.3L VIN Z (2007)
2. Disconnect the battery ground cable.
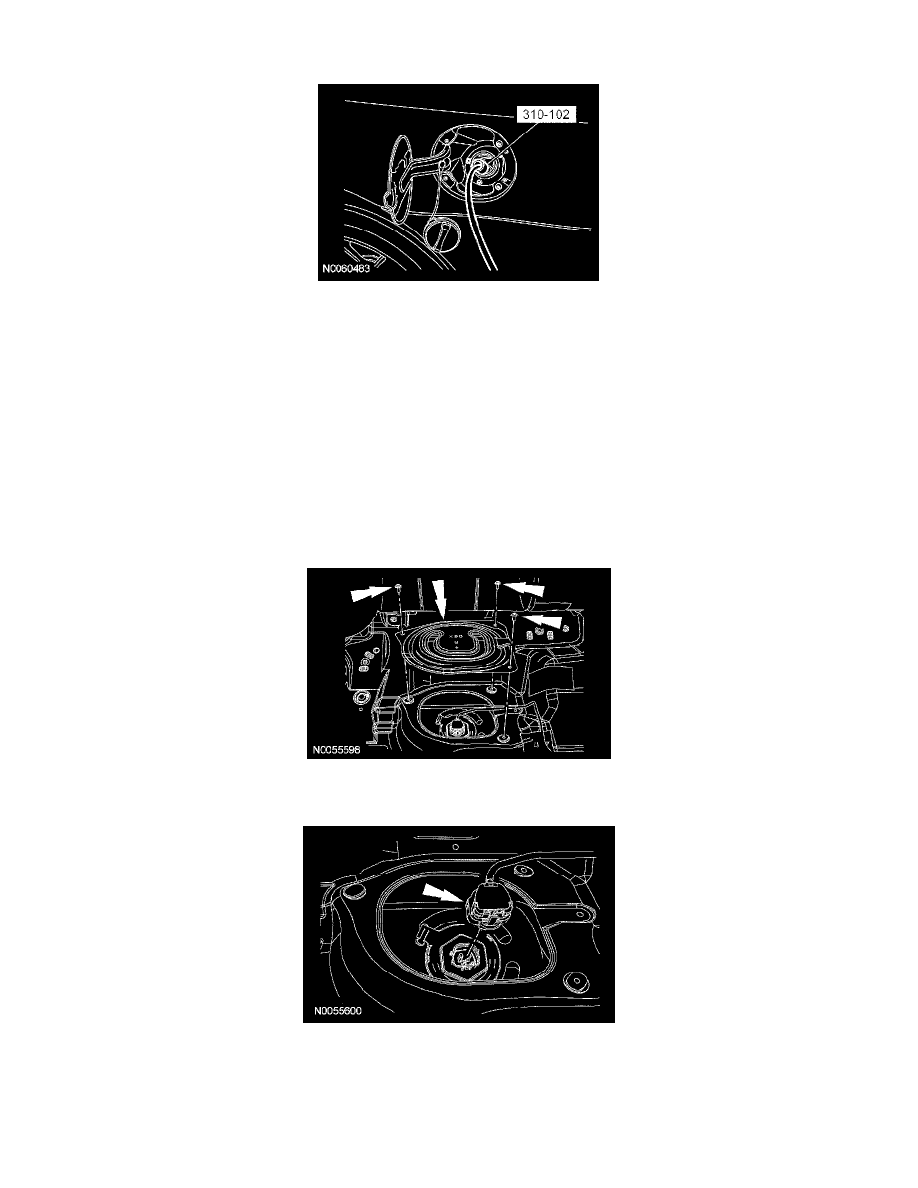
3. Release the fuel tank filler cap and position aside.
4. CAUTION: Upon removing the special tool, the fitting on the end of the hose can become detained by the one-way flapper valve.
Carefully remove the hose using a gentle agitating motion to avoid detaching the hose from the fitting.
NOTE: The special tool must be inserted into the fuel tank filler pipe until the fitting on the end of the hose enters into the fuel tank spout,
opening the one-way flapper valve.
Insert the special tool into the fuel tank filler pipe.
5. NOTE: This step will remove approximately 1/8 tank of the fuel from a completely full fuel tank and the majority of any residual fuel in the fuel
tank filler pipe.
Attach the fuel storage tanker to the special tool and remove as much fuel as possible from the fuel tank and fuel tank filler pipe.
6. Remove the rear seat lower cushion.
7. Position aside the carpet and/or any insulation covering the fuel level sensor access cover.
8. Remove the 3 screws and the fuel level sensor access cover.
-
To install, tighten to 2 Nm (18 lb-in).
9. Disconnect the fuel level sensor electrical connector.