
Milan FWD L4-2.3L VIN Z (2007)
Position the wheel knuckle and install the 4 trailing arm-to-knuckle nuts.
2. NOTE: Do not tighten the bolt at this time.
Install the lower arm outboard bolt.
3. NOTE: Do not tighten the bolt at this time.
Install the upper arm outboard bolt.
4. NOTE: Do not tighten the bolt at this time.
Install the shock absorber lower bolt and flag nut.
5. Install the brake disc and the 2 brake disc bolts.
-
Tighten the bolts to 20 Nm (15 ft. lbs.).
6. Position the brake caliper and anchor plate assembly and install the 2 bolts.
-
Tighten the bolts to 70 Nm (52 ft. lbs.).
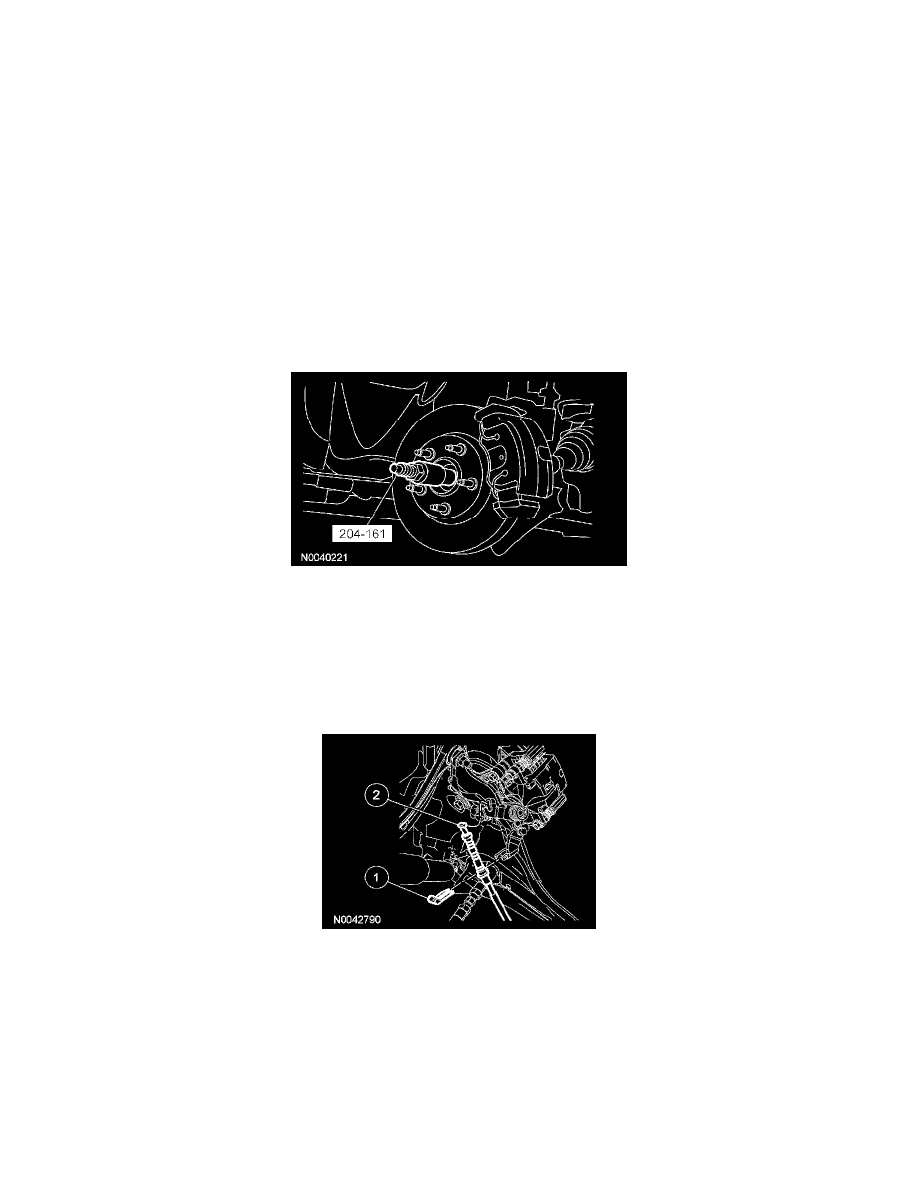
7. Using the special tool, install the halfshaft into the wheel hub.
8. CAUTION: Do not tighten the wheel hub nut with the vehicle on the ground. The nut must be tightened to specification before the vehicle
is lowered onto the wheels. Wheel bearing damage will occur if the wheel bearing is loaded with the weight of the vehicle applied.
Install a new wheel hub nut.
-
While applying the brakes to prevent the wheel hub nut from turning, tighten the nut to 225 Nm (185 ft. lbs.).
9. Connect the parking brake cable to the brake caliper.
1. Install the clip.
2. Connect the parking brake cable to the brake caliper.
10. CAUTION: Before tightening any suspension bushing fasteners, the suspension must be at the bushing fastener tightening position. Use a suitable
jack to raise the suspension until the distance between the center of the hub and the lip of the fender is equal to 395 mm (15.55 inch).
Using the positioned suitable jack, raise the lower arm to bushing fastener tightening position.