
Milan FWD L4-2.3L VIN Z (2007)
Transmission Cooler: Component Tests and General Diagnostics
FNR5 - Automatic Transaxle/Transmission
Transmission Fluid Cooler
CAUTION: Whenever the transaxle has been disassembled to install new parts, clean and backflush the transaxle fluid cooler.
NOTE: Cleaning and backflushing the transaxle fluid cooling system along with normal cleaning and inspection procedures as outlined in this section
during disassembly and reassembly will keep contamination from reentering the transaxle and causing a repeat repair.
When internal wear or damage has occurred in the transaxle, metal particles, clutch plate material or band material may have been carried into the
torque converter and transaxle fluid cooler. These contaminants are a major cause of recurring transaxle troubles and must be removed from the
system before the transaxle is put back in use.
Transaxle Fluid Cooler Flow Test
NOTE: The transaxle linkage adjustment, fluid level and line pressure must be within specification before carrying out this test. Refer to transaxle
linkage adjustment procedure. For transmission fluid level checking procedures, refer to Preliminary Inspection. For transaxle line pressure testing,
refer to Special Testing Procedures. See: Transmission Control Systems/Testing and Inspection/Initial Inspection and Diagnostic Overview/FNR5 -
Automatic Transaxle/Transmission/Preinspection/Preliminary Inspection See: Transmission Control Systems/Testing and Inspection/Component Tests
and General Diagnostics/FNR5 - Automatic Transaxle/Transmission/Line Pressure Test
1. Check the transmission fluid level and fill as necessary.
2. Remove the transmission fluid level indicator from the fluid filler tube and install the funnel in the fluid filler tube.
3. With the vehicle in NEUTRAL, position it on a hoist. Inspect the transmission fluid cooler lines for damage. Install new transmission fluid cooler
lines as needed.
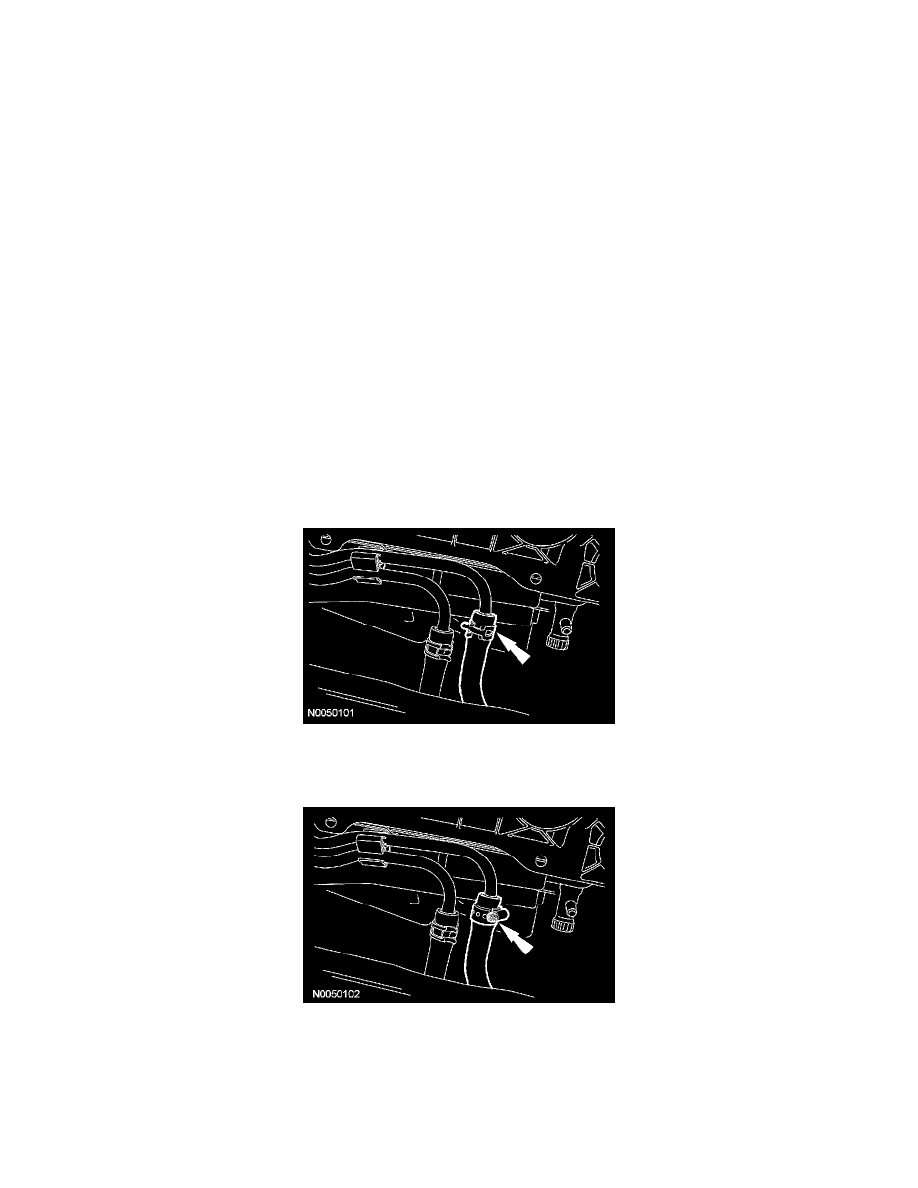
4. Disconnect the cooler return hose from the cooler return tube.
5. Plug the cooler return hose to avoid transmission fluid loss.
6. Connect one end of a hose to the cooler return tube and route the other end of the hose up to a point where it can be inserted into the funnel at the
fluid filler tube.
7. Start the engine and run at idle with the transaxle in NEUTRAL range until the automatic transmission fluid is warm. Temperature is important to
the flow rate measurement. Carry out the Fluid Cooler Flow Test.
-
Once fluid flow no longer has air bubbles in it, remove the rubber hose from the funnel and insert it into a liter container.
-
As soon as 0.95 L (1 qt) is dispensed into the container, install the hose into the funnel.
-
One quart of automatic transmission fluid should flow through the cooling system in approximately 17-21 seconds.
8. Once adequate flow is determined, shut off the engine, remove the extension hose and reassemble the cooler line with the constant tension clamp.