Milan FWD V6-3.0L (2010)

Air Door Actuator / Motor: Service and Repair
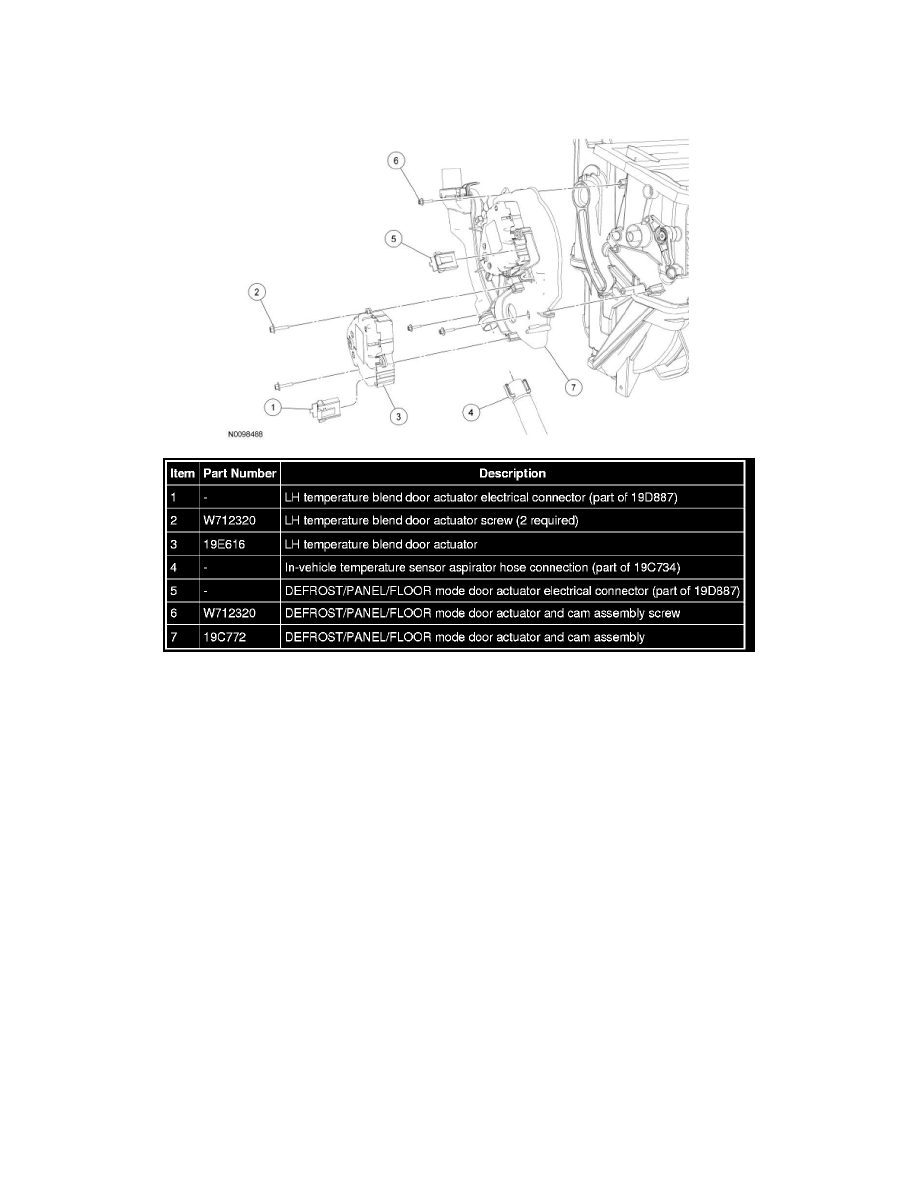
Mode Door Actuator - Defrost/Panel/Floor Door
Mode Door Actuator - Defrost/Panel/Floor Door
Removal and Installation
1. Remove the instrument panel. For additional information, refer to Instrument Cluster / Carrier &/or Interior Moulding / Trim.
2. Disconnect the LH temperature blend door actuator electrical connector.
3. Remove the 2 LH temperature blend door actuator screws.
4. Remove the LH temperature blend door actuator.
5. Disconnect the in-vehicle temperature sensor aspirator hose connection.
6. Disconnect the DEFROST/PANEL/FLOOR mode door actuator electrical connector.
7. Remove the 3 DEFROST/PANEL/FLOOR mode door actuator and cam assembly screws.
8. Remove the DEFROST/PANEL/FLOOR mode door actuator and cam assembly.
9. To install, reverse the removal procedure.
10. NOTE: The purpose of the module actuator position calibration is to allow the HVAC module to reinitialize and calibrate the actuator stop points.
To carry out calibration, carry out the following steps.
Remove the Smart Junction Box (SJB) fuse 15 for at least one minute.
11. NOTE: When the ignition switch is switched to the ON position, the HVAC module will initialize and calibrate the actuators. Calibration of the
actuators will take approximately 30 seconds.
