
Milan FWD V6-3.0L (2010)
6. Connect the battery ground cable. For additional information, refer to Battery.
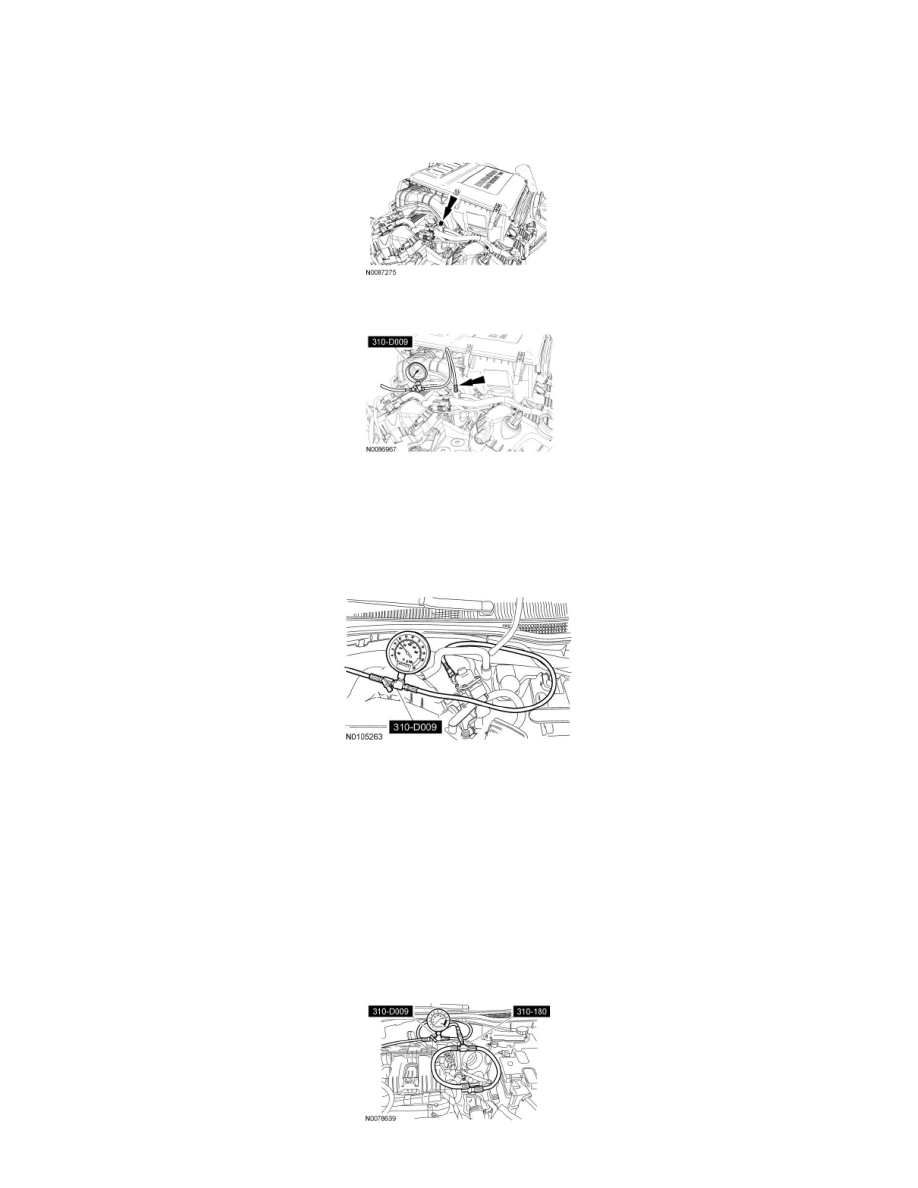
Early build 3.0L engine
7. Remove the fuel rail Schrader valve cap.
8. Install the Fuel Pressure Test Kit to the fuel rail Schrader valve.
Late build 3.0L engine
9. Disconnect the fuel jumper tube-to-fuel tube quick connect coupling. For additional information, refer to Quick Connect Coupling See: Fuel Line
Coupler/Service and Repair/Quick Connect Coupling.
10. Install the Fuel Pressure Test Kit between the fuel jumper tube and the fuel tube.
3.5L engine
11. Release the fuel system pressure. For additional information, refer to Fuel System Pressure Release See: Fuel Filter/Fuel Pressure Release/Service
and Repair.
12. Disconnect the battery ground cable. For additional information, refer to Battery.
13. Remove the Air Cleaner (ACL) outlet pipe. For additional information, refer to Fuel Delivery and Air Induction.
14. Disconnect the fuel tube-to-fuel rail spring lock coupling. For additional information, refer to Spring Lock Couplings See: Fuel Line
Coupler/Service and Repair/Spring Lock Couplings.
15. Install the Fuel Pressure Test Adapter and Fuel Pressure Test Kit between the fuel tube and the fuel rail.