
Milan FWD V6-3.0L (2010)
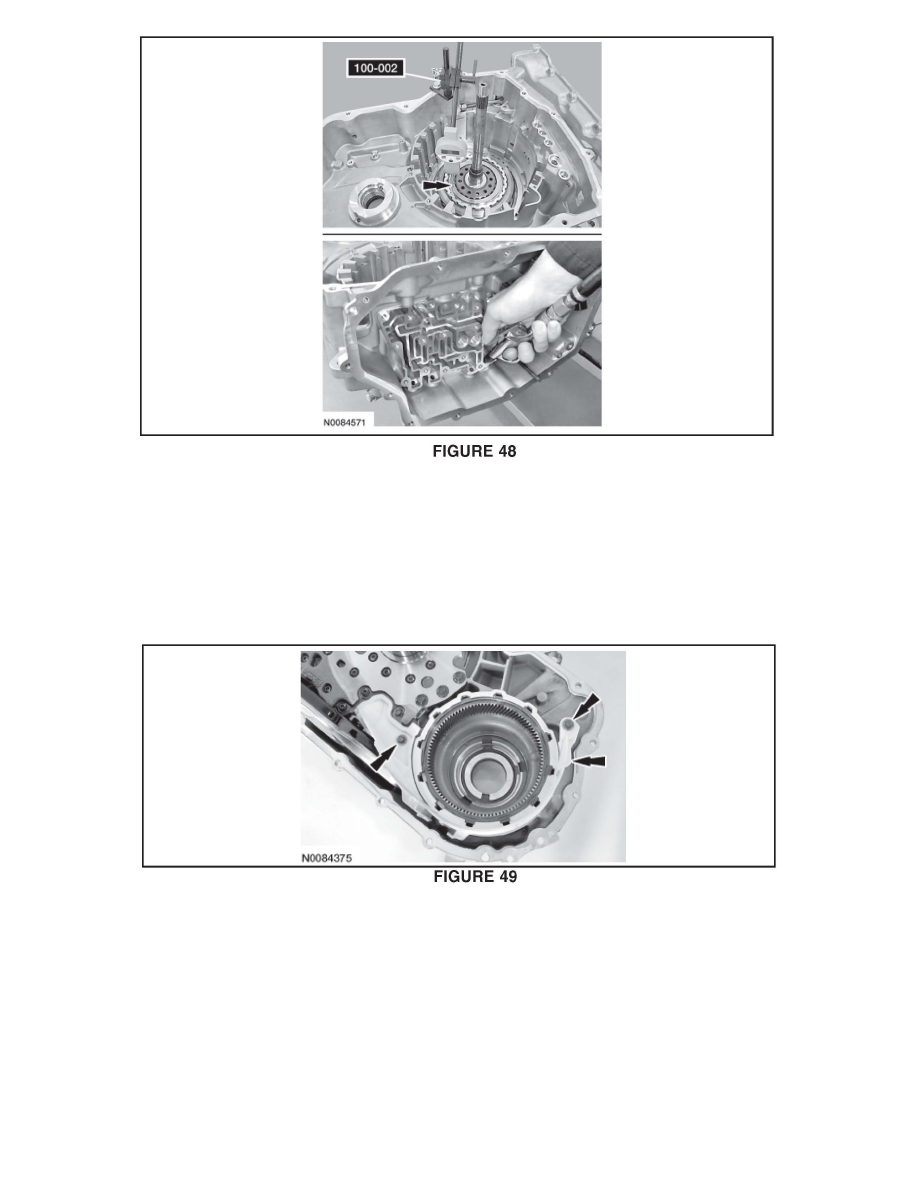
31. Position the O/D/direct clutch assembly in the transaxle case, install Dial Indicator Gauge with Holding Fixture # 100002 or a suitable dial indicator
and position the plunger on the O/D (4, 5, 6) clutch pressure plate. Apply 483 kPa (70 psi) of air pressure to the O/D (4, 5, 6) clutch piston port
while recording the clutch pack clearance on the Dial Indicator. The clearance should be between 0.950 mm (0.037 in) and 1.778 mm (0.07 in). If
the clearance is out of range, check the O/D (4, 5, 6) clutch pack for correct installation. See Figure 48.
32. Remove Dial Indicator Gauge with Holding Fixture # 100-002, O/D/direct clutch assembly and the No. 1 O/D/direct clutch assembly thrust bearing.
Filter Removal and Replacement
1. Remove the 2 bolts and the oil baffle from the torque converter housing. See Figure 49.