
Milan FWD V6-3.0L (2010)
71. Tighten the 22 main control Torx(R) bolts and the nut in a crisscross pattern.
Tighten to 10 Nm (89 lb-in).
72. NOTE: Be sure the solenoid body-to-main control cover seal is installed with the holes facing up.
Install the new solenoid body-to-main control cover seal.
73. Connect the TR sensor electrical connector.
74. Connect the OSS sensor electrical connector.
75. Apply silicone (Motorcraft(R) TA 29 or equivalent) to the main control sealing surface of the transaxle case.
76. Position the main control cover in place.
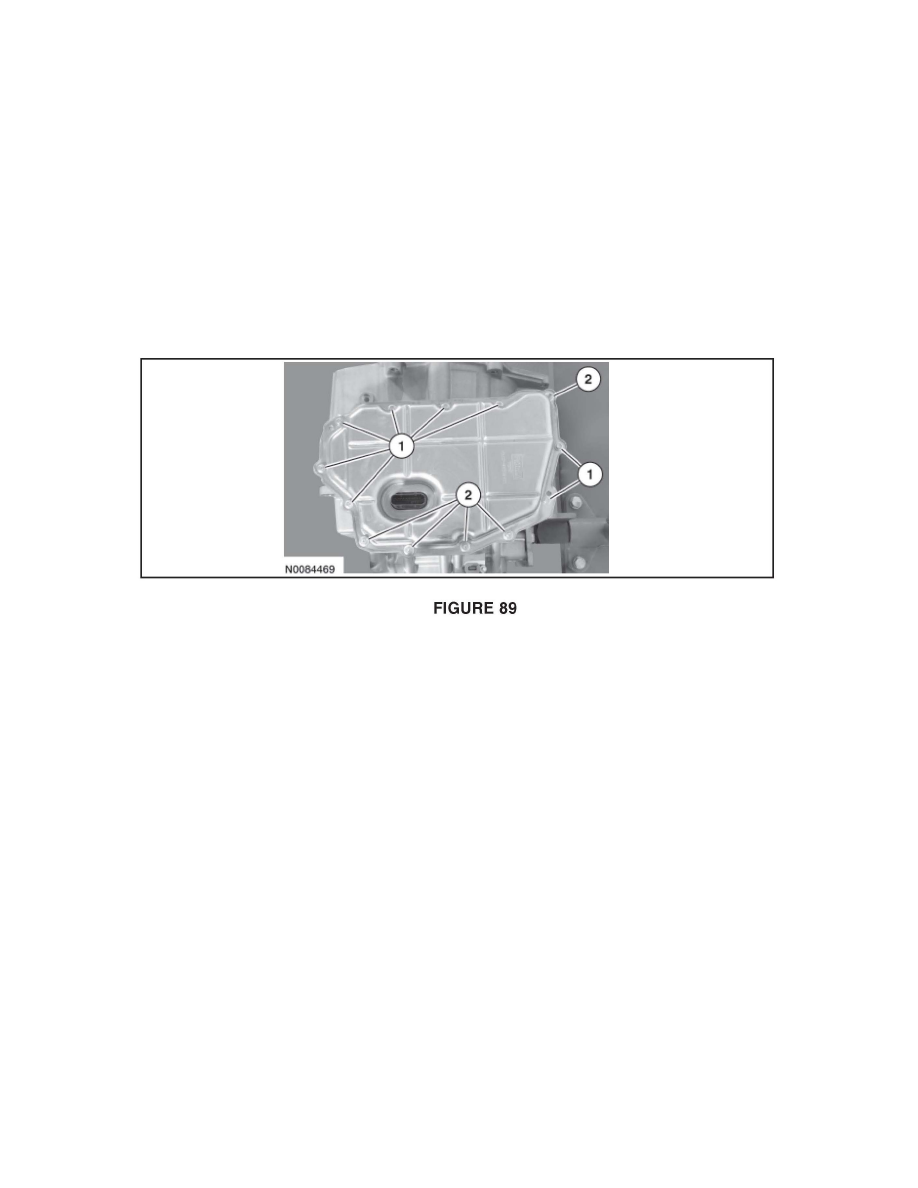
77. NOTE: Install the main control cover stud bolts in the correct location as noted during disassembly.
Install the 13 main control cover bolts. See Figure 89.
^
Tighten to 12 Nm (106 lb-in).
1. Bolt location
2. Stud bolt location
78. NOTICE: The torque converter is heavy. Be careful not to drop it or damage will result. Using the Torque Converter Handle 307-091 install the
torque converter.
79. Remove the Torque Converter Handle 3O7-091.
80. Install the Torque Converter Retainer 307-566.
81. Remove the transaxle from the bench-mounted holding fixture.
82. Remove the Transaxle Holding Fixture # 307-625.
Transaxle Installation and Post Test
1. Install the transaxle. For additional information, refer to the appropriate WSM, Section 307.
2. Perform post test drive to verify transmission is operating correctly.