Montego 2WD V6-3.0L VIN 1 (2006)

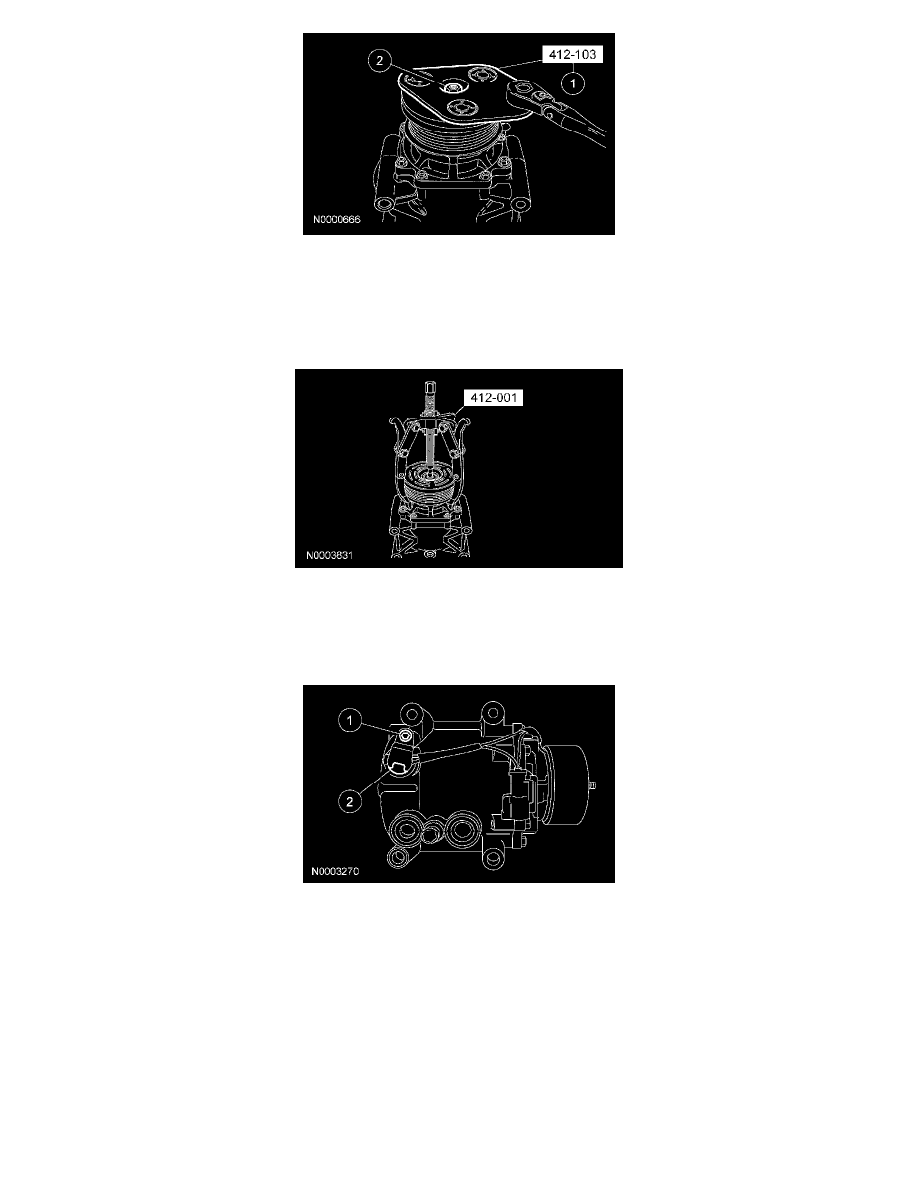
2. Remove the A/C clutch disc and hub nut.
1
Hold the A/C clutch disc and hub with the special tool.
2
Remove the nut.
3. Remove the A/C clutch disc and hub.
4. Remove the A/C compressor pulley snap ring.
5. CAUTION: Do not use air tools. Damage to the A/C compressor pulley may result.
Using the special tool, remove the A/C clutch pulley.
6. Remove the A/C clutch field coil snap ring.
7. Remove the A/C clutch field coil.
1
Remove the bolt.
2
Remove the thermal limiter and A/C clutch field coil.
Installation
1. NOTE: The A/C clutch components should be reused unless obvious signs of damage are found. If excessive grooving is found, a new A/C clutch
disc and hub and a new A/C compressor pulley must be installed together. Otherwise, each component can be installed individually where needed.
Visually inspect the A/C clutch disc and hub, A/C compressor pulley and A/C clutch field coil for damage.
-
Inspect for physical damage including cracked or melted components or discoloration due to excessive heat.
-
Inspect for excessive wear including grooving in the A/C clutch disc and hub or A/C compressor pulley that is more than fingernail depth.
-
Inspect for roughness in the A/C compressor pulley bearing.
