Montego AWD V6-3.0L VIN 1 (2005)

NOTE
PRIOR TO INSTALLING DOOR MOLDINGS, PAINT TO MATCH EXTERIOR VEHICLE BODY COLOR (BASE COLOR COAT/CLEAR
COAT).
INSTALLATION PROCEDURE
FRONT MUD SPAT INSTALLATION
1.
Raise vehicle on hoist. Refer to Workshop Manual, Section 100-02.
2.
Remove front wheel. Refer to Workshop Manual, Section 204-04.
3.
Remove the two (2) push pins that attach the splash shield to the fender.
4.
Remove the scrivet (screw/rivet) that attaches the splash shield to the rocker molding.
5.
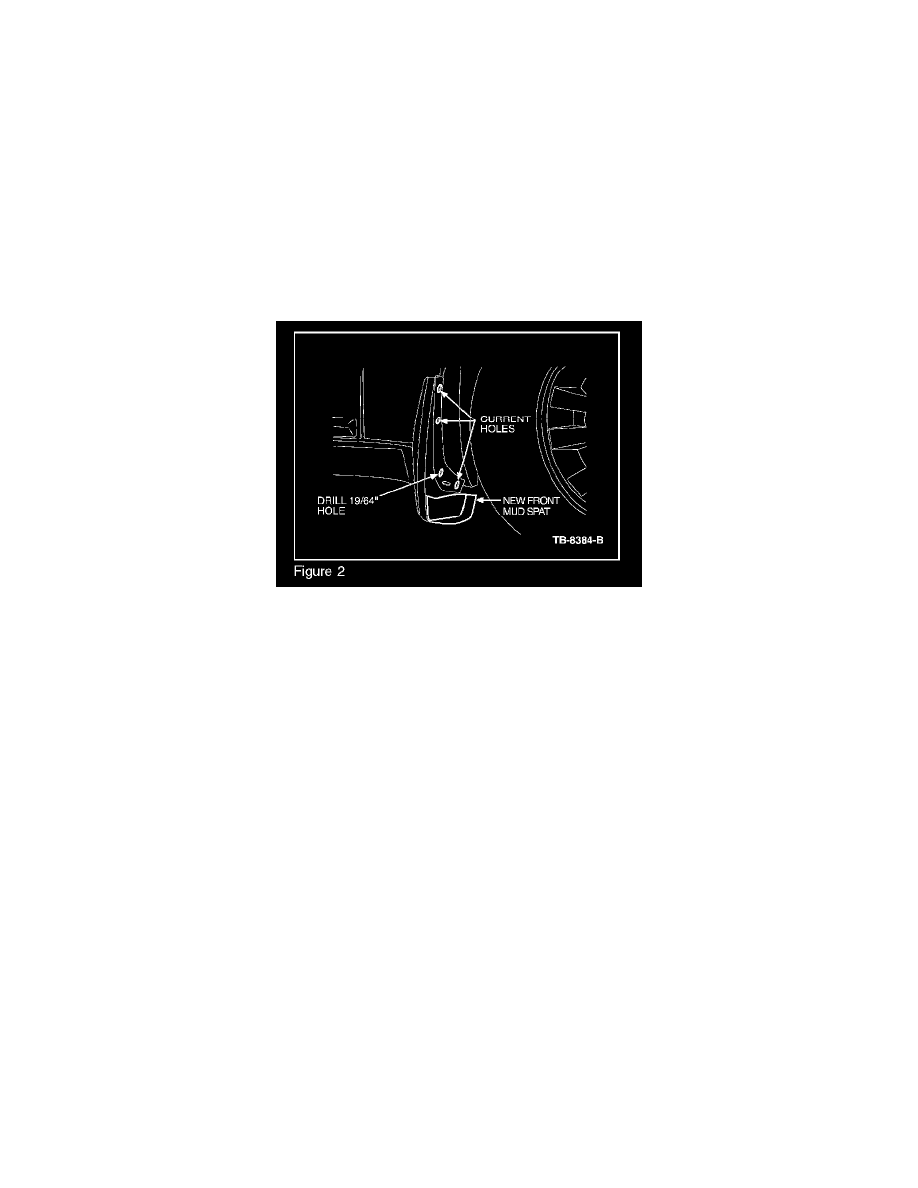
Align new mud spat to fender/rocker molding using wheel spat holes (Figure 2).
6.
Insert two (2) scrivets through holes to attach mud spat to fender.
NOTE
ONE (1) HOLE, LOWER OUTBOARD CORNER OF WHEEL SPAT, IS BLOCKED AND REQUIRES A HOLE TO BE DRILLED THROUGH
THE SPLASH SHIELD AND ROCKER.
7.
Drill a 19/64" (7.5 mm) hole through the splash shield and rocker at the lower corner of the wheel spat.
NOTE
THE SIZE OF THE LOWER INBOARD HOLE NEEDS TO BE INCREASED.
8.
Use the same 19/64" (7.5 mm) drill to increase the size of the lower inboard hole.
9.
Insert two (2) scrivets through drilled holes.
10.
Install front wheel.
11.
Repeat process for other side of vehicle.
REAR MUD SPAT INSTALLATION
1.
Remove rear wheel.
2.
Remove the two (2) lower screws that attach the rear fascia to the rear splash shield.
