
Monterey V6-4.2L VIN 2 (2004)
Part 2
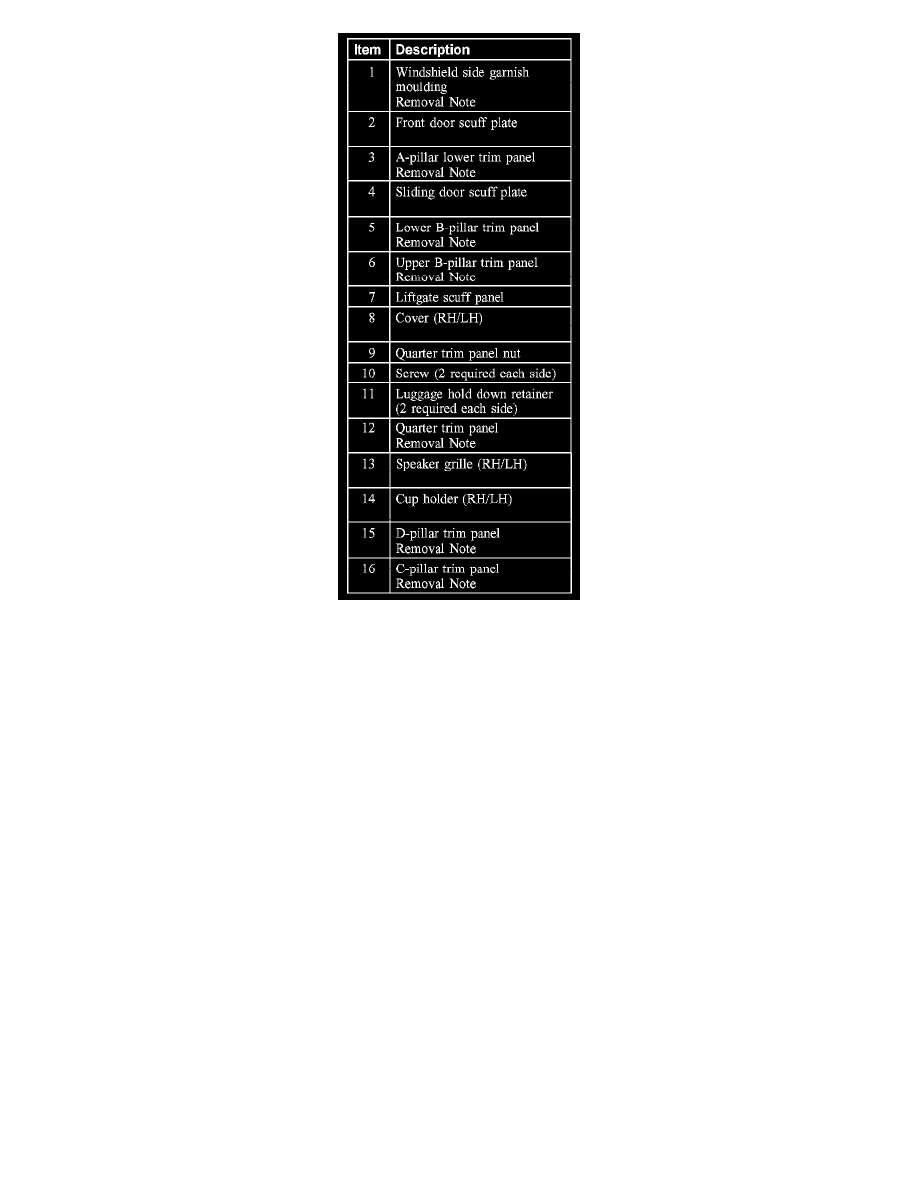
1. Remove the parts in the order indicated in the illustration and table.
To remove individual parts, only carry out the listed steps.
Item 1: Windshield Side Garnish Moulding Removal Note
1. Pull out at the top and then up to release the lower tabs.
Item 3: A-pillar Trim Panel Removal Note
1. Position the door weather strip aside.
Item 5: Lower B-pillar Trim Panel Removal Note
1. If equipped with power sliding doors, disconnect the power sliding door switch electrical connector.
Item 6: Upper B-pillar Trim Panel Removal Note
1. Remove the upper safety belt anchor nut.
Item 12: Quarter Trim Panel Removal Note
1. If equipped with rear auxiliary power, disconnect the electrical connector.
Item 15: D-pillar Trim Panel Removal Note
1. Remove the upper safety belt anchor nut.
Item 16: C-pillar Trim Panel Removal Note
1. Remove the upper safety belt anchor nut.
INSTALLATION
1. To install, reverse the removal procedure.