
Mountaineer 2WD V6-4.0L VIN K (2007)
Part 2
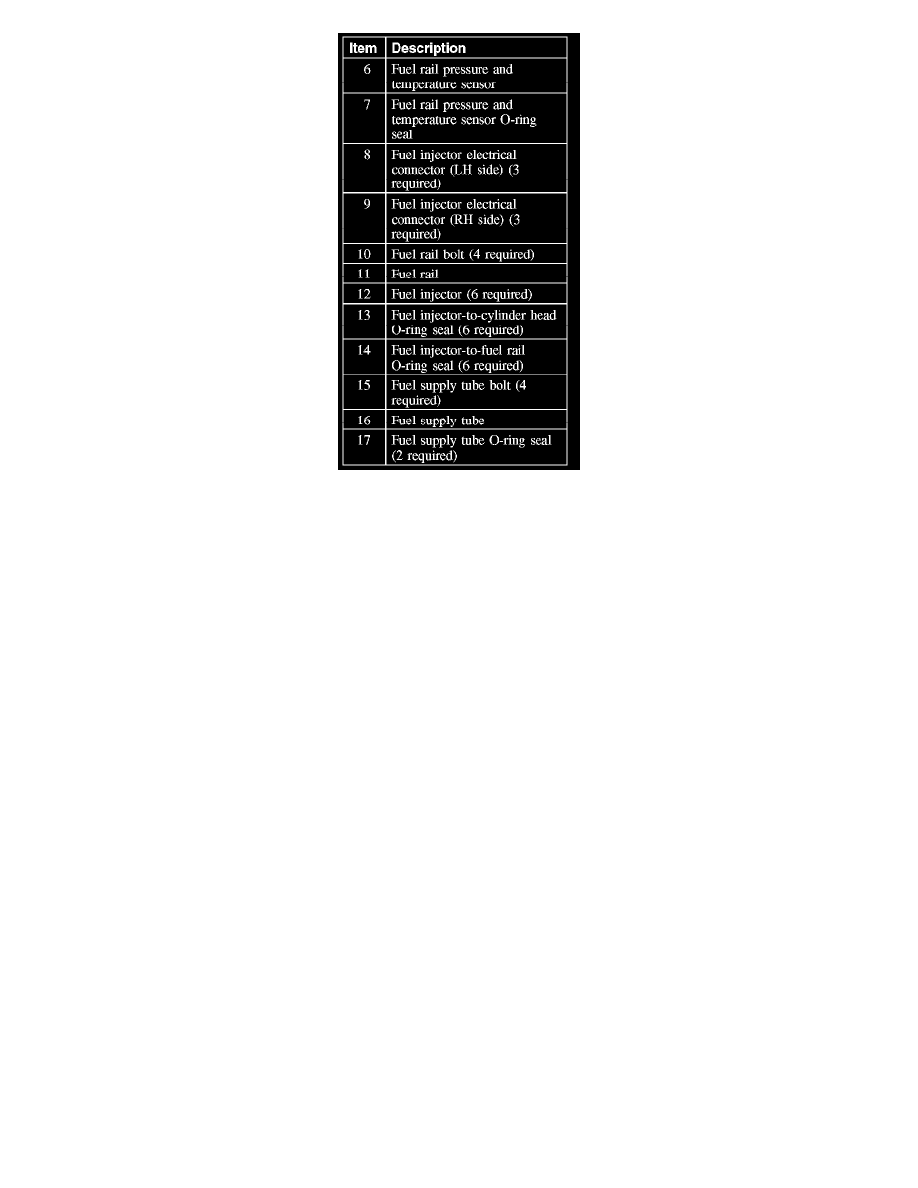
Exploded View
Removal and Installation
WARNING:
-
Do not smoke or carry lighted 6. tobacco or open flame of any type when working on or near any fuel-related components. Highly
flammable mixtures are always present and may be ignited. Failure to follow these instructions 7. may result in personal injury.
-
Fuel in the fuel system remains under high pressure even when the engine is not running. Before working on or disconnecting any of the
fuel lines or fuel system components, the fuel system pressure must be relieved. Failure to follow these instructions may result in personal
injury.
CAUTION: If used as a leverage device, the fuel rail may be damaged. Care must be taken when working around the fuel rail.
NOTE: During the repair or replacement of fuel-related components, cap, tape or otherwise appropriately protect all liquid and vapor fuel openings to
prevent the ingress of dirt or other contamination. Remove all caps, tape and other protective materials prior to installation.
1. Disconnect the spring lock coupling.
2. Remove the intake manifold.
3. Remove the fuel supply tube bracket bolt.
-
To install, tighten to 8 Nm (71 lb-in).
4. Disconnect the fuel injector electrical connectors.
5. Disconnect the fuel pressure and temperature sensor electrical and vacuum connectors.
6. Remove the bolts and the fuel rail and injectors as an assembly.
-
To install, tighten to 23 Nm (17 lb-ft).
7. CAUTION: O-ring seals are made of special fuel-resistant material. Use of ordinary O-ring seals can cause the fuel system to leak. Do
not reuse O-ring seals.
NOTE: Install new fuel injector-to-intake manifold O-ring seals and lubricate them with clean engine oil.
To install, reverse the removal procedure.