
Mountaineer 2WD V8-302 5.0L VIN P SFI (2000)
-
Use a backup wrench to hold the case fitting secure.
3. Remove the nut.
4. Remove the transmission fluid cooler tubes.
Installation
1. Note: When a transmission fluid cooler tube is replaced, each replacement tube must be fabricated from the same size tube as the original.
Shape a new transmission fluid cooler tube.
-
Use the prior tube as a guide.
-
Install the appropriate fittings.
-
Use a double flare on the ends of the tubes.
CAUTION: To prevent damage, make sure all plugs are removed from port openings before installing tubes.
CAUTION: To prevent cross threading, all tube nuts must be hand started before being torqued to specification.
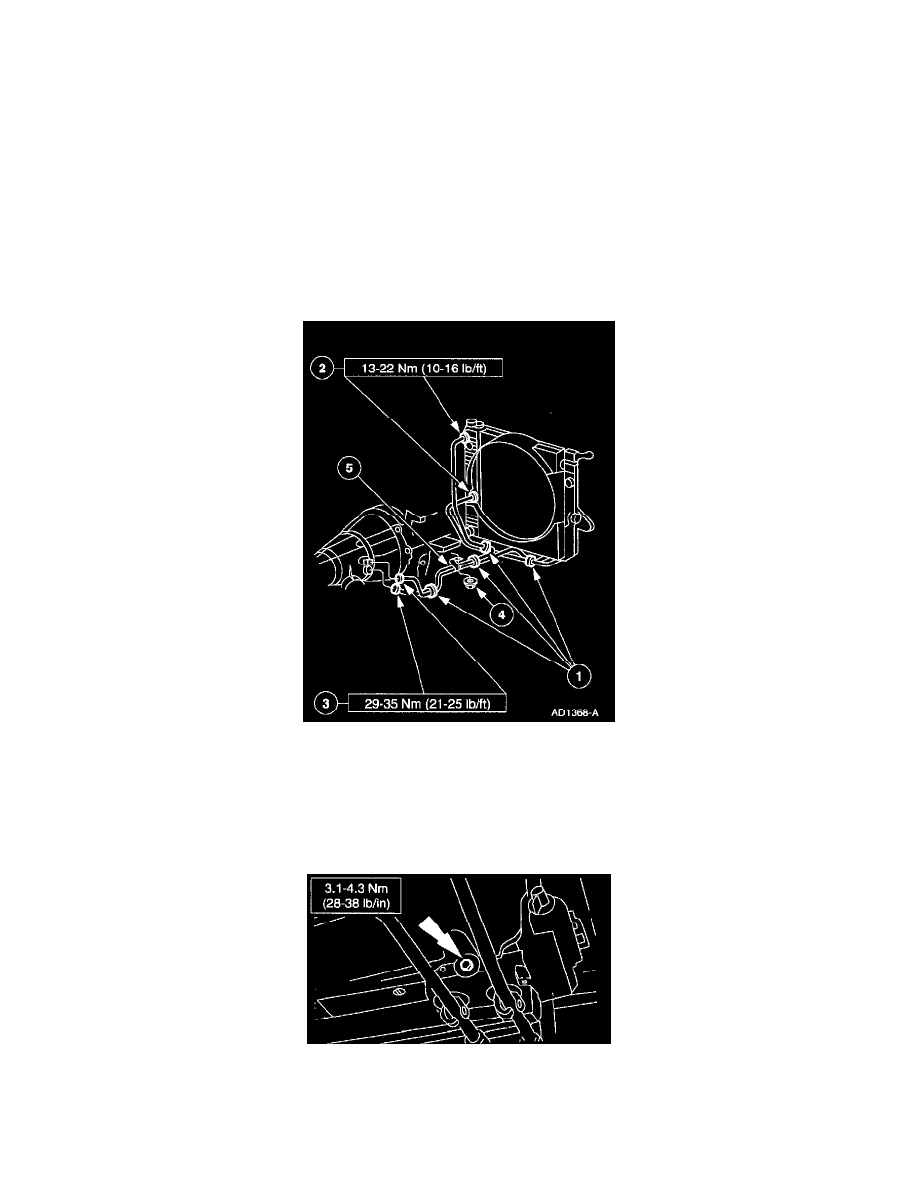
2. Install the transmission fluid cooler tubes.
1. Install the clips.
2. Connect the tube fittings to the radiator.
3. Connect the tube fitting to the transmission.
-
Use a backup wrench to hold the case fitting secure.
4. Install the tube bracket nut.
5. Install the transmission fluid cooler tubes.
3. Install the transmission cooler line bracket and nut and bolt.