
Mountaineer 2WD V8-4.6L (2010)
-
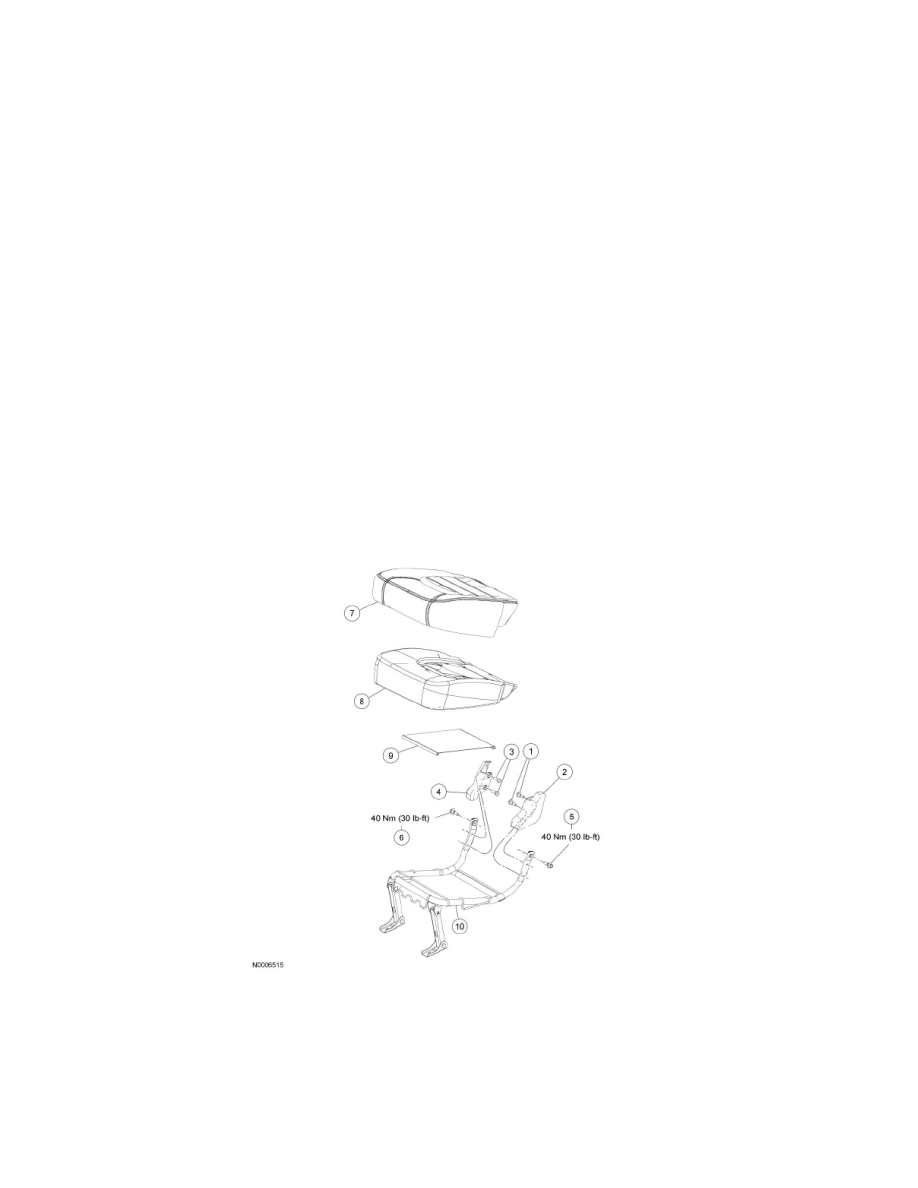
Make sure the lower anchor and tethers for children wires at the rear of the cushion frame are positioned through the cushion trim cover and
accessible for use after installation.
28. Position the latch feet release bar and install the 2 screws.
29. Install the second row, 60 percent E-Z entry seat backrest. For additional information, refer to Seat Backrest - Second Row, 60 Percent, E-Z Entry
See: Seat Back/Service and Repair/Removal and Replacement/Rear Seat/Seat Backrest - Second Row, 60 Percent, E-Z Entry.
30. Lower the backrest and position the seat to the E-Z entry position.
-
The latch feet should be released from the mounting plate and the cushion and backrest must be pivoted up.
31. Using the kneeling mechanism release handle on the backrest, pull the handle and position the kneeling mechanism down in the fold flat load floor
position.
-
The cushion and backrest of the seat will be in the E-Z entry position and the kneeling mechanism will be in the fold flat load floor position.
32. NOTE: The shock should be fully extended when installed.
Position and install the shock onto the seat assembly.
33. Install the second row, 60 percent E-Z entry seat into the vehicle. For additional information, refer to Seat - Second Row, 60/40, E-Z Entry See:
Service and Repair/Rear Seat/Seat - Second Row, 60/40, E-Z Entry.
34. Cycle the backrest down and then back to the upright position. Make sure the inboard and outboard recliners simultaneously and securely
lock in the upright position.
Seat Cushion - Second Row, 40 Percent, Bench
Seat Cushion - Second Row, 40 Percent, Bench