
Mountaineer 2WD V8-4.6L (2010)
follow these instructions may result in engine damage.
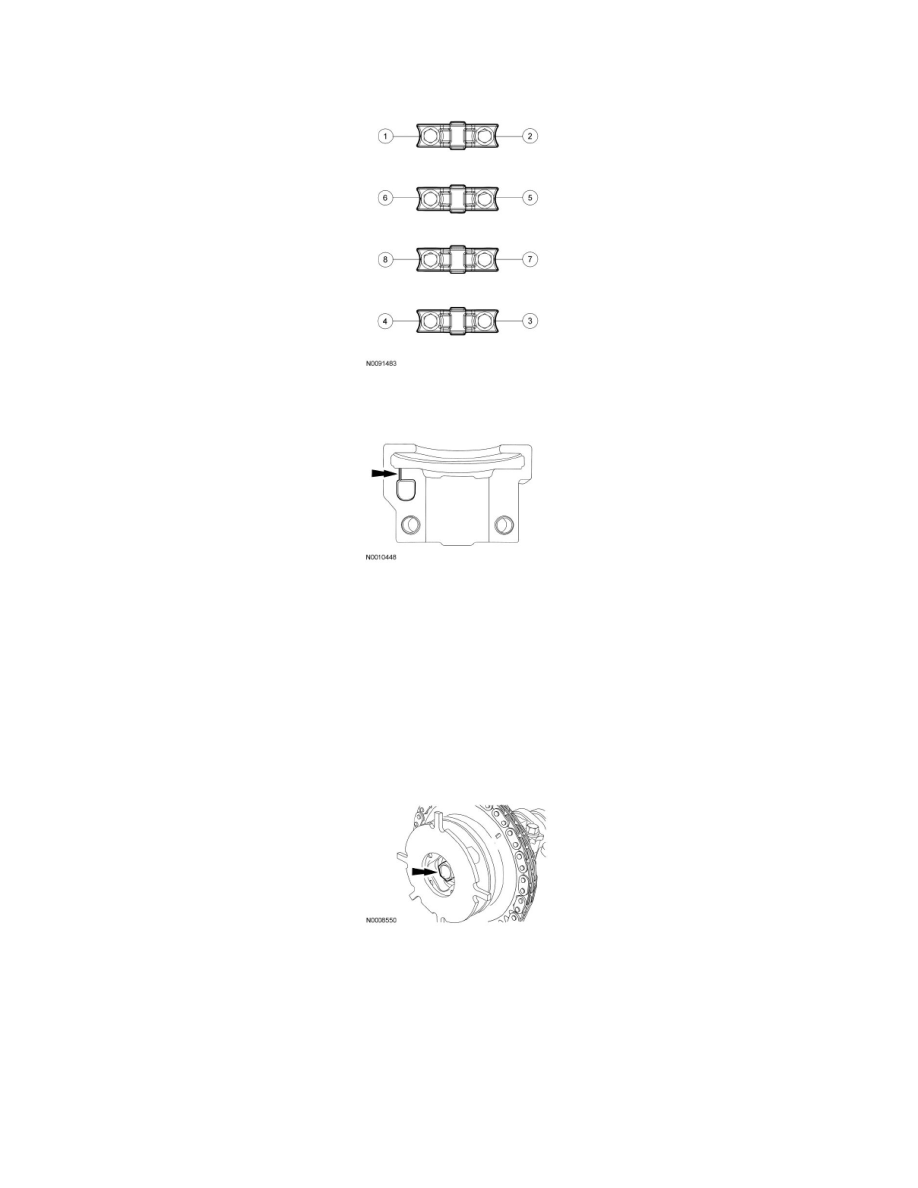
Remove the remaining bolts in the sequence shown and remove the RH cylinder head camshaft bearing caps.
13. Clean and inspect the RH camshaft bearing caps.
-
The camshaft front thrust bearing cap contains an oil metering groove. Make sure the groove is free of foreign material.
14. NOTICE: Damage to the camshaft phaser and sprocket assembly will occur if mishandled or used as a lifting or leveraging device.
NOTICE: Only use hand tools to remove the camshaft phaser and sprocket bolt or damage may occur to the camshaft or camshaft phaser
and sprocket.
NOTICE: Do not remove the Timing Chain Locking Tool at any time during assembly. If the Timing Chain Locking Tool is removed or
out of placement, the engine front cover must be removed and the engine must be retimed. For additional information, refer to Timing
Drive Components See: Timing Components/Service and Repair/Removal and Replacement.
Remove the bolt and the camshaft phaser and sprocket assembly from the camshaft.
-
Discard the bolt and washer.
15. Remove the camshaft.
16. Remove and inspect the camshaft phaser and sprocket for damage. For additional information, refer to Engine.
Installation
1. NOTE: Do not allow the camshaft roller followers to move out of position when installing the camshaft.
Lubricate the camshaft and camshaft journals with clean engine oil and install the camshaft.
2. NOTICE: Do not remove the Timing Chain Locking Tool at any time during assembly. If the Timing Chain Locking Tool is removed or
out of placement, the engine front cover must be removed and the engine must be retimed. For additional information, refer to Timing