
Mountaineer 2WD V8-4.6L SOHC VIN W (2003)
1.
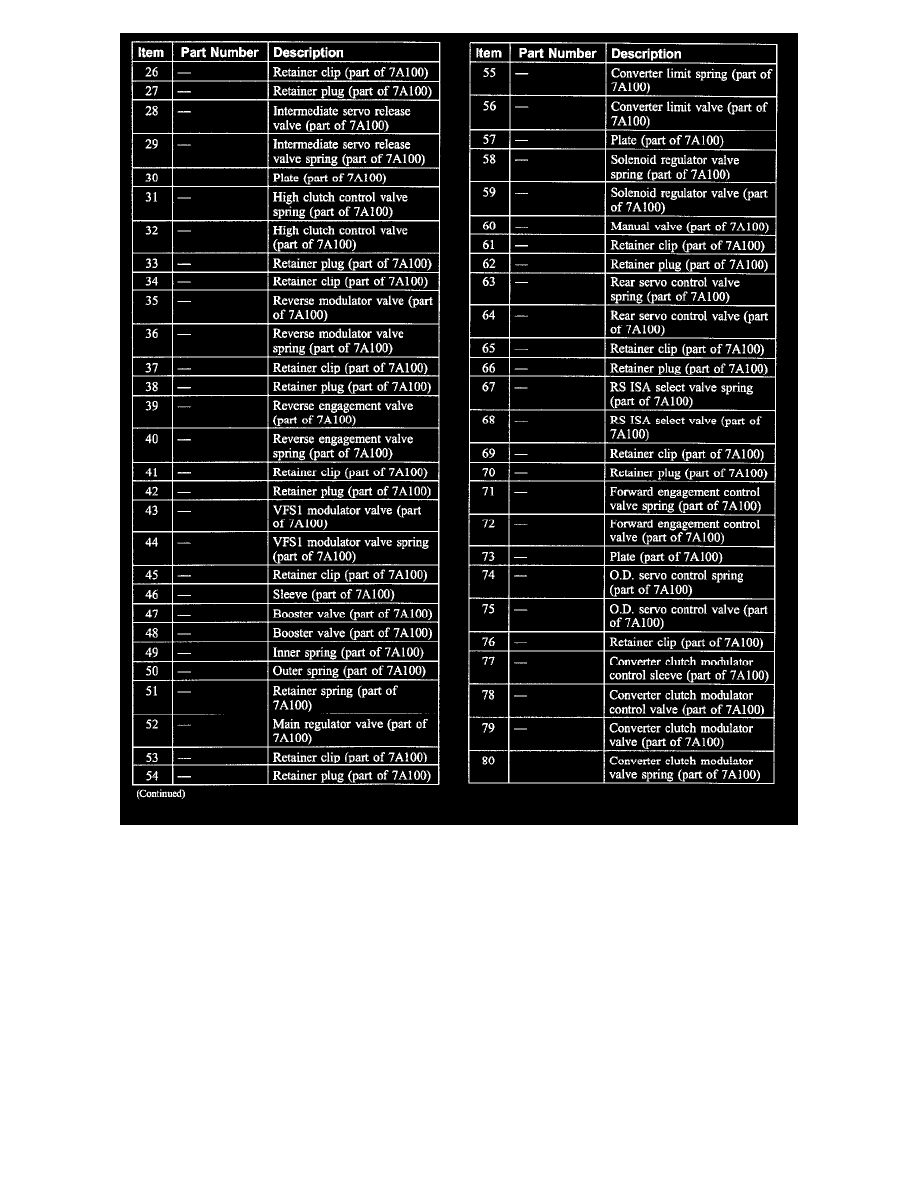
Remove the components in the order indicated in the illustration and table. To remove, clean and inspect the valves, carry out the steps listed.
2.
After cleaning the main control valve body, carry out the following.
-
Inspect all valve and plug bores for scoring or burrs.
-
Check all fluid passages for obstructions.
-
Inspect all valves and plugs for burrs.
-
Inspect all mating surfaces for burrs or distortion.
-
Inspect all springs for distortion.
-
Check all valves and plugs for free movement in their respective bores.
-
Valves and plugs, when dry, must fall from their own weight into their respective bores.
-
Roll the manual valve on a flat surface to check for a bent condition.
3.
Assemble in the reverse order of disassembly.