
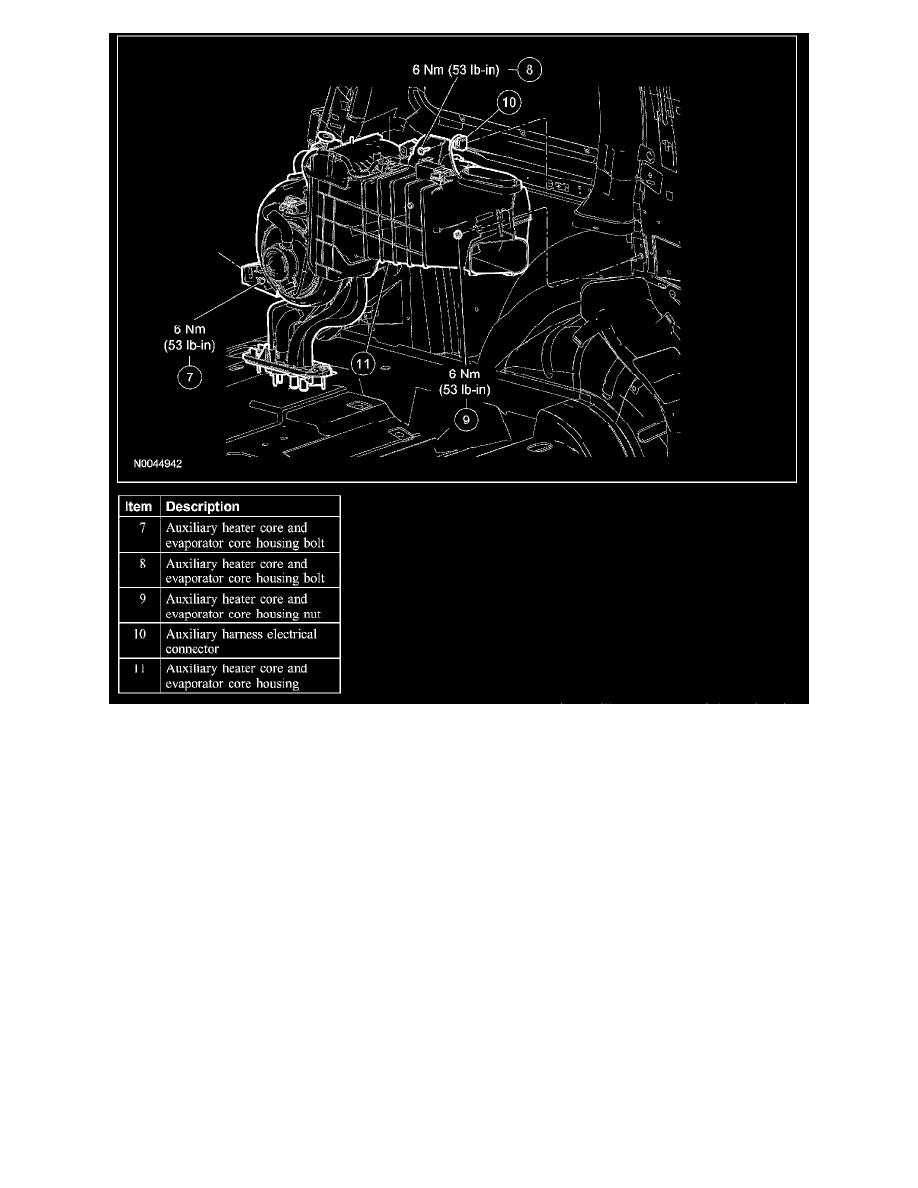
Heater Core and Evaporator Core Housing Replacement
Removal and Installation
NOTE:
-
Installation of a new suction accumulator is not required when repairing the air conditioning system except when there is physical evidence of
contamination from a failed A/C compressor or damage to the accumulator.
-
Clean and lubricate the coolant hoses with plain water only if needed.
1. With the vehicle in NEUTRAL, position it on a hoist.
2. Recover the refrigerant.
3. Drain the engine coolant.
4. Remove the LH quarter trim panel. Refer to: Body and Frame, Interior Moulding/Trim, Trim Panel, Service and Repair, See: Body and
Frame/Interior Moulding / Trim/Trim Panel/Service and Repair
5. Detach the headliner duct from the auxiliary climate control housing
6. Remove the auxiliary evaporator inlet and outlet line fitting nuts.
-
Discard the O-ring seals.
-
Discard the thermostatic expansion valve (TXV) filter.
-
To install, tighten to 8 Nm (71 lb-in).
7. Release the heater hose clamps and disconnect the heater hoses.
-
After disconnecting the heater hoses, allow any residual coolant to drain from the auxiliary heater core to avoid coolant spilling inside the
passenger compartment.
8. Remove the 2 auxiliary line floorpan bracket nuts.
-
To install, tighten to 8 Nm (71 lb-in).